Pixelcade Install Guide for Rec Room Masters Xtension 32" Upright for Gen3

Super Pixelcade LCD Marquee Hardware Installation

IMPORTANT: Use only the included 12V, 5A power supply or Pixelcade SATA power cable to power your Super Pixelcade LCD. 

The video below will guide you how to install Super Pixelcade LCD in your Rec Room Masters 32″ Upright Cab. 

Guide

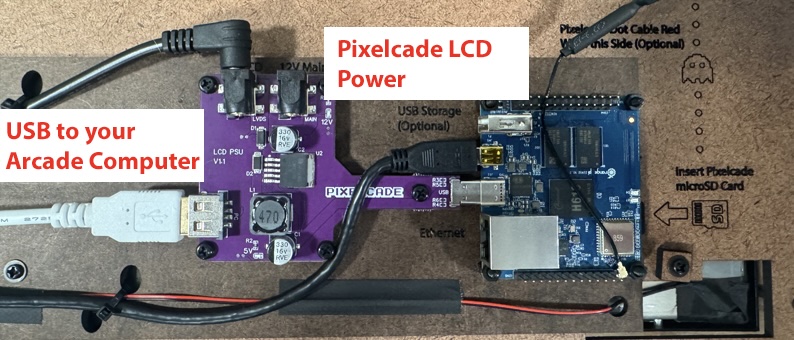
Step 1: Using the included USB A-A cable, USB connect Pixelcade LCD to your arcade computer. Please note that Pixelcade LCD firmware 6.0 or higher is required for USB connectivity.

Optional: If you’d like to access Pixelcade LCD from other devices on your network—for managing artwork or using the Pixelcade Companion UI—proceed to Step 2. Otherwise, or if you’re also connecting via Ethernet, you can skip ahead to Step 3.
 
Step 2: Adding Pixelcade LCD to your WiFi
 
Windows
 

Linux

From a terminal that is USB connected to your Pixelcade LCD:

mkdir -p /mnt/pixelcade
mount -t cifs //169.254.100.1/PixelcadeInternal /mnt/pixelcade -o guest
cd /mnt/pixelcade
./setupWifi.sh

Then enter your WiFi SSID and password and then reboot your Pixelcade LCD.

If you are not USB connected, you can also physically remove the microSD card and follow the instructions below:

Windows

IMPORTANT: After inserting the microSD card on Windows, you will see a cannot read error message, just ignore this as Windows cannot read the Linux volume on the microSD card.

From the root of the Pixelcade microSD card, launch “Pixelcade WiFi Wizard.exe” and follow prompts to enter your WiFi SSID/network name and WiFi password.

Linux

From the root of the Pixelcade microSD card, run this script from a terminal command prompt and follow prompts to enter your WiFi SSID/network name and WiFi password.

./setupWifi.sh

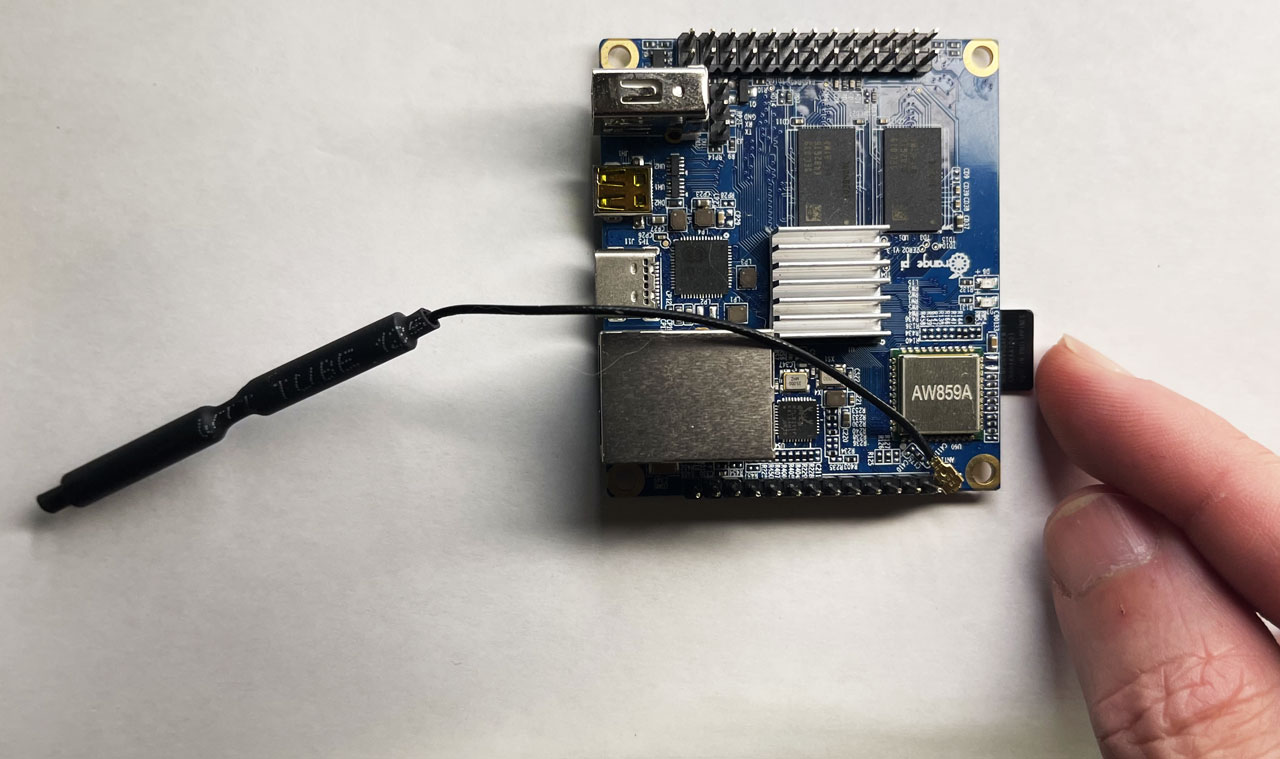
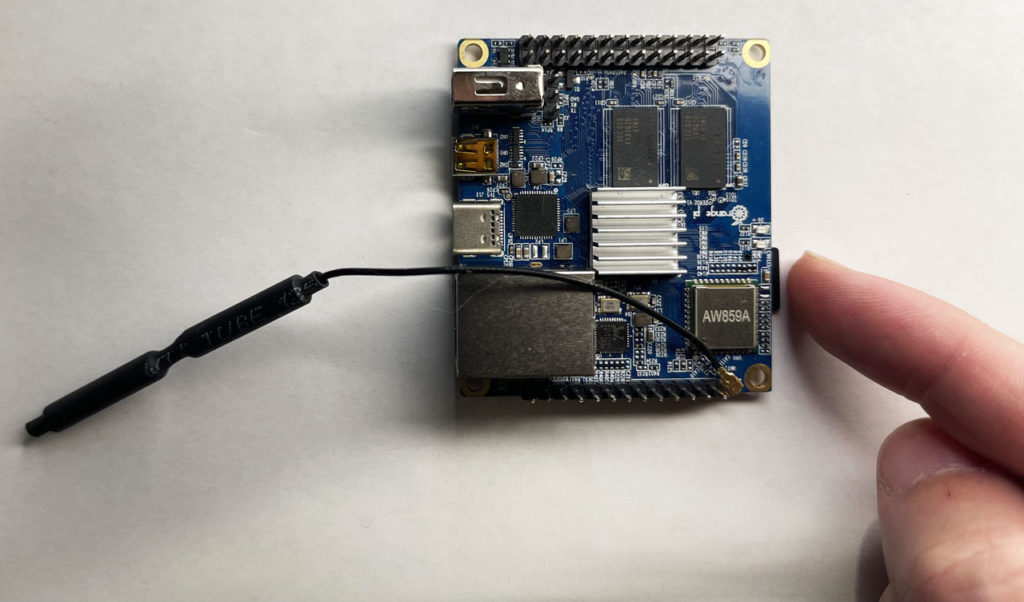
Now remove the Pixelcade microSD card from your computer and insert it back into the Pixelcade LCD board (blue color).  


Step 3: Power using the included 12V, 5A power brick or Pixelcade SATA power cable. Only use the power brick or Pixelcade SATA power cable that shipped with your Pixelcade LCD marquee.

Power on your LCD marquee, and after the boot-up sequence, if you see this Pixelcade logo, then Pixelcade LCD has successfully connected to your network and continue to step 4.

Step 4: Install the Pixelcade software on your Arcade Windows PC, Raspberry Pi, or MiSTer. Note at the end of the Pixelcade software install, a program will run to find and pair your Pixelcade LCD to your arcade PC. If this program does not run, you can launch the pairing manually by running the “Pixelcade LCD Pair” utility.

Turning Super Pixelcade LCD On and Off

Once you shutdown Super Pixelcade LCD using the safe shutdown procedure and applications described above, you’ll need to cycle the power on the power strip that Super Pixelcade LCD is plugged into to turn it back on. 

It’s recommended to have Super Pixelcade LCD on the same power strip as your Arcade computer. 

One option is to use an IoT relay power strip that will turn on and off based on your Arcade computer’s USB signal. When your Arcade computer is turned on, it’s USB becomes active and flips the power strip on and when your Arcade computer is off, it’s USB is off and tells the power strip to turn off. With this option, you will need to cut a USB cable and splice the 5V (red wire) and GND (black wire) and connect those two wires to the IoT relay power strip. The video below describes how it works. 

The second option is to use a smart power strip and turn on and off with voice commands or a smart phone using Alexa, Google Home, Apple, etc. or the best option is to use the Pixelcade SATA power cable. 

Pixelcade Software Installation

After installing your marquee, next install the Pixelcade software on your Windows PC or Raspberry Pi. The Pixelcade software enables your Arcade Front End (CoinOps, HyperSpin, Launch Box / Big Box, Game Ex, or RetroPie) to communicate with your Pixelcade marquee. 

Click Here for Windows 

or 

Click Here for RetroPie on Raspberry Pi

Pixelcade Companion Web Interface

The Pixelcade Companion app allows you to browse marquee artwork from any web browser on your home network. 

Pixelcade LCD Artwork and Firmware Updates

Pixelcade LED Base Plate Mount

For users upgrading to Super PixelcadeLCD who already have Pixelcade LED, this video illustrates how to move Pixelcade LED to the base plate area using the optional conversion kit.

Proudly powered by Wpopal.com
Add to cart