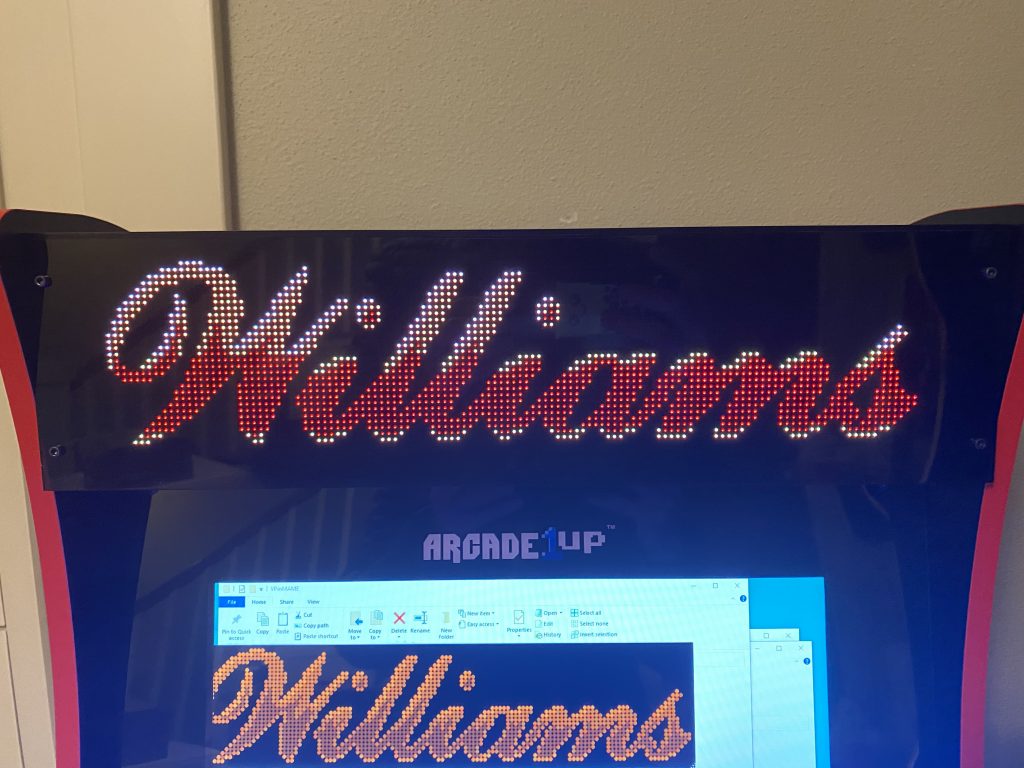
Pixelcade doubles as a virtual pinball display, otherwise known as a DMD (dot matrix display). The guides below are for Visual Pinball, Pinball FX3, Pinball FX Classic, Pinball FX2, Future Pinball, and Pinball Arcade. You can play virtual pinball in traditional arcade cabinet mode or with a virtual pinball machine as shown in the videos below.

Use this Pixelcade DMD installer for Arcade One instead if you have an Arcade-One HyperSpin image which enables dynamic switching between Pixelcade Arcade marquee mode and DMD mode for Virtual Pinball, Pinball FX2, Pinball FX3, and Future Pinball, demo here.
Note that the Pixelcade Arcade listener (pixelweb.exe) and the Pinball listeners cannot be running at the same time.
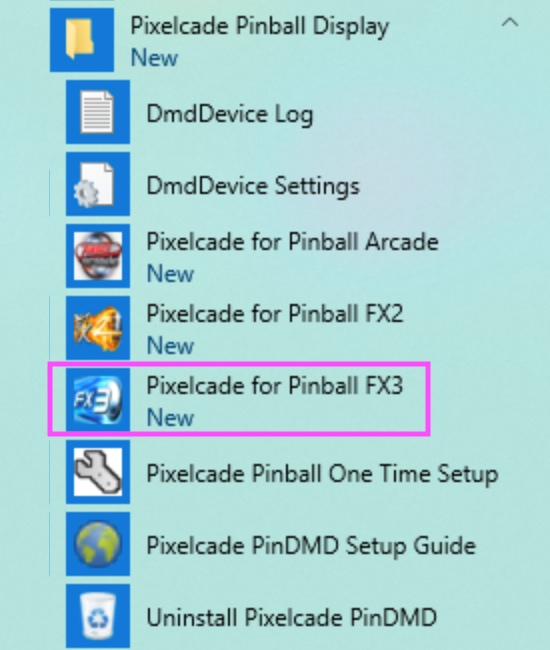
The Pixelcade DMD installer includes the following utilities to make integration with front ends (PinUp Popper, Pinball X, HyperSpin, BigBox, etc.) easier. Launch the respective utility from your front end to put the Pixelcade DMD in a mode listening for incoming DMD frames before the respective Pinball application (FX3, FX Classic, FX2, Pinball Arcade) is launched. After installing Pixelcade DMD, refer to the “scripts” folder for examples on how to automate switching between arcade marquee mode and various pinball platforms from your front end.
Note that no additional utility is required for Visual Pinball or Pinball FX (Pinball FX2, FX3, and FX Classic do require the additional utility). Pixelcade DMD for Visual Pinball and Pinball FX will launch automatically after it has been setup (see setup steps below).
| Pinball Application | Utility | Usage / Function |
| Pinball FX3 | pixelcade-pinballfx3.exe | Kills the Pixelcade Listener (Arcade Marquee Mode) if it’s running Runs dmdext.exe with this command line:
Launches FX3 Steam Optionally, you may also include a specific FX3 Steam Game as a parameter to launch that particular game automatically: pixelcade-pinballfx3.exe “table_File” Examples: pixelcade-pinballfx3.exe “WMS_Medieval_Madness” Be sure to enclose the target marquee name in double quotes. You can include the leading hyphen or not, either way is fine |
| Pinball FX Classic | pixelcade-pinballfxclassic.exe | Kills the Pixelcade Listener (Arcade Marquee Mode) if it’s running Runs dmdext.exe with this command line:
Launches FX3 Classic on Steam Optionally, you may also include a specific FX Classic Steam Game as a parameter to launch that particular game automatically: pixelcade-pinballfxclassic.exe “table_File” Examples: pixelcade-pinballfxclassic.exe “WMS_Medieval_Madness” Be sure to enclose the target marquee name in double quotes. You can include the leading hyphen or not, either way is fine |
| Pinball FX3 | pixelcade-pinballfx3nosteam.exe | Kills the Pixelcade Listener (Arcade Marquee Mode) if it’s running Runs dmdext.exe with this command line:
|
| Pinball FX2 | pixelcade-pinballfx2.exe | Kills the Pixelcade Listener (Arcade Marquee Mode) if it’s running Runs dmdext.exe with this command line:
|
| Pinball Arcade | pixelcade-pinballarcade.exe | Kills the Pixelcade Listener (Arcade Marquee Mode) if it’s running Runs dmdext.exe with this command line:
|
| Future Pinball | pixelcade-futurepinball.exe | Kills the Pixelcade Listener (Arcade Marquee Mode) if it’s running Runs dmdext.exe with this command line:
Note for Future Pinball, you must also Copy |
 | For Pinball FX3Install Pinball FX3 from Steam (not from the Microsoft Windows 10 store) For Pinball FX2
|
| Run this installer and install in the directory of your choice.
Run this installer instead if you are on an ArcadeOne HyperSpin image |
| During the install, you’ll be prompted to enter the COM Port Number of the Pixelcade DMD. Device manager will automatically pop up on the left, click ‘Ports’ and then enter the COM Port number for Pixelcade. Pixelcade will appear under “USB Serial Device” on Windows 10 and will appear under “IOIO-OTG” under Windows 7. Only enter the number (Ex. 6,7,8) and do not enter COM6, COM7, COM8 . |
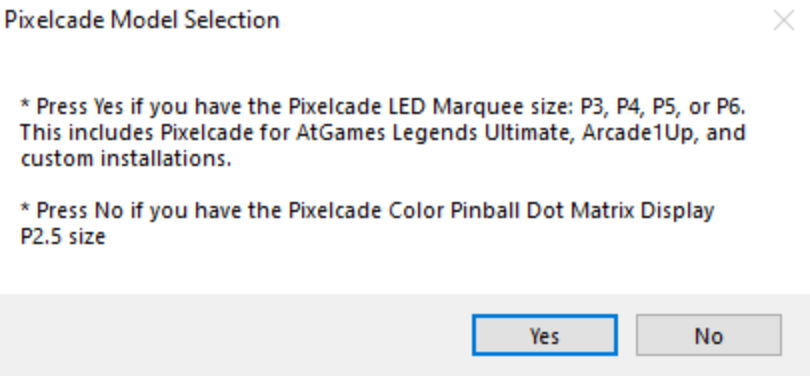
| Choose “Yes” if you have a Pixelcade LED Marquee size P3, P4, P5, or P6. This would include Pixelcade for AtGames Ultimate Legends, Arcade1Up, and custom installations. Choose “No” if you have the Pixelcade Pinball Display P2.5 panel size. This is used to set the correct colors for Pixelcade. |
 | Launch the respective listener which will run in the background: Pinball FX2, FX3, or Pinball Arcade. |
| If the install went correctly, you’ll see “DMDEXT” minimized in your Windows tray. Click “DMDEXT” and check if it’s communicating with Pixelcade. Pinball FX3 will also launch automatically assuming the Steam version of Pinball FX is installed on your computer. For Pinball FX2 and Pinball Arcade, you’ll need to launch those manually after. |
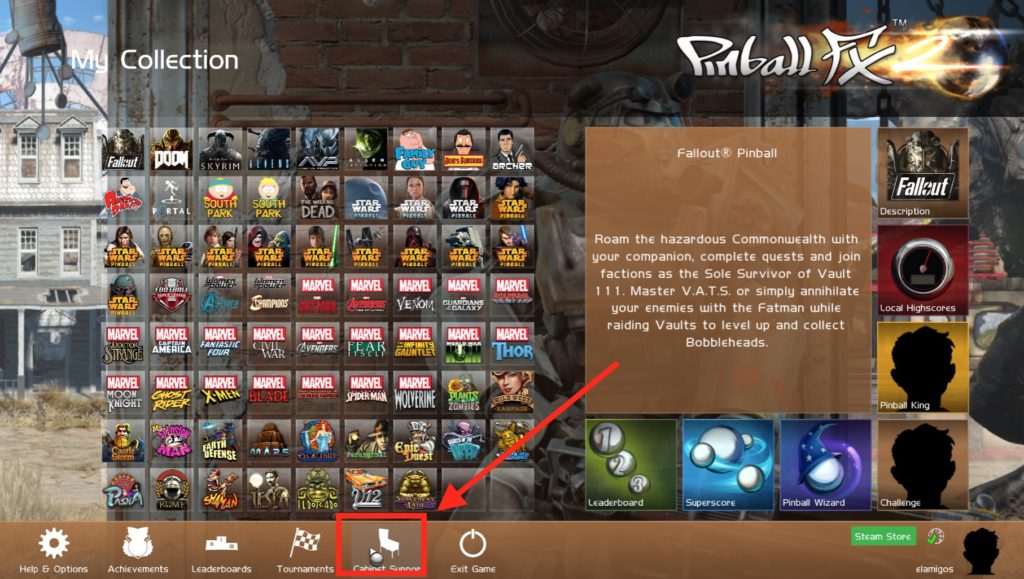
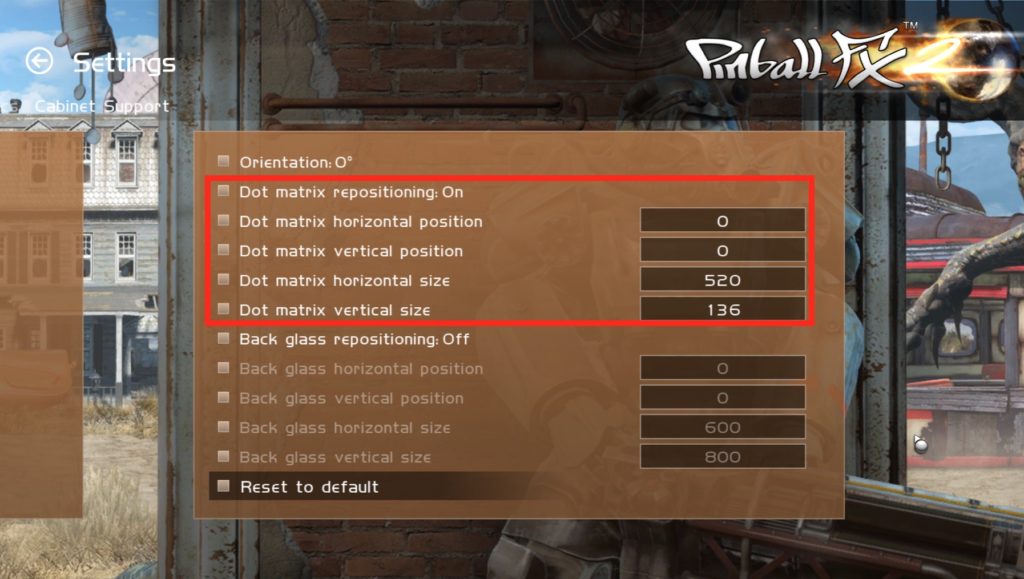
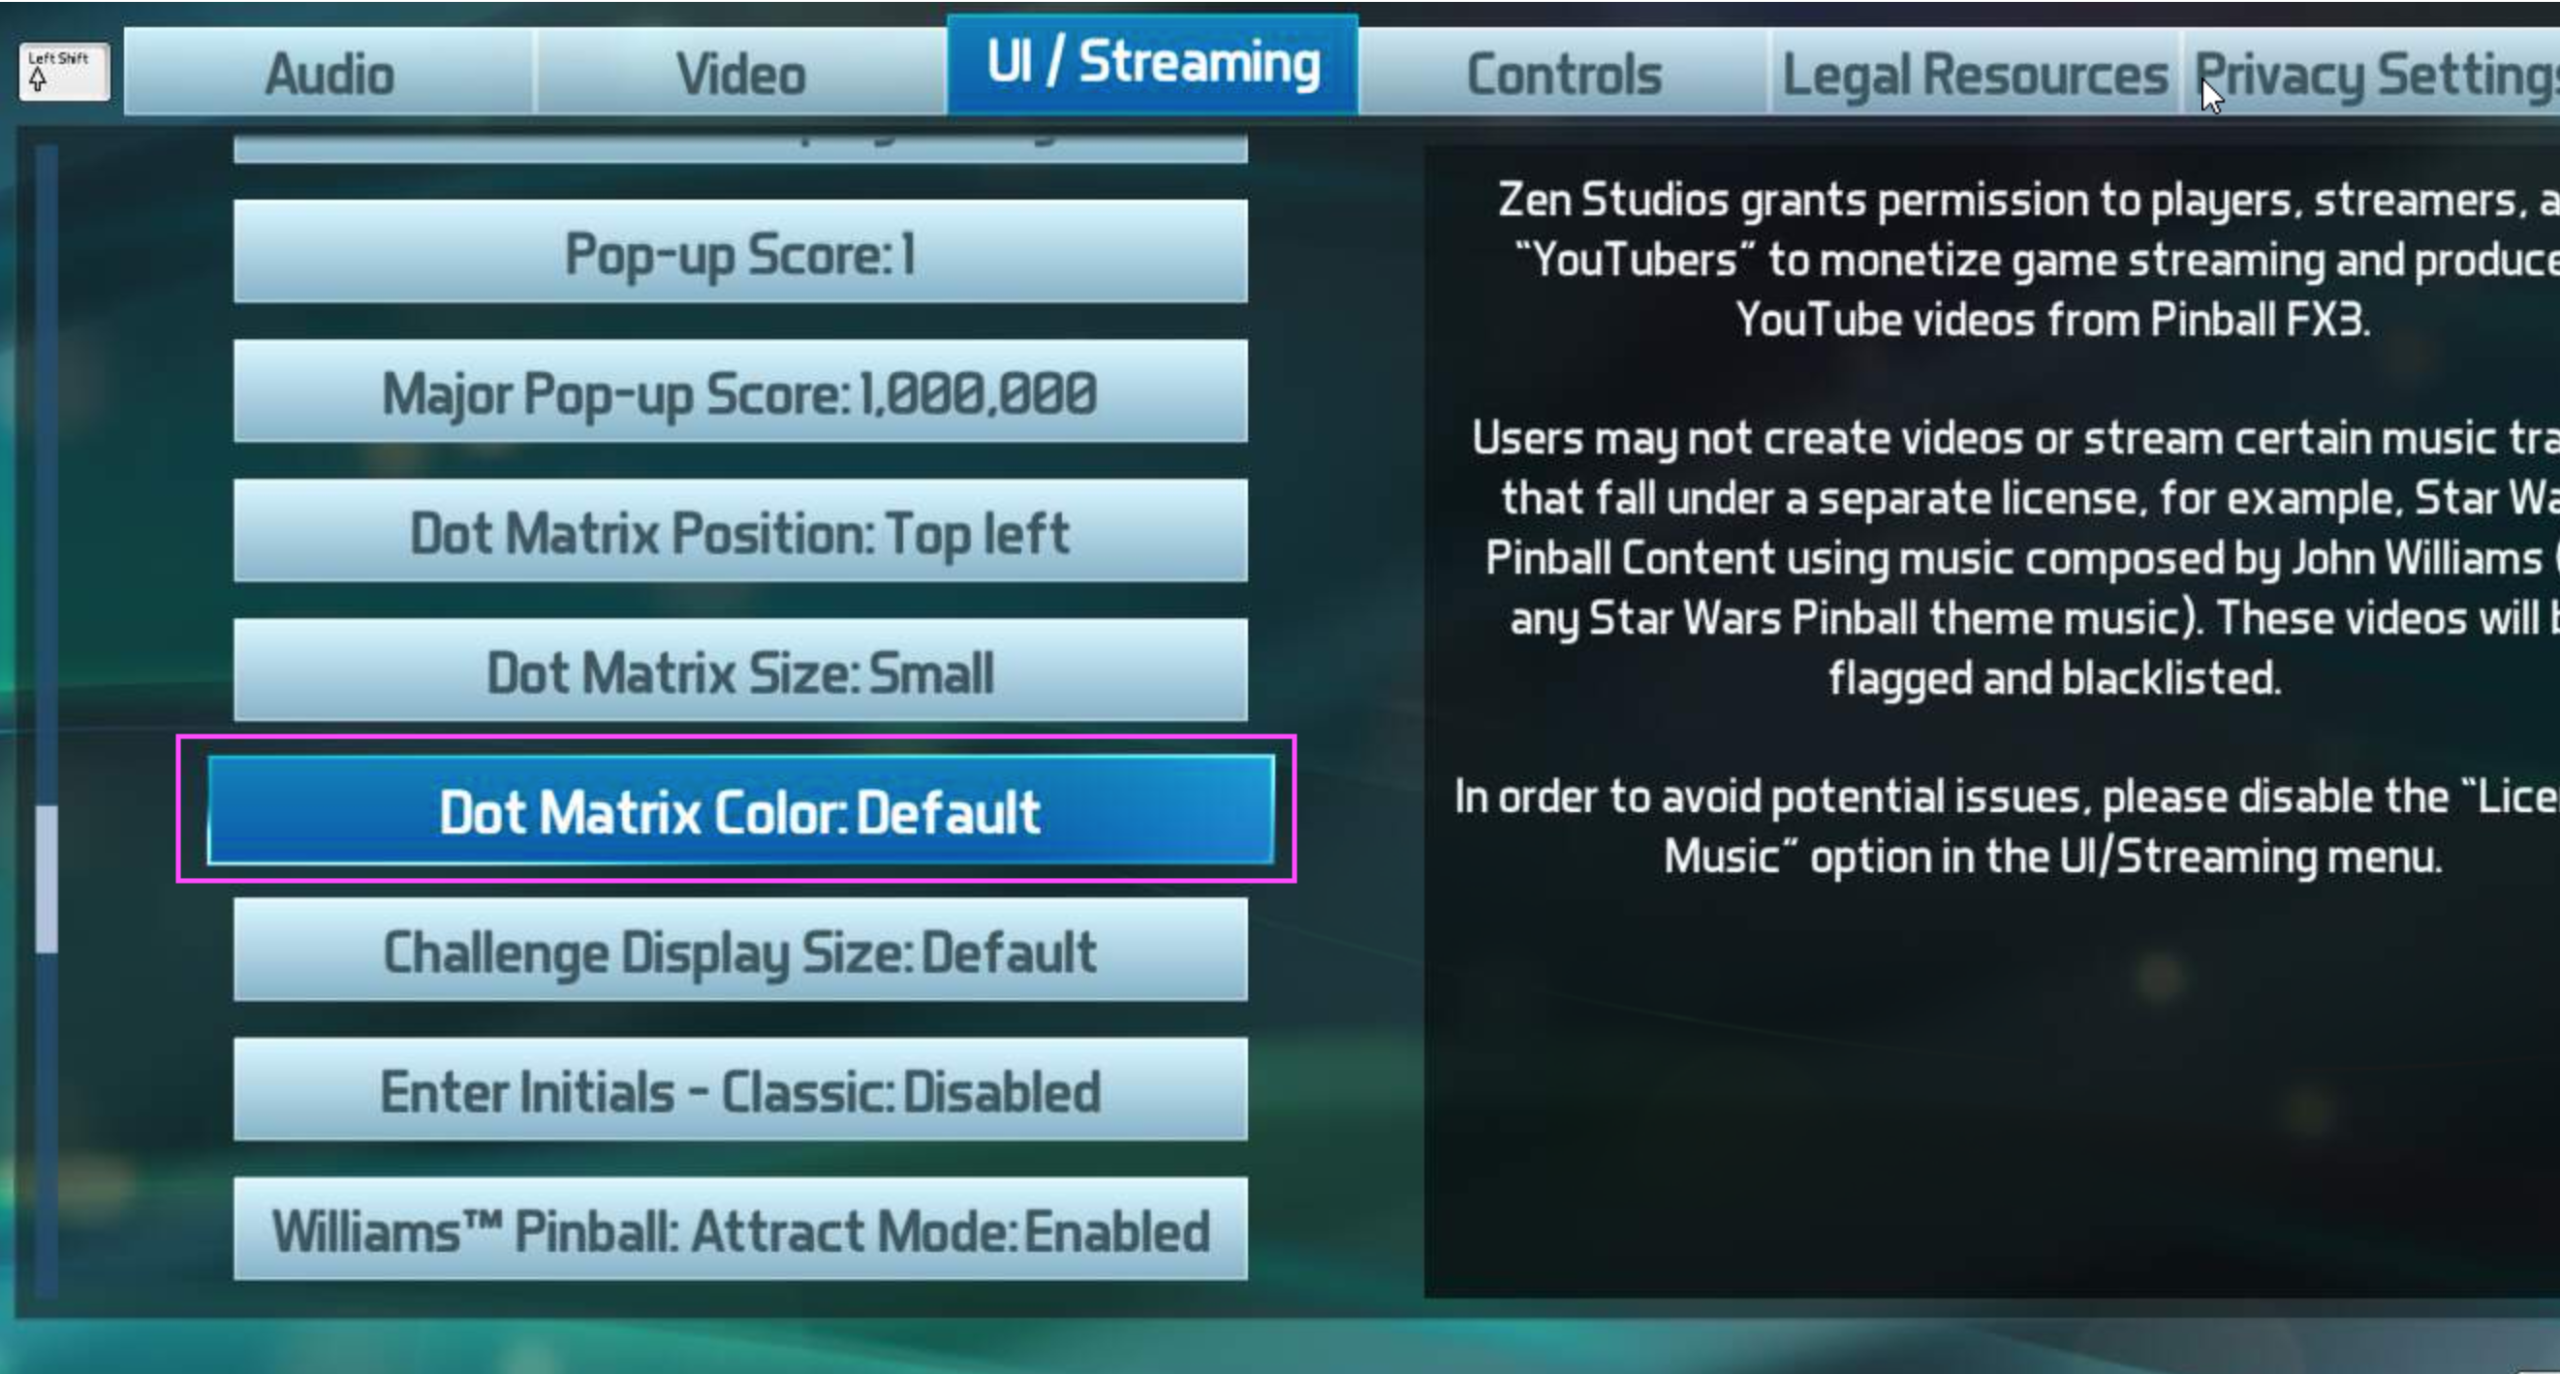
| Pixelcade will be single color for Pinball FX2 and FX3. You can however change the color from Pinball FX –> Options –> UI/ Stream –> Dot Matrix Color |
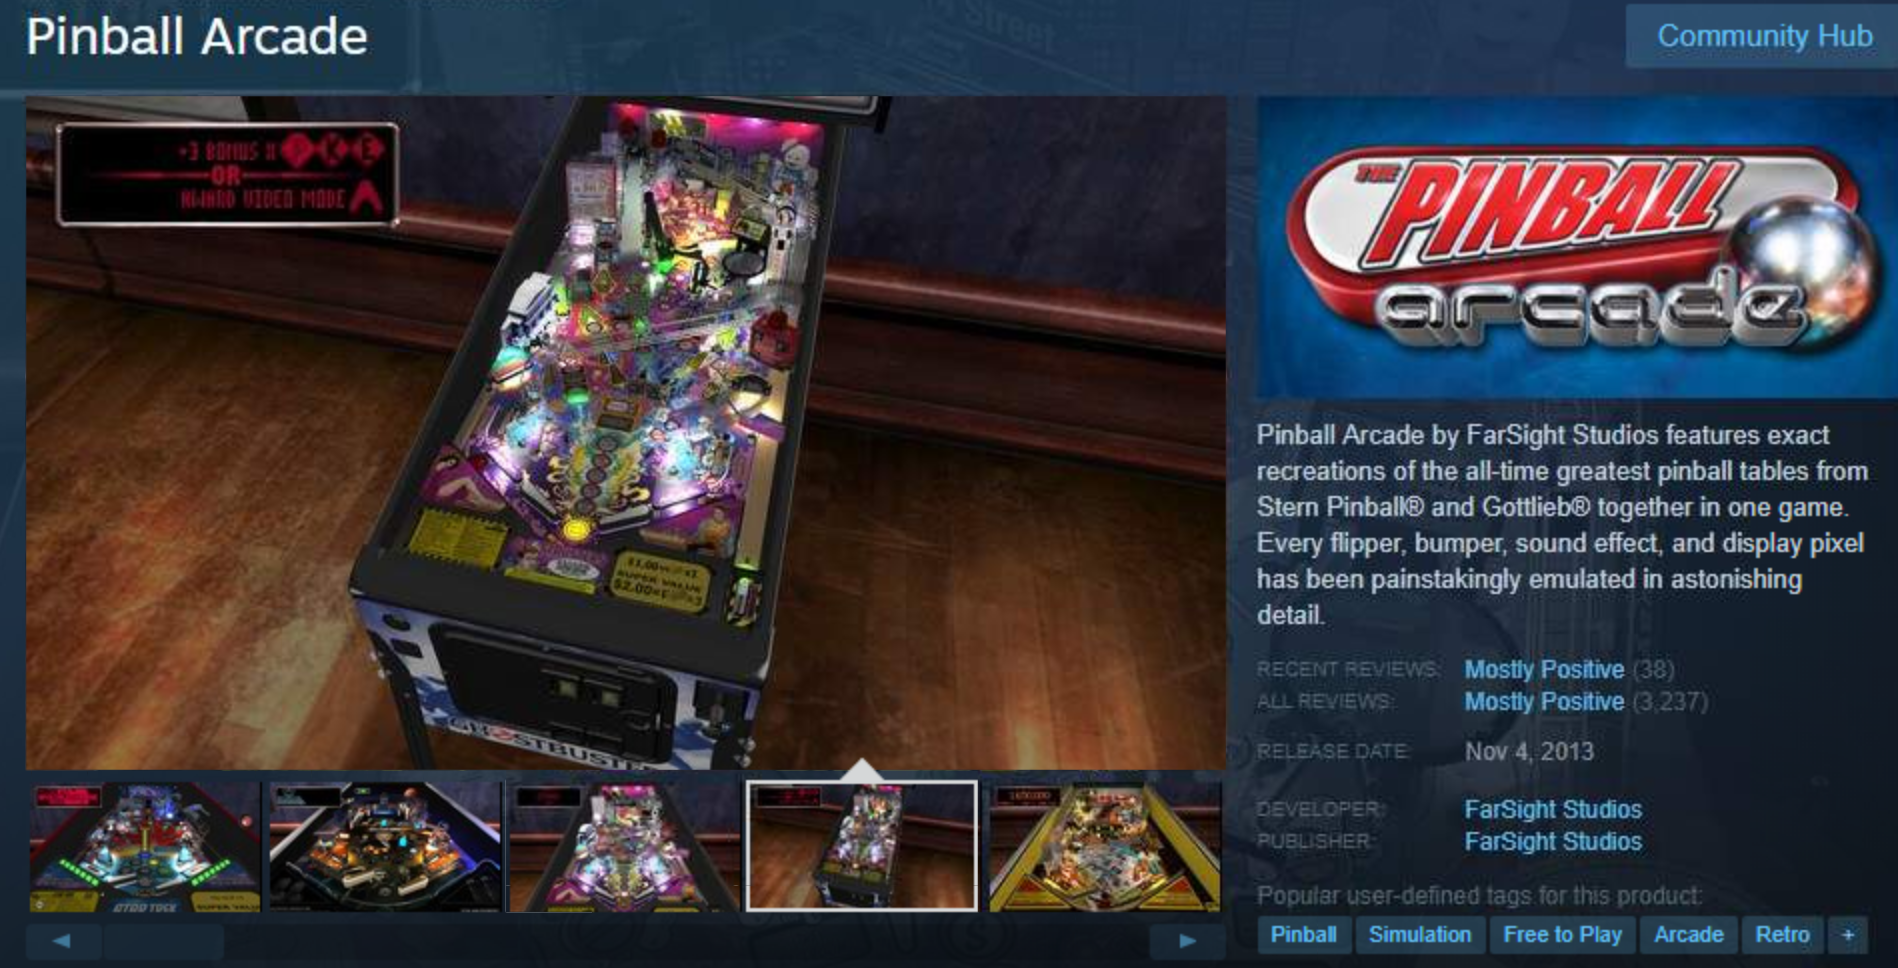 | Note that Pixelcade only supports 128×32 DMD games for Pinball Arcade. This means the free Pinball Arcade table, Frankenstein, is not supported nor our early electromechanical (EM) tables. Install Pinball Arcade from Steam Run this installer and note you don’t need to run again if you already installed this for Pinball FX
|
| Launch the “Pixelcade for Pinball Arcade” listener which will run in the background. A minimized window called DMDEXT will appear. | |
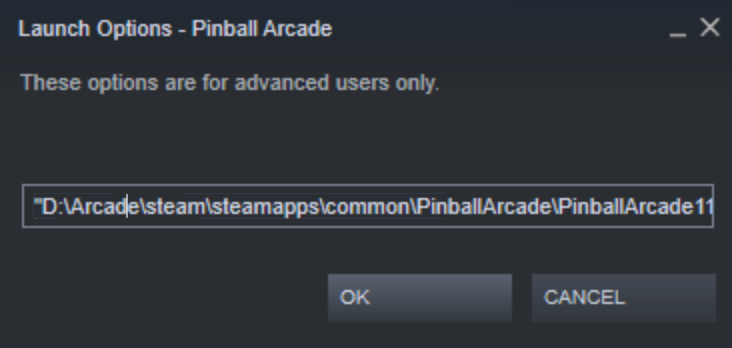
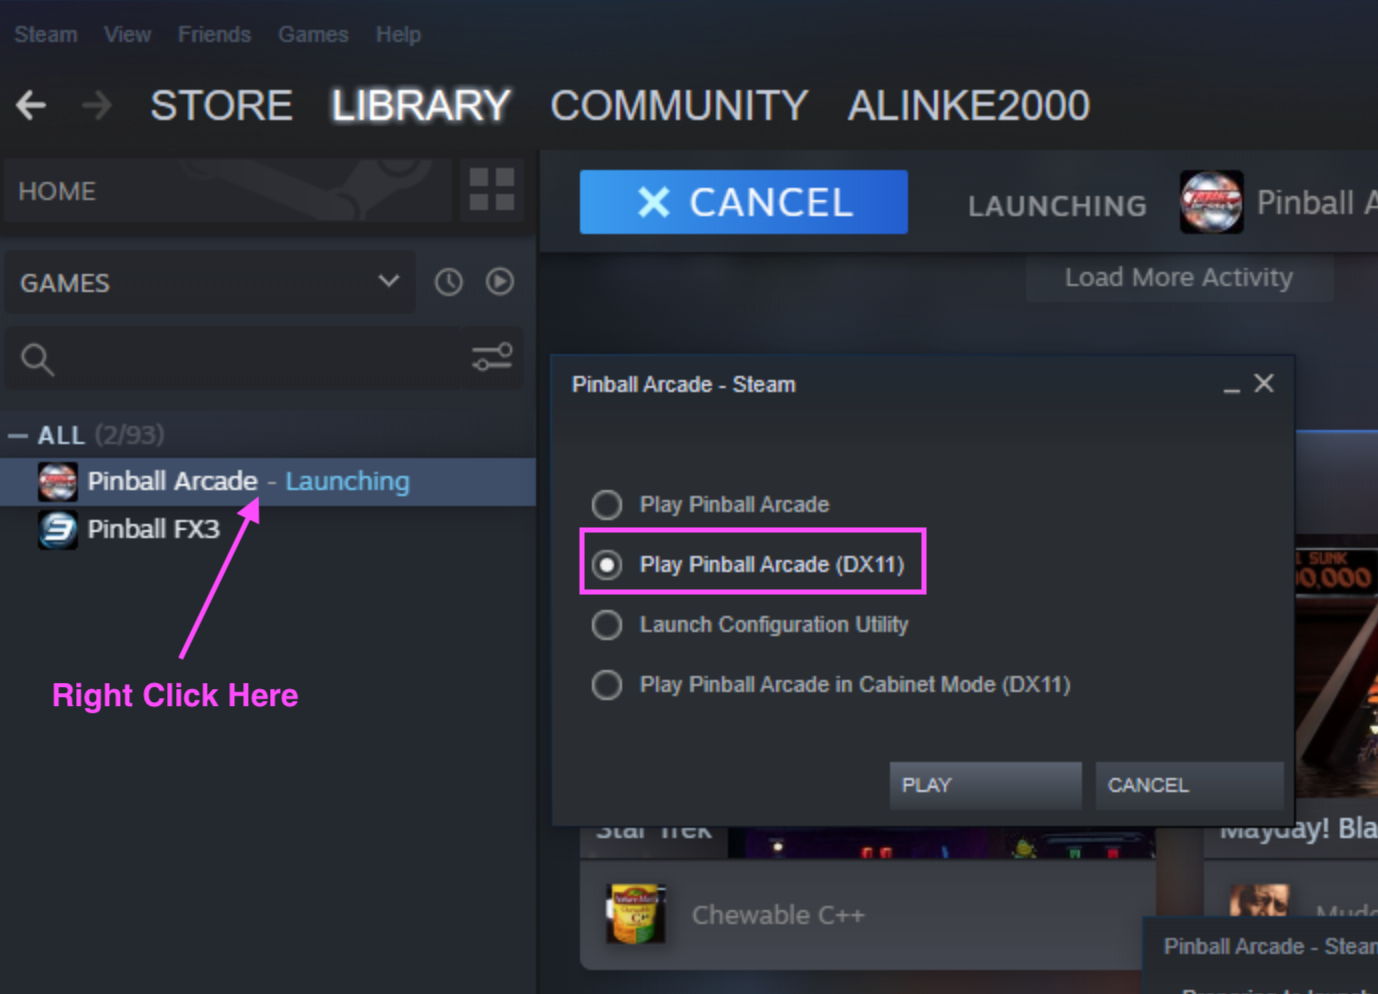 | Pixelcade will only work with the DX11 version of The Pinball Arcade. To launch the DX11 version of Pinball, right click from Steam and select “Play Pinball Arcade (DX11) or “Play Pinball Arcade in Cabinet Mode (DX11)” |
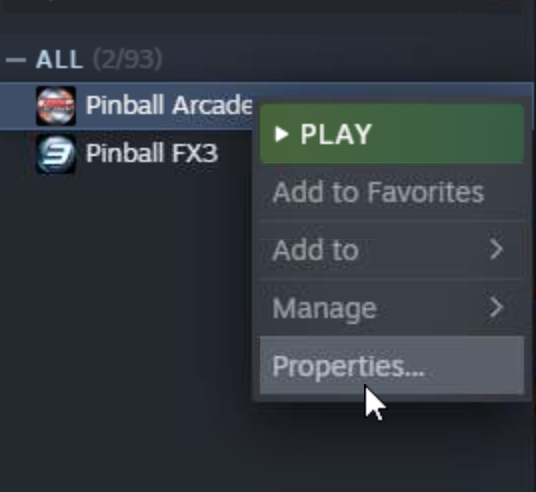
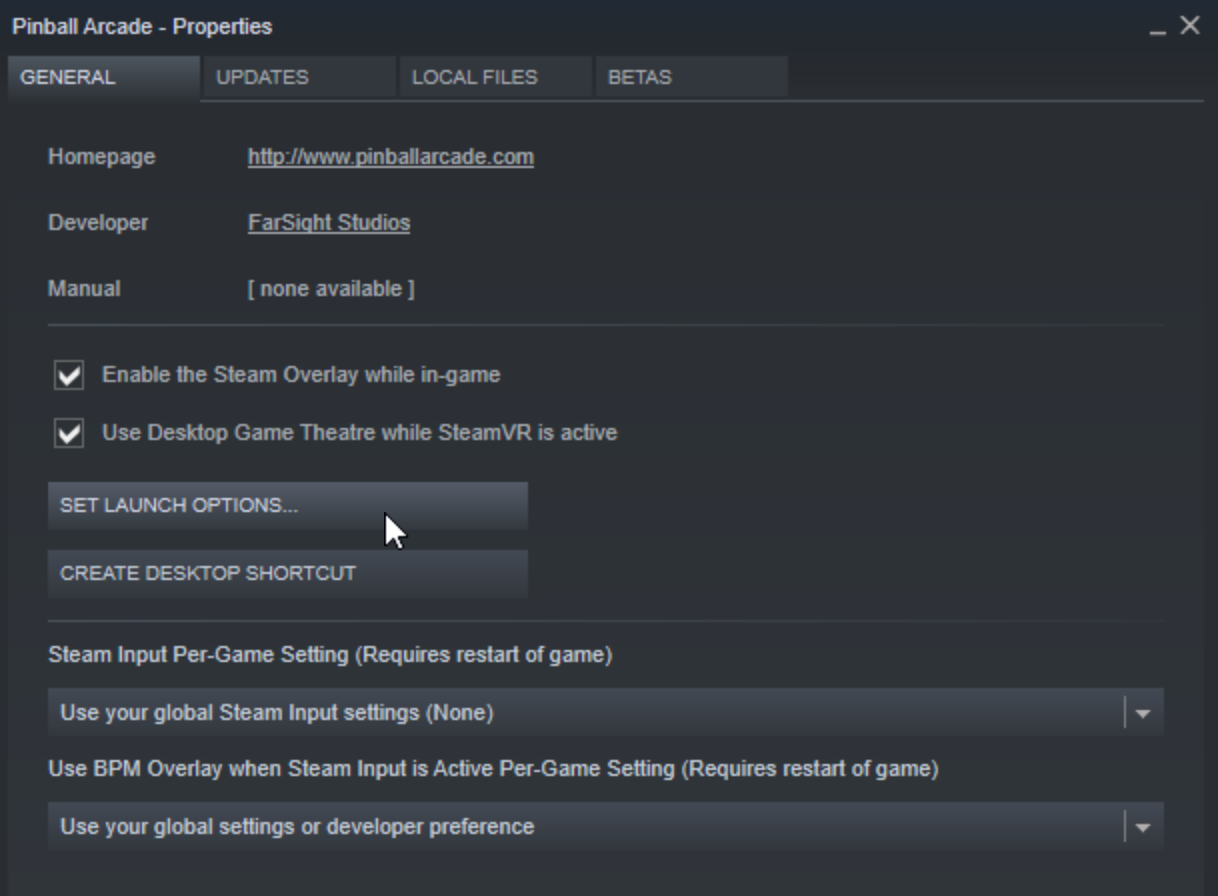
| Optional: If you want to set Pinball Arcade to launch DX11 by default: Click “Properties” Click “Set Launch Options” Add this command:”< Your Steam Installation Directory\steam\steamapps\common\ PinballArcade\PinballArcade11.exe” %command% |
| Launch Pinball Arcade and select a table. Pixelcade will kick in when you click the Start button in the table. |
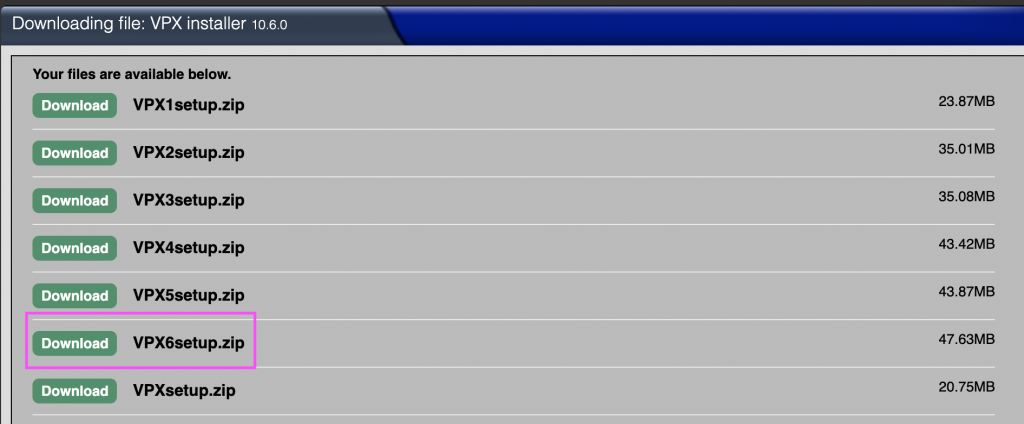 | Download VPX installer from vpforums.org Pick the latest one which is VPX6setup.zip at the time of this writing |
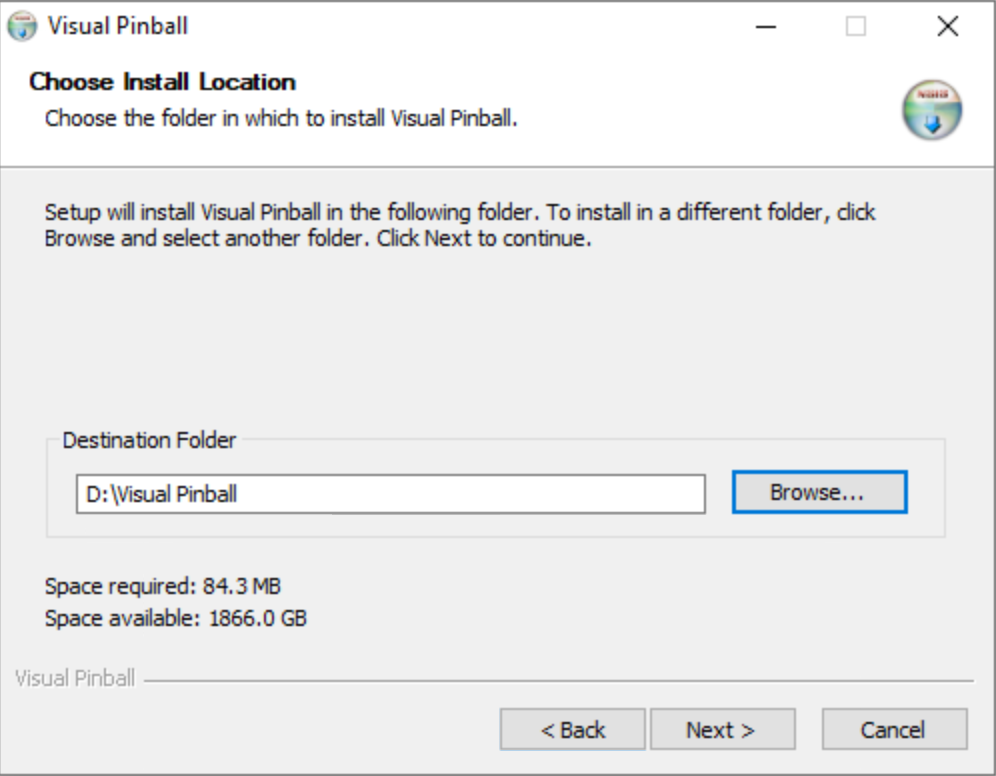 | Install into the directory of your choice |
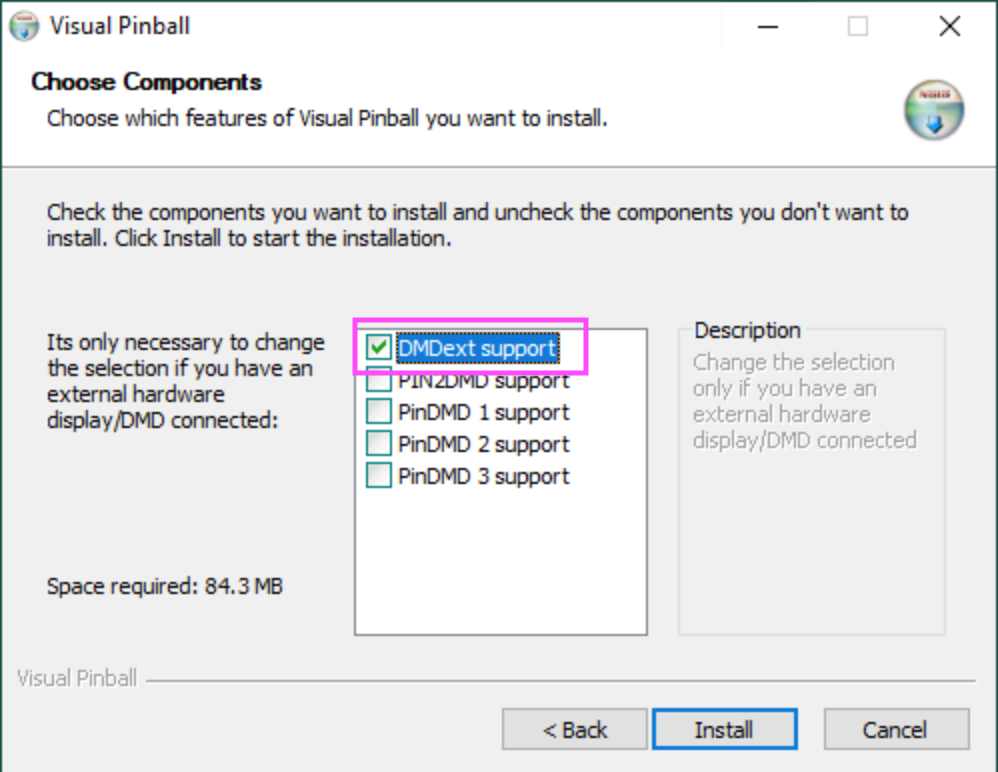 | Check “DMDext support” |
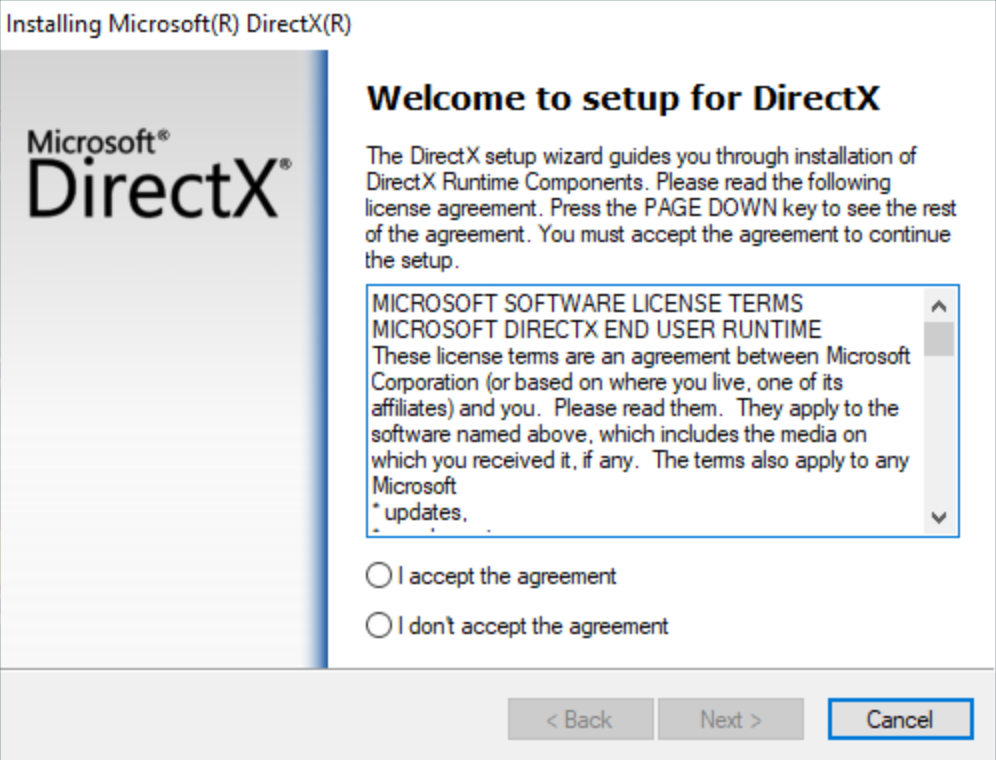 | You may be prompted to install DirectX |
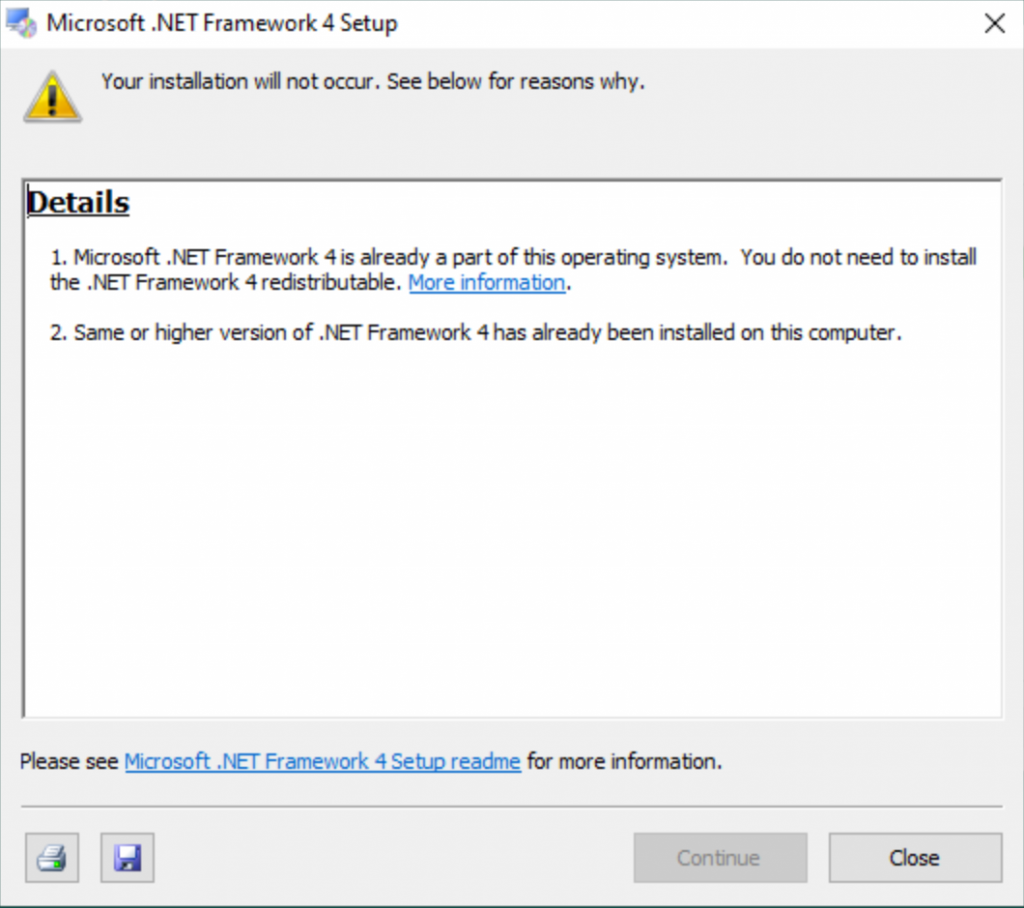 | You’ll be prompted to install the .NET framework if you don’t already have it |
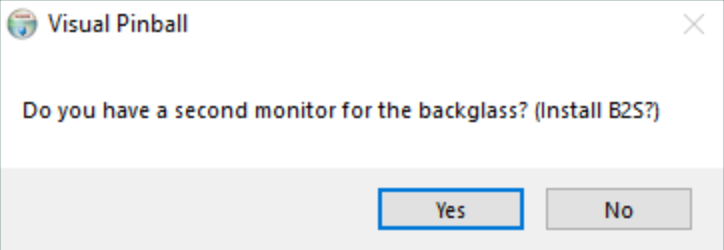 | Select “Yes” if you have a second monitor for the backglass |
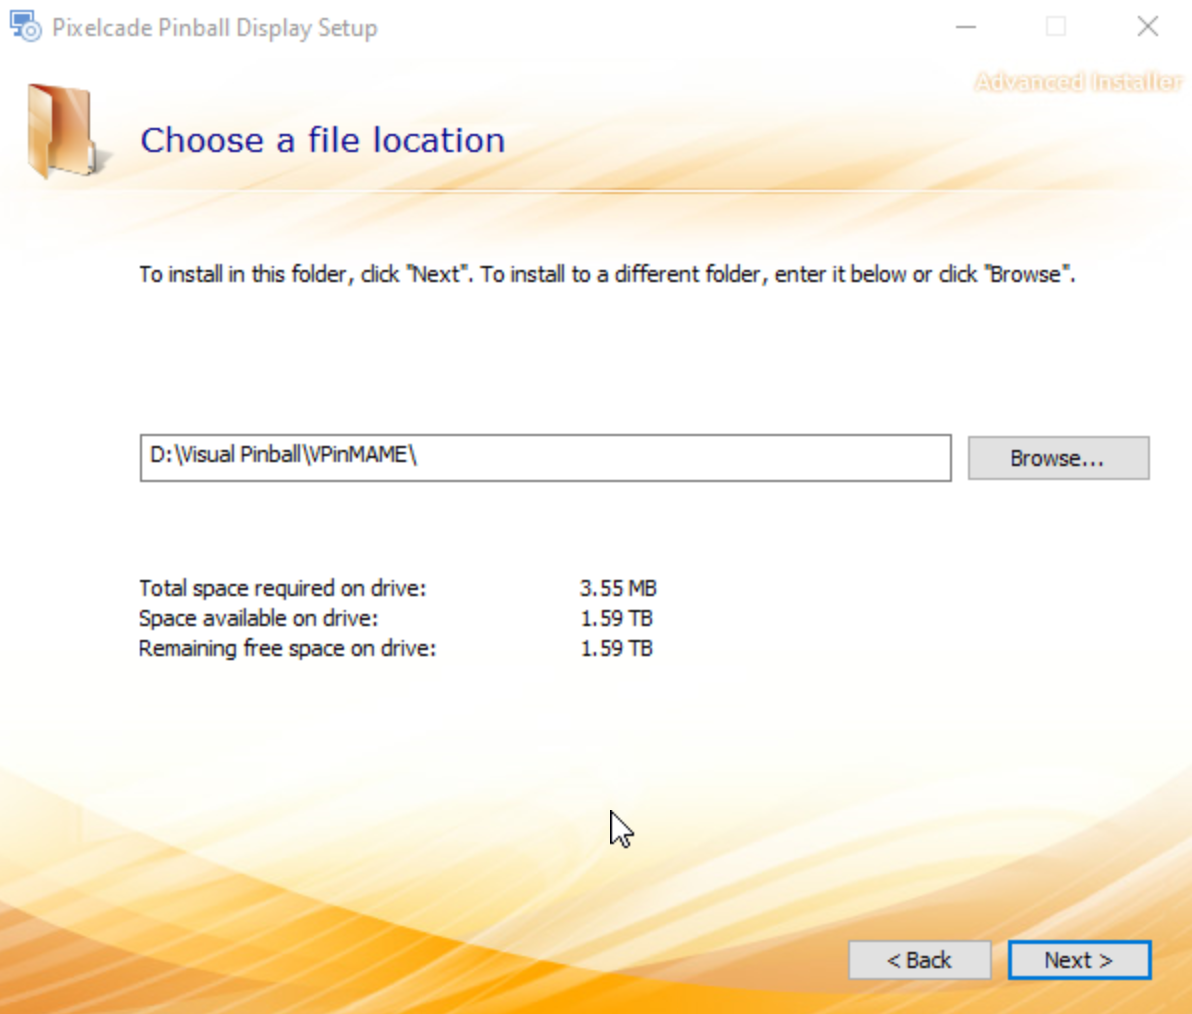
Run this installer and be sure to install it in your EXISTING VPinMAME folder
| |
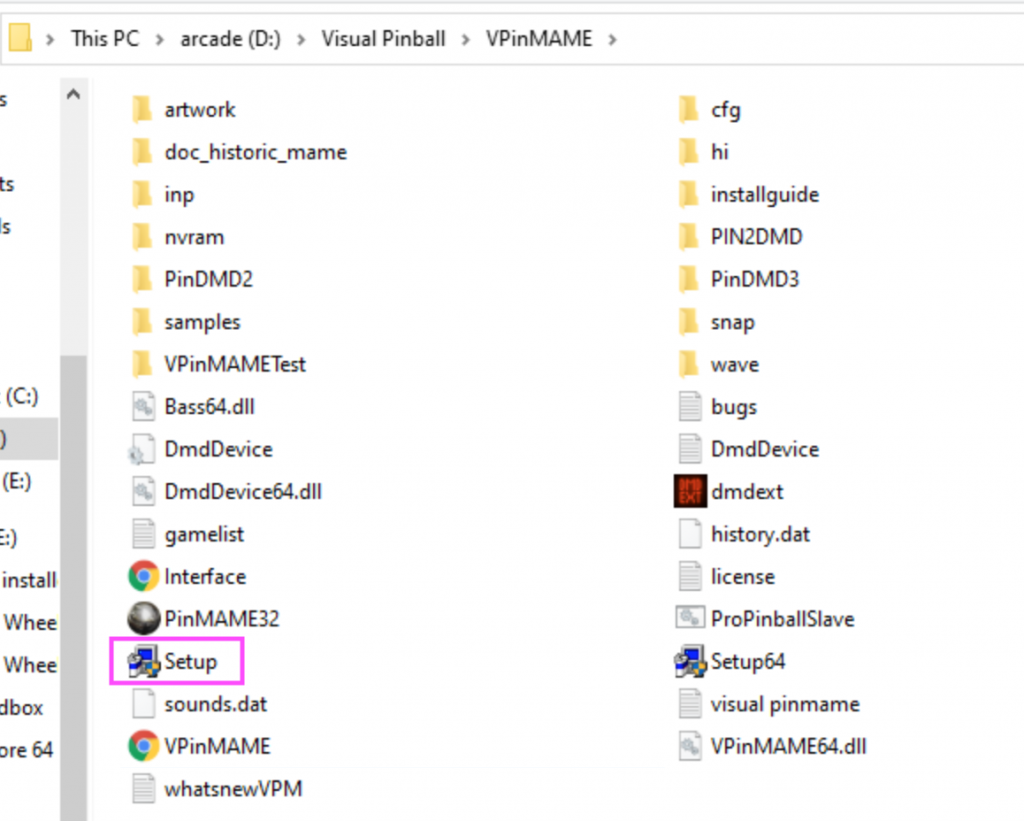
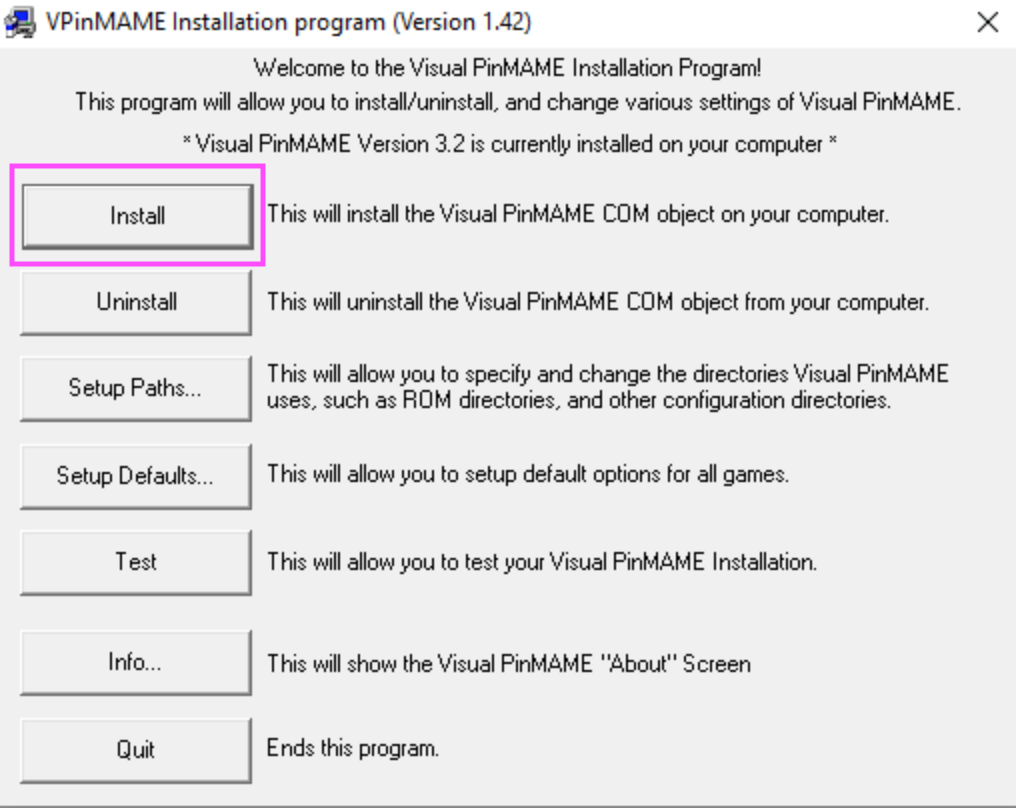
| From your VPinMAME directory, run “setup.exe” Choose “Install” |
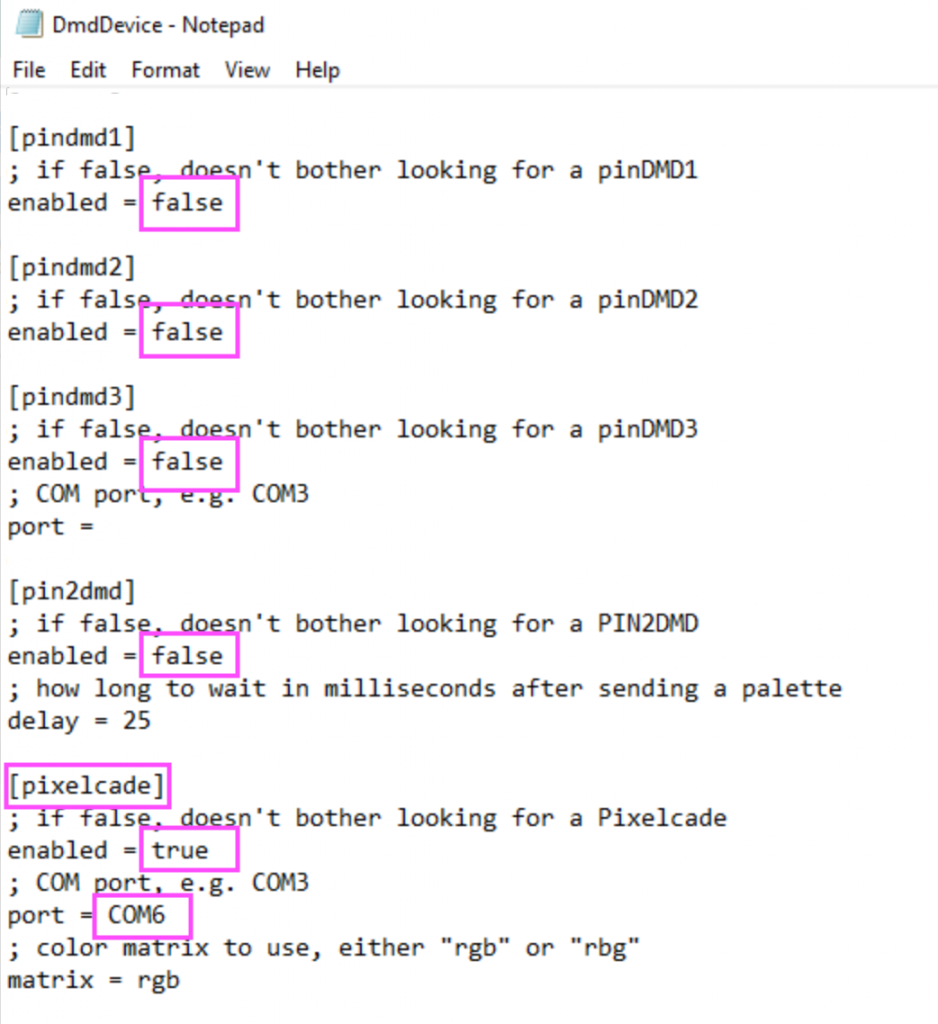 | From your VPinMAME directory, edit the file “DmdDevice.ini” In the [pixelcade] section, add the COM port of your Pixelcade board. You must add the specific COM port here or the board will not be found. Disable other pinDMD boards except pixelcade If you are using a P2.5 sizes PinDMD (most popular size), then use:
If using a P3 – P6 sized PinDMD, then use:
|
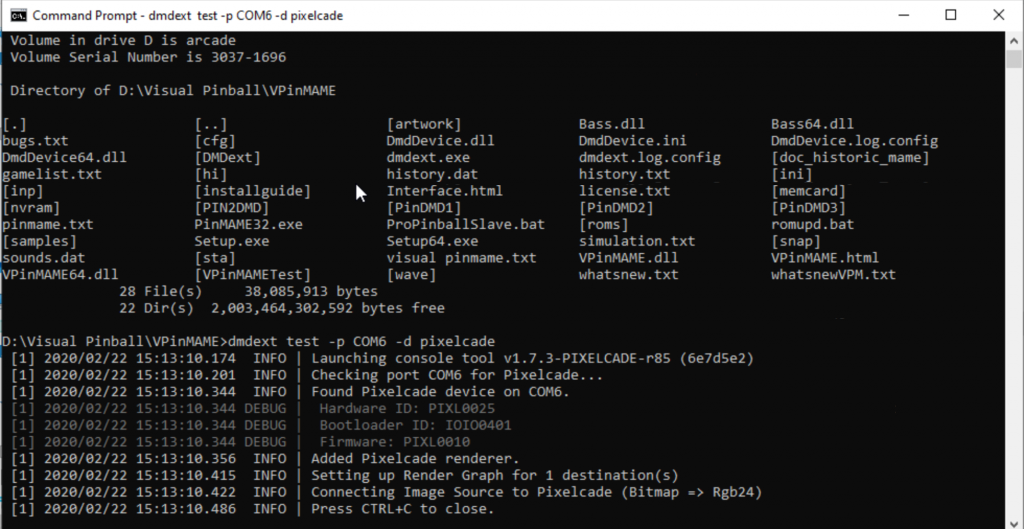
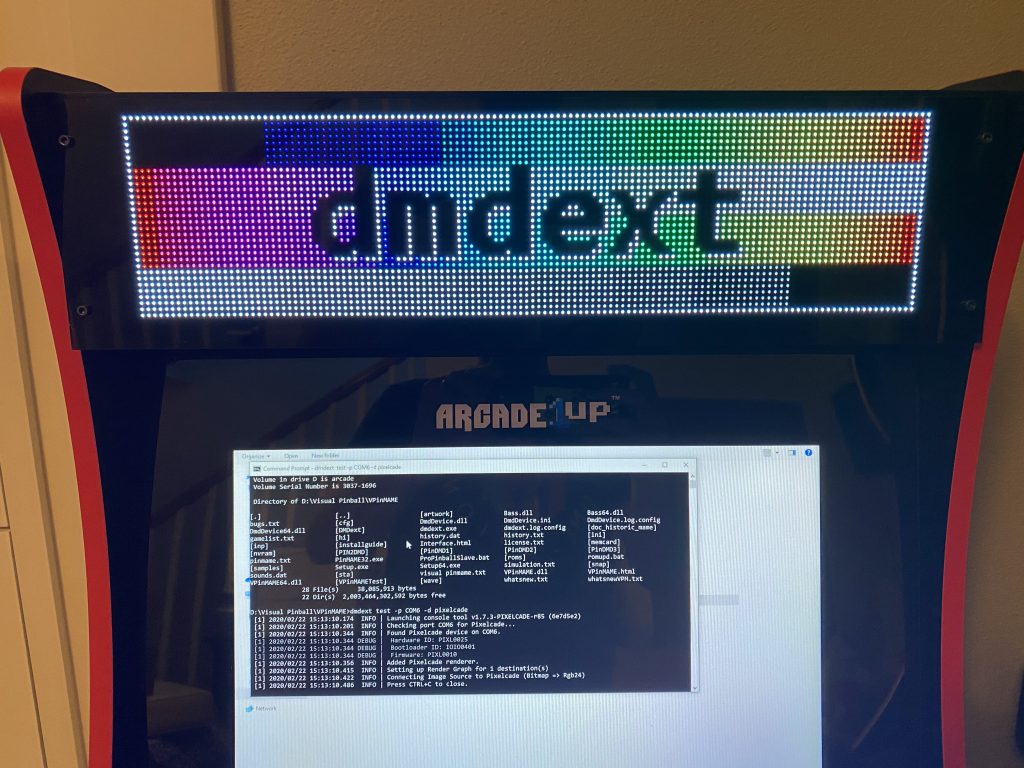
| From a command line from your VPinMAME directory, enter this command to test connectivity. Replace COM6 with the COM port of your Pixelcade board. dmdext test -p COM6 -d pixelcade |
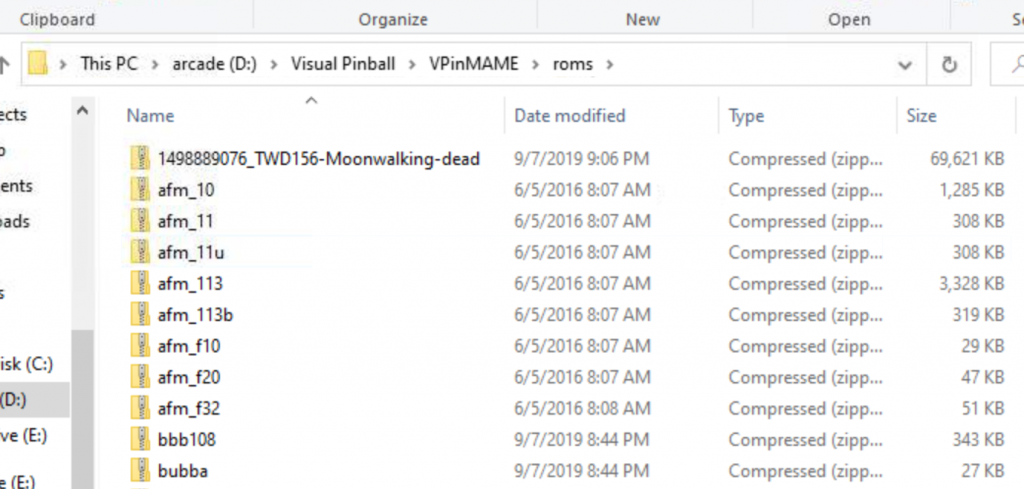 | Add some roms, placing them in the roms folder (look for patched roms if using color) https://www.vpforums.org is a good place to find tables |
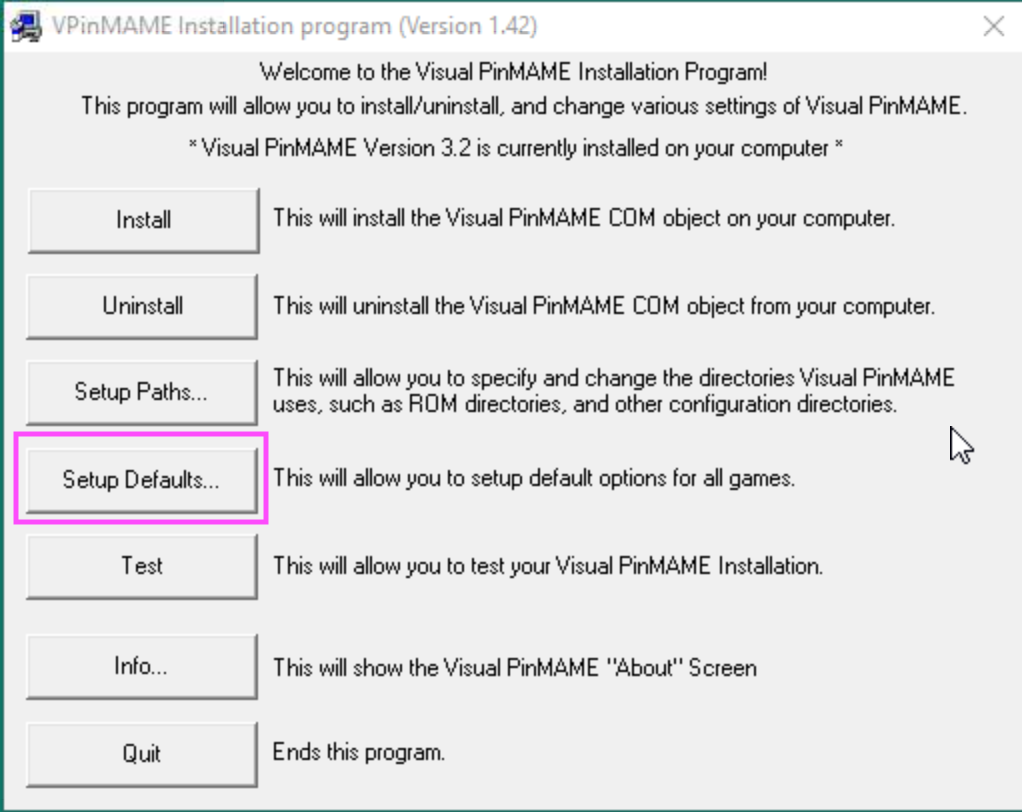
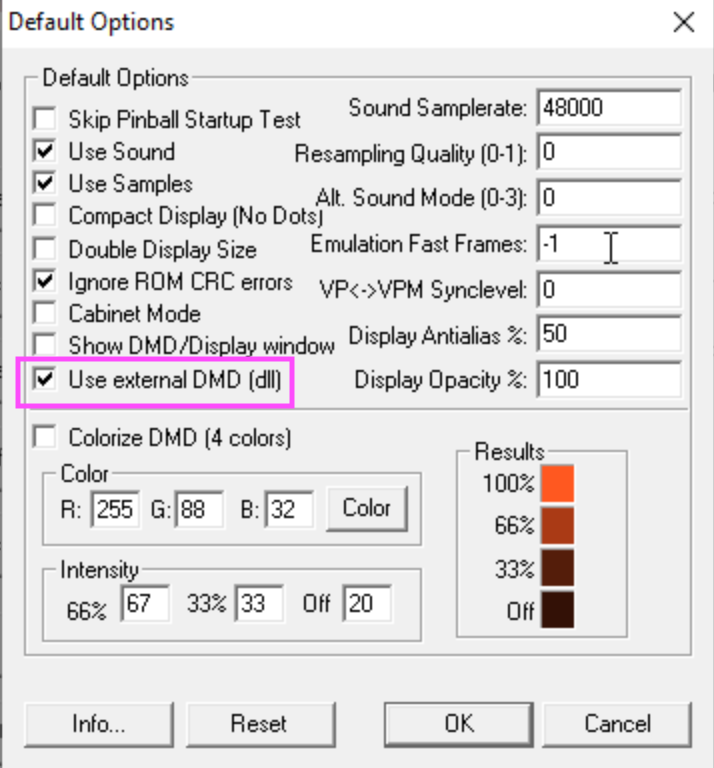
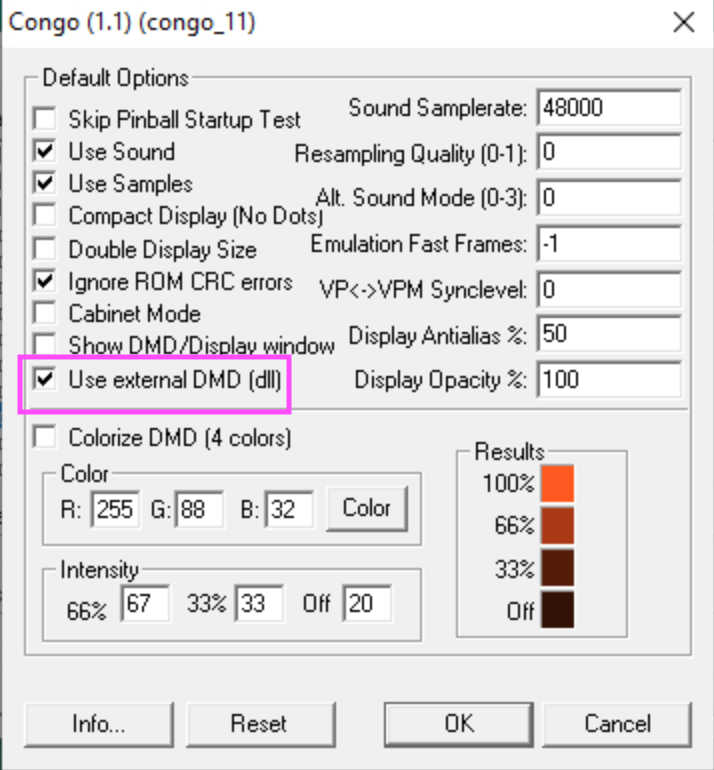
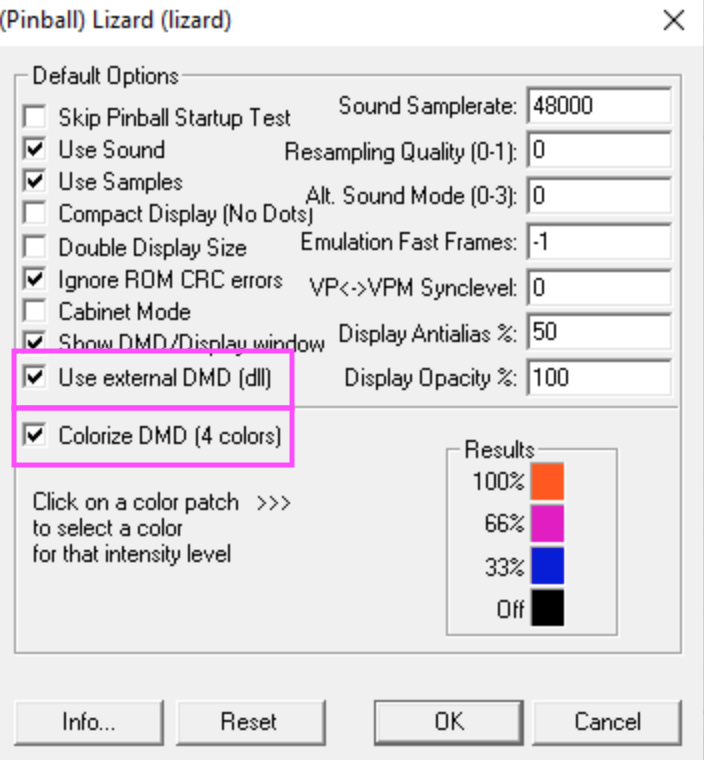
| From your VPinMAME directory, run “setup.exe” Choose “Setup Defaults…” Check “Use external DMD (dll)” Click “OK” |
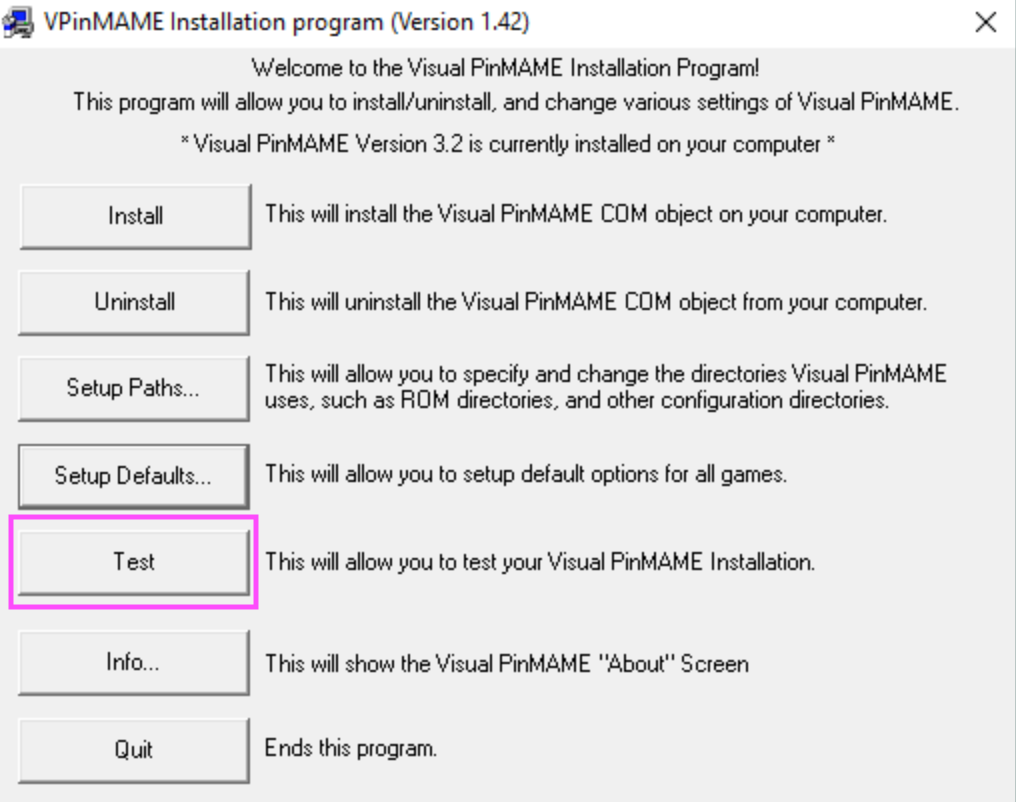
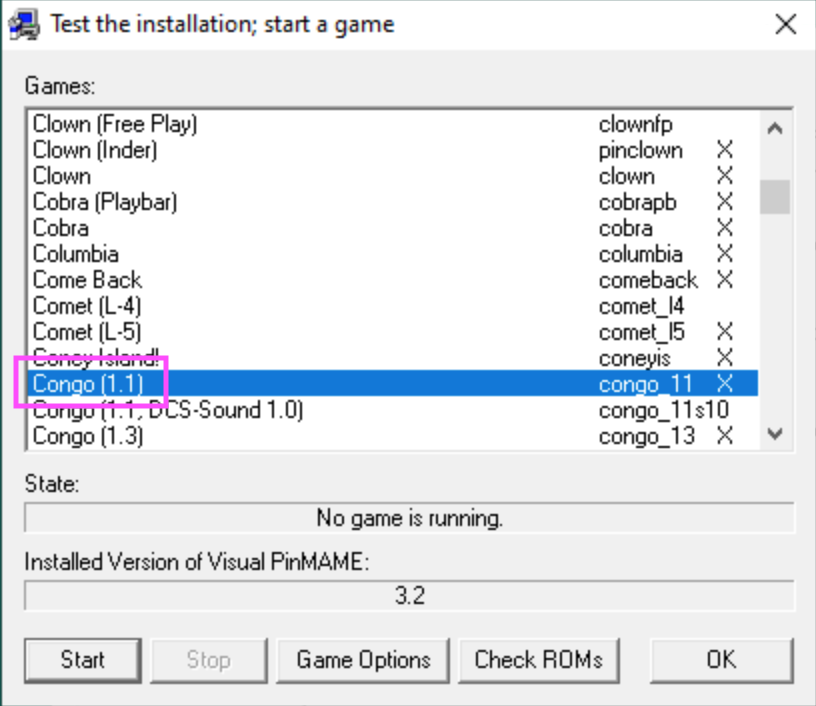
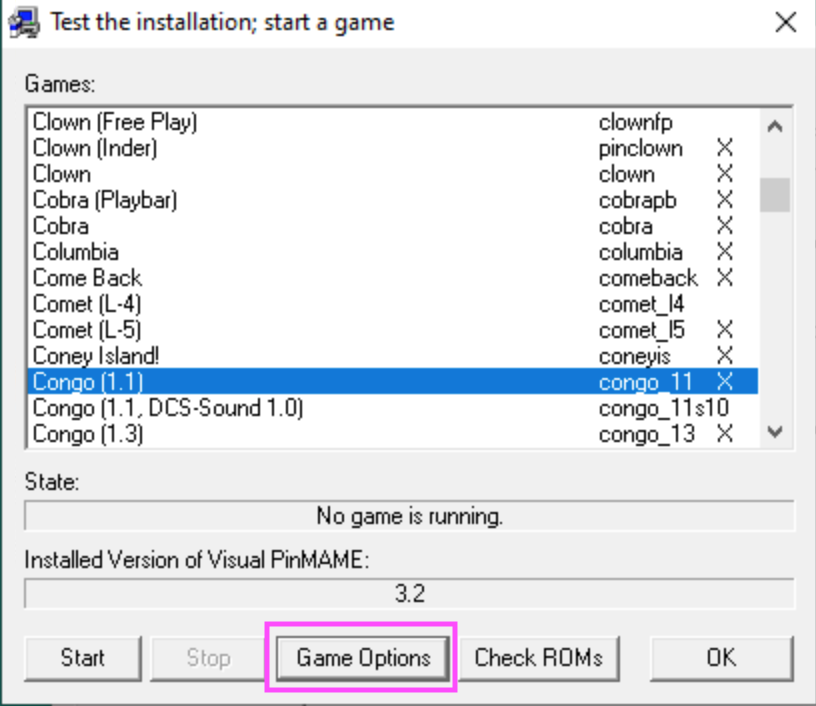
| Now click “Test” Select a rom Select “Game Options” Ensure “Use external DMD (dll)” is checked Click “OK” |
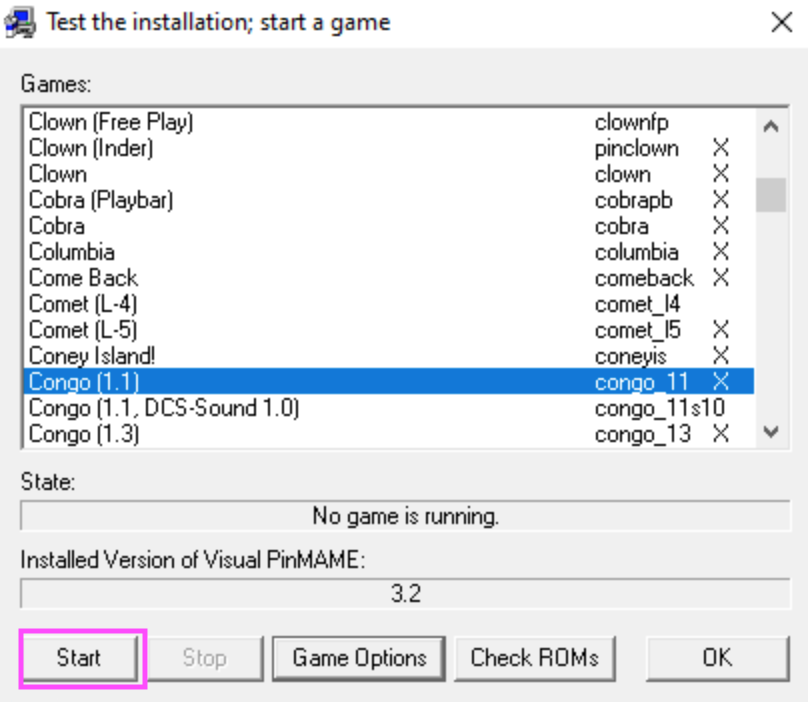
| Click “Start” The Pixelcade PinDMD should now be displaying the game If not displaying correctly, check the log file “DMDDevice.log” |
 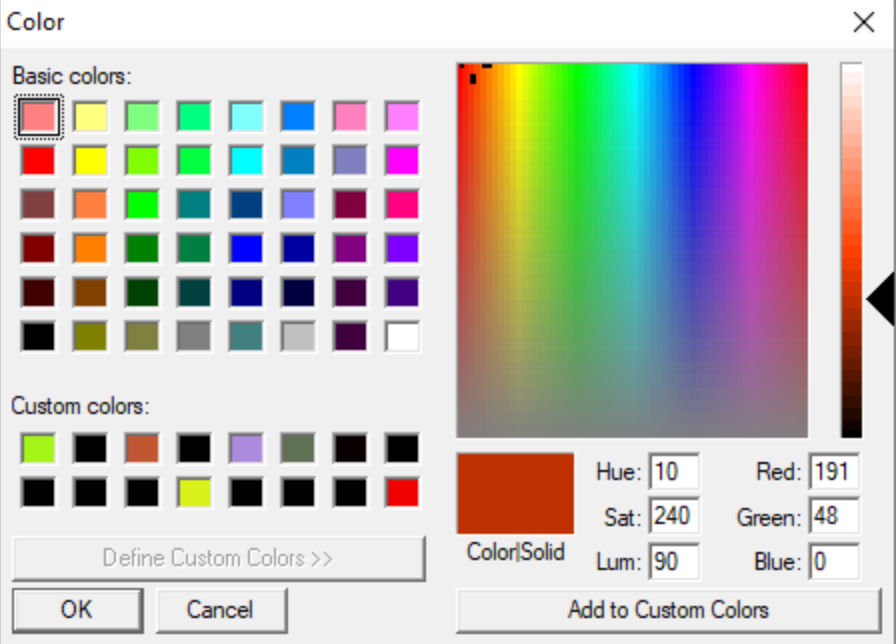 | If you like, you can also tweak the color. Do this from “Default Options” so you don’t need to do for each game individually. |
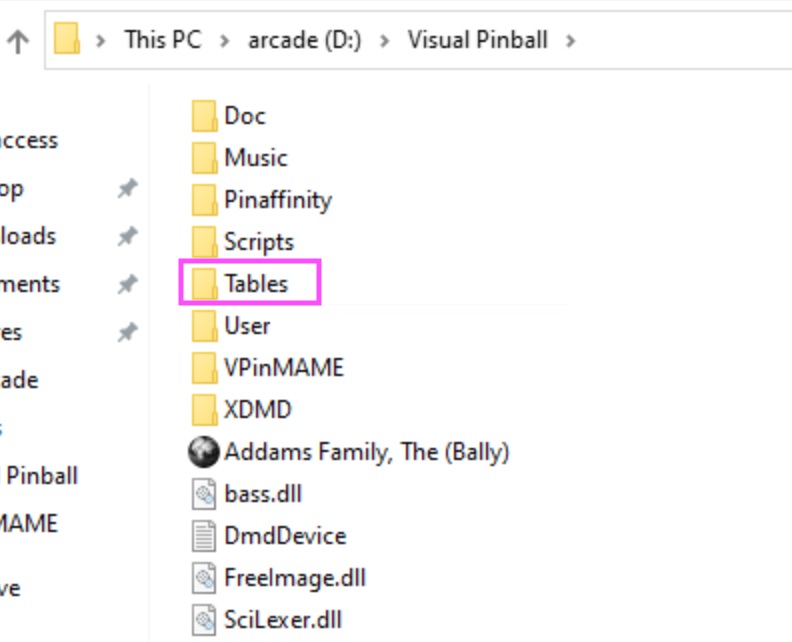 | Now add some tables https://www.vpforums.org is a good place to find tables Tables should be copied to tables folder of your Visual Pinball installation. |
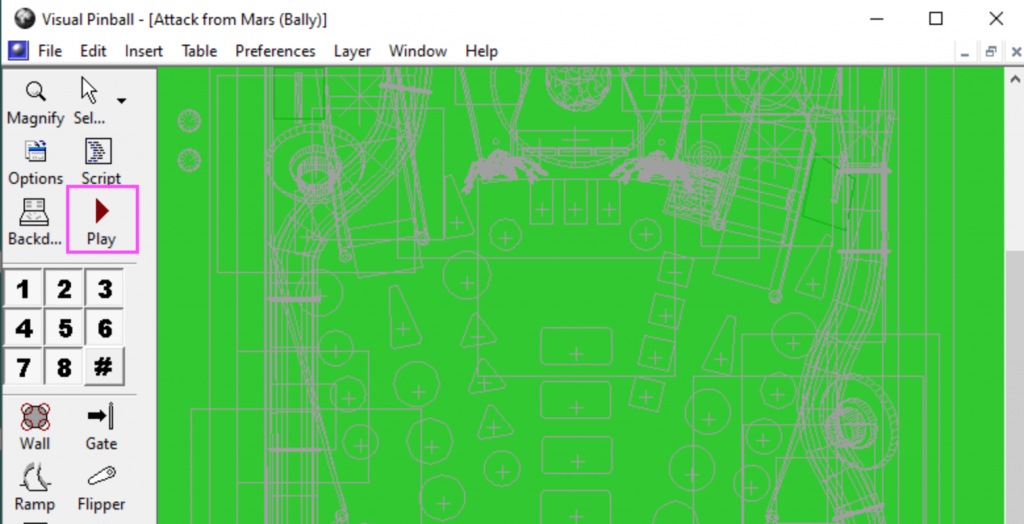 | Launch Visual Pinball 9 or X and then open a table to test and hit “Play” |
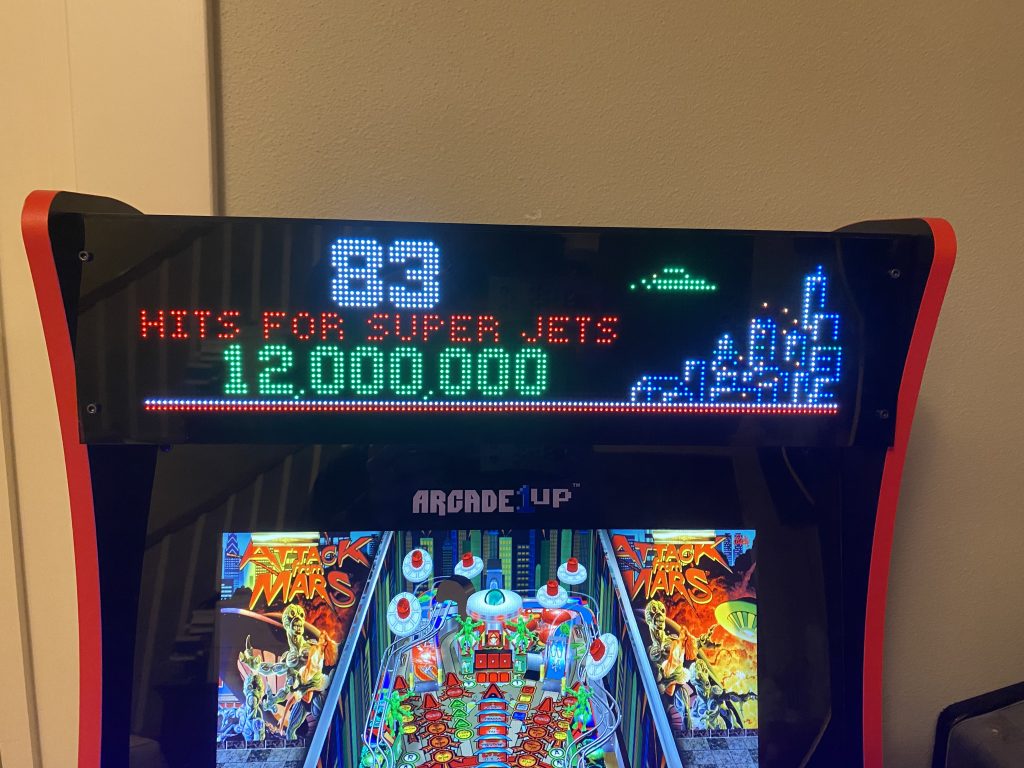 | The pinball table should launch and the Pixelcade DMD should be displaying game specific frames |
 | Now if you want to add color, then follow these steps:
|
Lastly if you like, you can add a front end. Note that the Pixelcade listener (pixelweb.exe) cannot run at the same time as the Pixelcade PinDMD. So you’ll need to stop the Pixelcade listener (pixelweb.exe) before running a pinball table. If you have pixelweb.exe running, then this REST API call will close it http://localhost:8080/quit A curl command is one way to make this call. curl is included in your Pixelcade installation d:\arcade\pixelcade\curl.exe -s http://localhost:8080/quit | |
 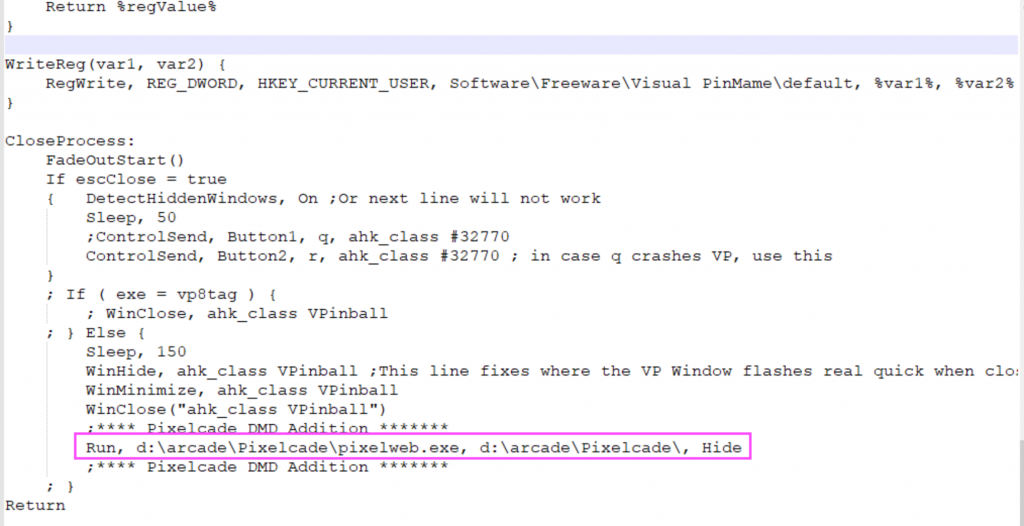 | Here is a HyperSpin example. In this example, pixelweb.exe runs normally during HyperSpin until a Visual Pinball table has been launched. When a table is launched, this modification to the Visual Pinball.ahk script will stop pixelweb.exe when a Visual Pinball tables has been launched. At that point, Pixelcade PinDMD takes over and changes interactively with the pinball game. And then when you exit the table, pixelweb.exe is again launched. For HyperSpin, Visual Pinball.ahk is located in RocketLauncher\Modules\Visual Pinball\Visual Pinball.ahk Command to stop pixelweb.exe. Be sure and update for your correct path.
Command to start pixelweb.exe
|