Pixelcade for RetroPie and Attract Mode

Pixelcade for RetroPie Features

  • High scores will scroll for select MAME games. If the MAME game has a high score, Pixelcade will cycle between high scores and the game marquee upon game launch. By default, Pixelcade will scroll the top 3 high scores but this can be customized per the scripts below.
  • Now Playing < Game Name > will scroll when a new game is launched and then the marquee will be displayed.
  • Game marquees will now display correctly from EmulationStation collections and no longer require re-mapping using the console.csv file
  • Power users can customize Pixelcade behavior on game launch, and other events, see user customizable scripts below.
  • You can now re-run the installer to get the latest Pixelcade artwork while preserving any custom artwork you’ve done.

Step 1: Burn the RetroPie image using a tool like Balena Etcher.

Step 2: Insert the microSD card in your Pi and power on. After EmulationStation loads, hit < F4 > to exit to a command line and type:

sudo raspi-config

Follow prompts to enable Wi-Fi. You can also enable SSH to remote shell to your Pi (optional).

Step 3:

  • If using Pixelcade LED, power on your Pixelcade LED Marquee and remove the Bluetooth dongle if it’s plugged in. Using the included USB A-A cable, plug one end into Pixelcade’s PCB board and the other end to your Raspberry Pi. Ensure the toggle switch on the Pixelcade PCB board is pointing towards “USB”, it will not work if it’s pointing towards “BT”.
  • If using Pixelcade LCD, ensure it was previously setup and configured to your WiFi or Ethernet. Pixelcade LCD must be on the same WiFi or Ethernet network as your Raspberry Pi. 

Step 4: From a command line, type the command below and follow the prompts. If you are in EmulationStation, you can exit to a command line by hitting < F4 > on your keyboard. You may also copy and paste this command via a remote SSH session (easier).

Pixelcade LED Installer Command

curl -kLO -H "Cache-Control: no-cache" https://raw.githubusercontent.com/alinke/pixelcade-linux-builds/main/install-scripts/setup-retropie.sh && chmod +x setup-retropie.sh && ./setup-retropie.sh

Pixelcade LCD 

Use this version for Pixelcade LCD

Note if installing on a pre-made RetroPie image, you may get a “permission denied” message when running the above command. If this happens, then  use the command with sudo.

If you are using Sinden Light Guns, you’ll need to manually modify this file /opt/retropie/configs/all/autostart.sh and replace the Pixelcade line with this

At the end of the setup script, Pixelcade should be displaying the RetroPie logo.

When prompted, choose yes to reboot. Your Pi should then boot directly into EmulationStation and Pixelcade should be changing as you browse through emulators and games.

A huge thanks to the developers who contributed to Pixelcade

Pixelcade supports RetroPie with EmulationStation and Attract Mode.  See the Attract Mode section towards the bottom of this page. Many thanks to Russ, Kai and Tony for developing the integrations with EmulationStation and Attract Mode. 

Raspberry Pi 3 Series and Raspberry Pi 4 are supported. It’s highly recommended and supported to use the stock RetroPie image from http://retropie.org.uk

Other pre-made RetroPie images may or may not work and are not supported.

For Pi 3 and B+ and Pi 4

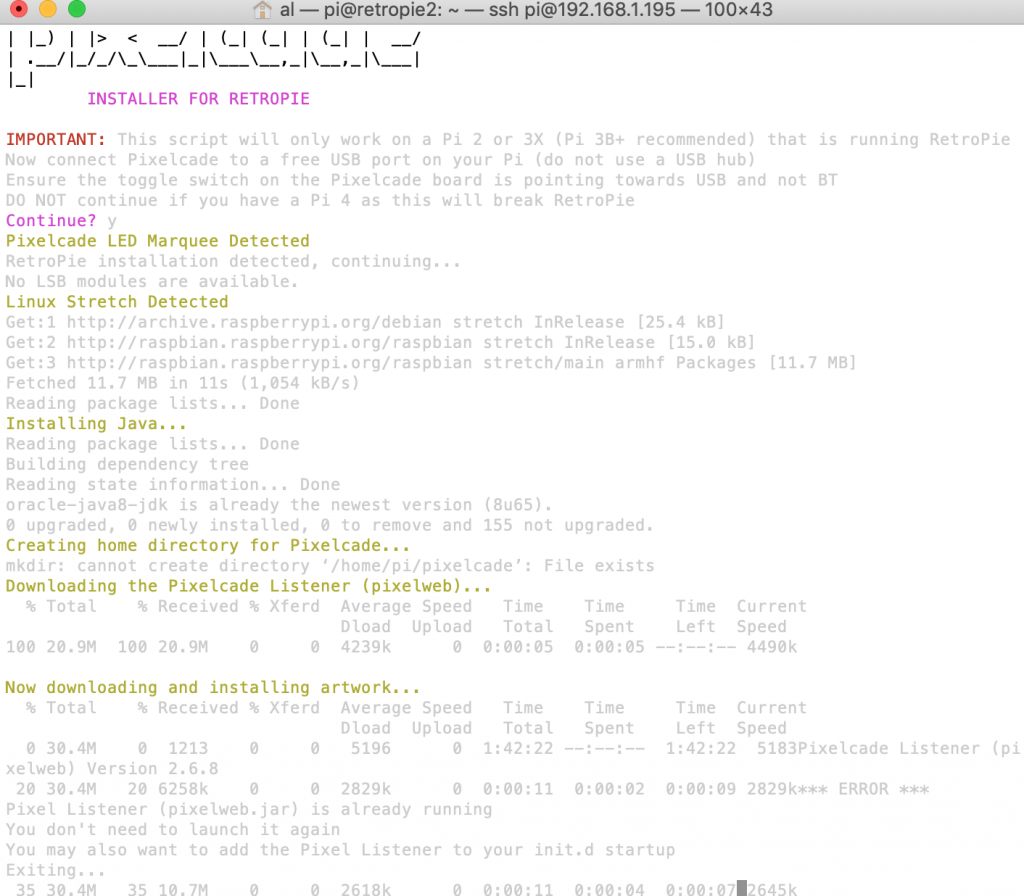
For reference, this automated installer script does the following:

  • Checks if the Pixelcade LED marquee is USB connected
  • Checks if RetroPie is installed
  • Checks if EmulationStation is at the minimum required version
  • Checks if Attract Mode is installed and installs Pixelcade Attract mode plug-in
  • Creates /home/pi/pixelcade which is the home folder for Pixelcade and copies files including artwork
  • Check if new artwork is available from the Pixelcade artwork repo
  • Adds a udev rule for Pixelcade such that Pixelcade will show in Linux as /dev/PIXELCADE0
  • Adds the Pixelcade listener (pixelweb) to your startup via /opt/retropie/configs/all/autostart.sh
  • Installs updater which checks for upgrades upon reboot if that was selected
  • Installs a few fonts that Pixelcade uses
  • Prompts for Reboot

Optional LED Art Pack

An optional paid LED art pack is available for Pixelcade LED with additional animated marquees. Note this art pack is for Pixelcade LED only and not for Pixelcade LCD marquees.

After purchasing the LED art pack, you’ll receive a serial code. Use this command to install the art pack:

cd ~/pixelcade && ./pixelweb --install-artpack <serial code>

Pixelcade Companion Web Interface

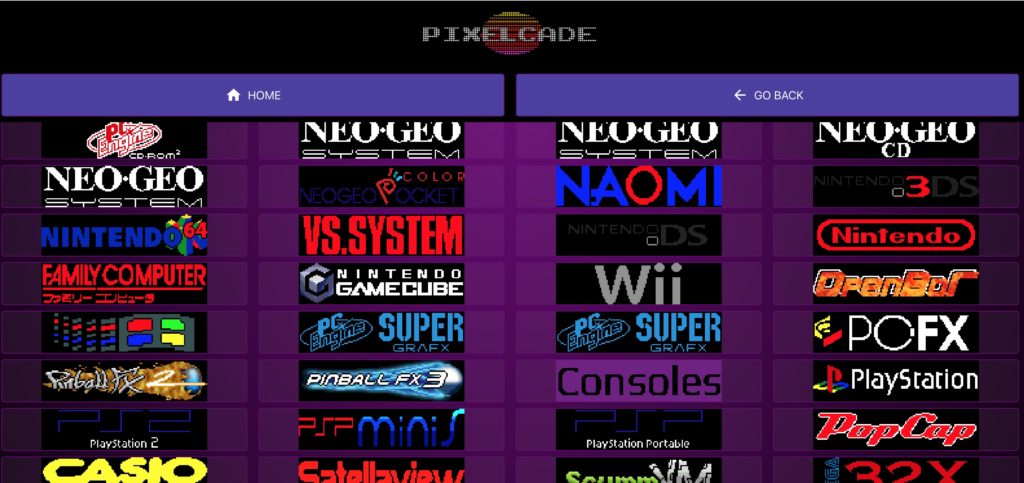
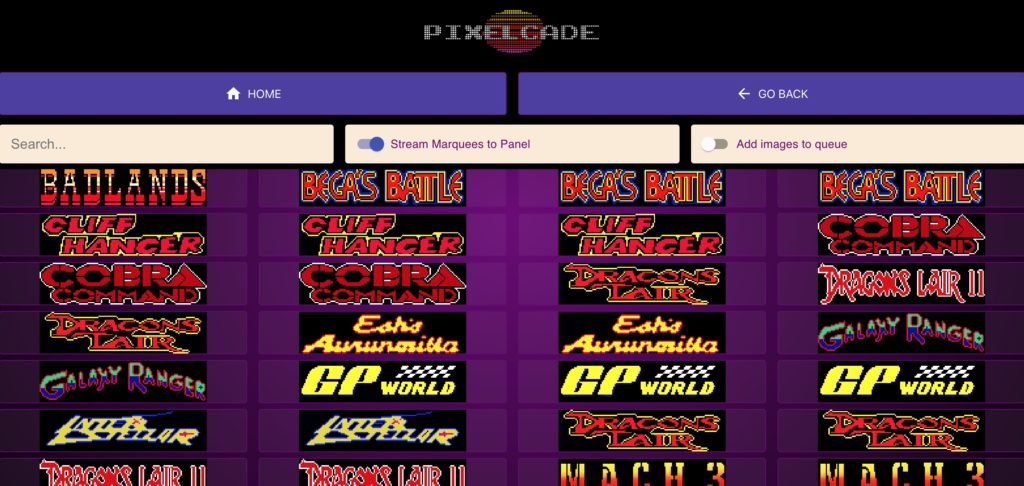
Use the Pixelcade Companion Web interface to browse marquee artwork. From any web browser on the same network as your RetroPie device, go to:

http://retropie.local:8080 or < RetroePie IP Address >:8080

For example: http://retropie.local:8080 or 192.168.1.198:8080

Widget Features (Experimental)

While not in Arcade marquee mode, Pixelcade can display weather, act as a clock, display sport scores, and stock prices. Please note this widgets are currently experimental.

Weather

http://batocera.local:8080/weather?location=x

x can be a zip code or a city/country name

Clock

http://batocera.local:8080/clock

Sports Scores Ticker

http://batocera.local:8080/sports/x

x can be: nfl, nba, nhl, mlb

Stock Ticker

http://batocera.local:8080/stocks?tickers=x,y,z

where x,y, z are ticker names

ex. 

http://batocera.local:8080/stocks?tickers=aapl,googl,sbux

Pixelcade Command Line Parameters

Pixelcade will start automatically utilizing the autostart.sh built in startup script of RetroPie located at:

/opt/retropie/configs/all/autostart.sh

The Pixelcade installer adds this line to autostart.sh which will start Pixelcade automatically upon boot up with these command line parameters:

cd /home/pi/pixelcade && ./pixelweb -image "system/retropie.png" -startup &

If you are experiencing a conflict with another USB device (Sinden Light Gun, Adafruit USB volume board, etc.), then try modifying this line in your autostart.sh command to the following:

cd /home/pi/pixelcade && ./pixelweb -image "system/retropie.png" -d /dev/PIXELCADE0 -startup &

Pixelcade has additional command line parameters for customization. Use this command to see the possible parameters.

cd /home/pi/pixelcade && ./pixelweb -h

Usage of ./pixelweb:

  -b string

   optional bind address (default “0.0.0.0”)

  -check-artwork

    check Pixelcade artwork for updates. Exits with code 0 if no update available, 1 if update is available, 2 if directory does not exist, 3 if unknown error.

  -d string

    path to pixelcade device. Set to auto to scan for device. On Windows use COM# (default “auto”)

  -debug

    debug log level

  -delay int

    time (in seconds) to delay device init

  -devicescan

    scan for device if not found or not specified with -d (default true)

  -font string

    default font for text (default “Arial Narrow 7”)

  -fontcolor string

    default font color for text (default “red”)

  -fontcolorrandom

    random default font color. Overrides -fontcolor

  -fontsize int

    default font size for text (default 28)

  -fuzzy

    enable fuzzy matching for images

  -image string

    optional image to display on startup (default “mame/pixelcade.png”)

  -install-artpack string

    install art pack with license code

  -install-artwork

    install Pixelcade artwork to pixelcade root. Exits with code 2 if artwork already installed.

  -logfile string

    optional log file

  -nointro

    skips playing the startup text and logo. Screen will be black on startup.

  -p string

    path to pixelcade root (default “/userdata/system/pixelcade”)

  -port int

    optional port to listen on (default 8080)

  -progress-stdout

    print progress output as stdout only

  -startup

    startup mode

  -swapbluegreen

    swap blue and green. Only needed for certain panels.

  -system-image string

    optional system image to display on startup. Overrides -image

  -text string

    optional text to display on startup (default “Welcome to Pixelweb”)

  -trace

    trace log level

  -update-artwork

    install Pixelcade artwork to pixelcade root

  -version

    display the version number

Customizing Pixelcade Behavior in RetroPie

You can customize the Pixelcade behavior by modifying the scripts located in

/home/pi/.emulationstation/scripts

Here are the scripts for reference which you can customize

https://github.com/alinke/pixelcade-linux/tree/main/retropie/scripts

ScriptDescription
system-select

Launches each time a system/console/collection is selected. This script make this API call to display the system/console marquee:

http://127.0.0.1:8080/console/stream/[console-name]

game-select

Launches each time a game is selected like for example while scrolling through games. This script makes this API call to display the game marquee:

http://localhost:8080/arcade/stream/[console name]/[rom name]

game-start

Launches each time a game is launched. This script will check if the game has high scores and display high scores in cycle mode if yes. Cycle mode means cycling between the game marquee and the high score scrolling. If the game does not have or does not support high scores, then the text “Now Playing will scroll and then the game marquee will be displayed.

You can customize these settings in this script:

DISPLAYHIGHSCORES=yes

If set to no, high scores will not scroll and the “Now Playing will scroll and then the game marquee will be displayed.

NUMBERHIGHSCORES=3

The number of high scores to scroll, choose 1 for example to only show the top score.

CYCLEMODE=yes

Cycle mode continually cycles between the game marquee and scrolling high scores while a game is active. If set to no, then high scores will scroll only once on game launch and then display the game marquee.


Launches each time a game is launched. This script will check if the game has high scores and display high scores in cycle mode if yes. Cycle mode means cycling between the game marquee and the high score scrolling. If the game does not have or does not support high scores, then the text “Now Playing will scroll and then the game marquee will be displayed.

You can customize these settings in this script:

DISPLAYHIGHSCORES=yes

If set to no, high scores will not scroll and the “Now Playing will scroll and then the game marquee will be displayed.

NUMBERHIGHSCORES=3

The number of high scores to scroll, choose 1 for example to only show the top score.

NOTEXT=no

If set to yes, just display the respective game marquee and skip any scrolling text (ie, Now Playing Game X and/or high scores). If there is an associated animated marquee, the animated marquee will play for one loop and then the static marquee will be displayed.

NUMBER_MARQUEE_LOOPS=10

For cycle mode, number of seconds a still image PNG marquee will remain before scrolling the high score text.  This has no effect if it’s an animated GIF marquee which will always loop once.

Front End Restart or Shutdown

 Launches when the EmulationStation front end is restarted or shutdown. This script will display the text “Bye” using this API call:

http://localhost:8080/text?t=<Your%20Scrolling%20Text%20Here>

Here are features available from the Pixelcade API which you can use in the above scripts https://pixelcade.org/api

Attract Mode

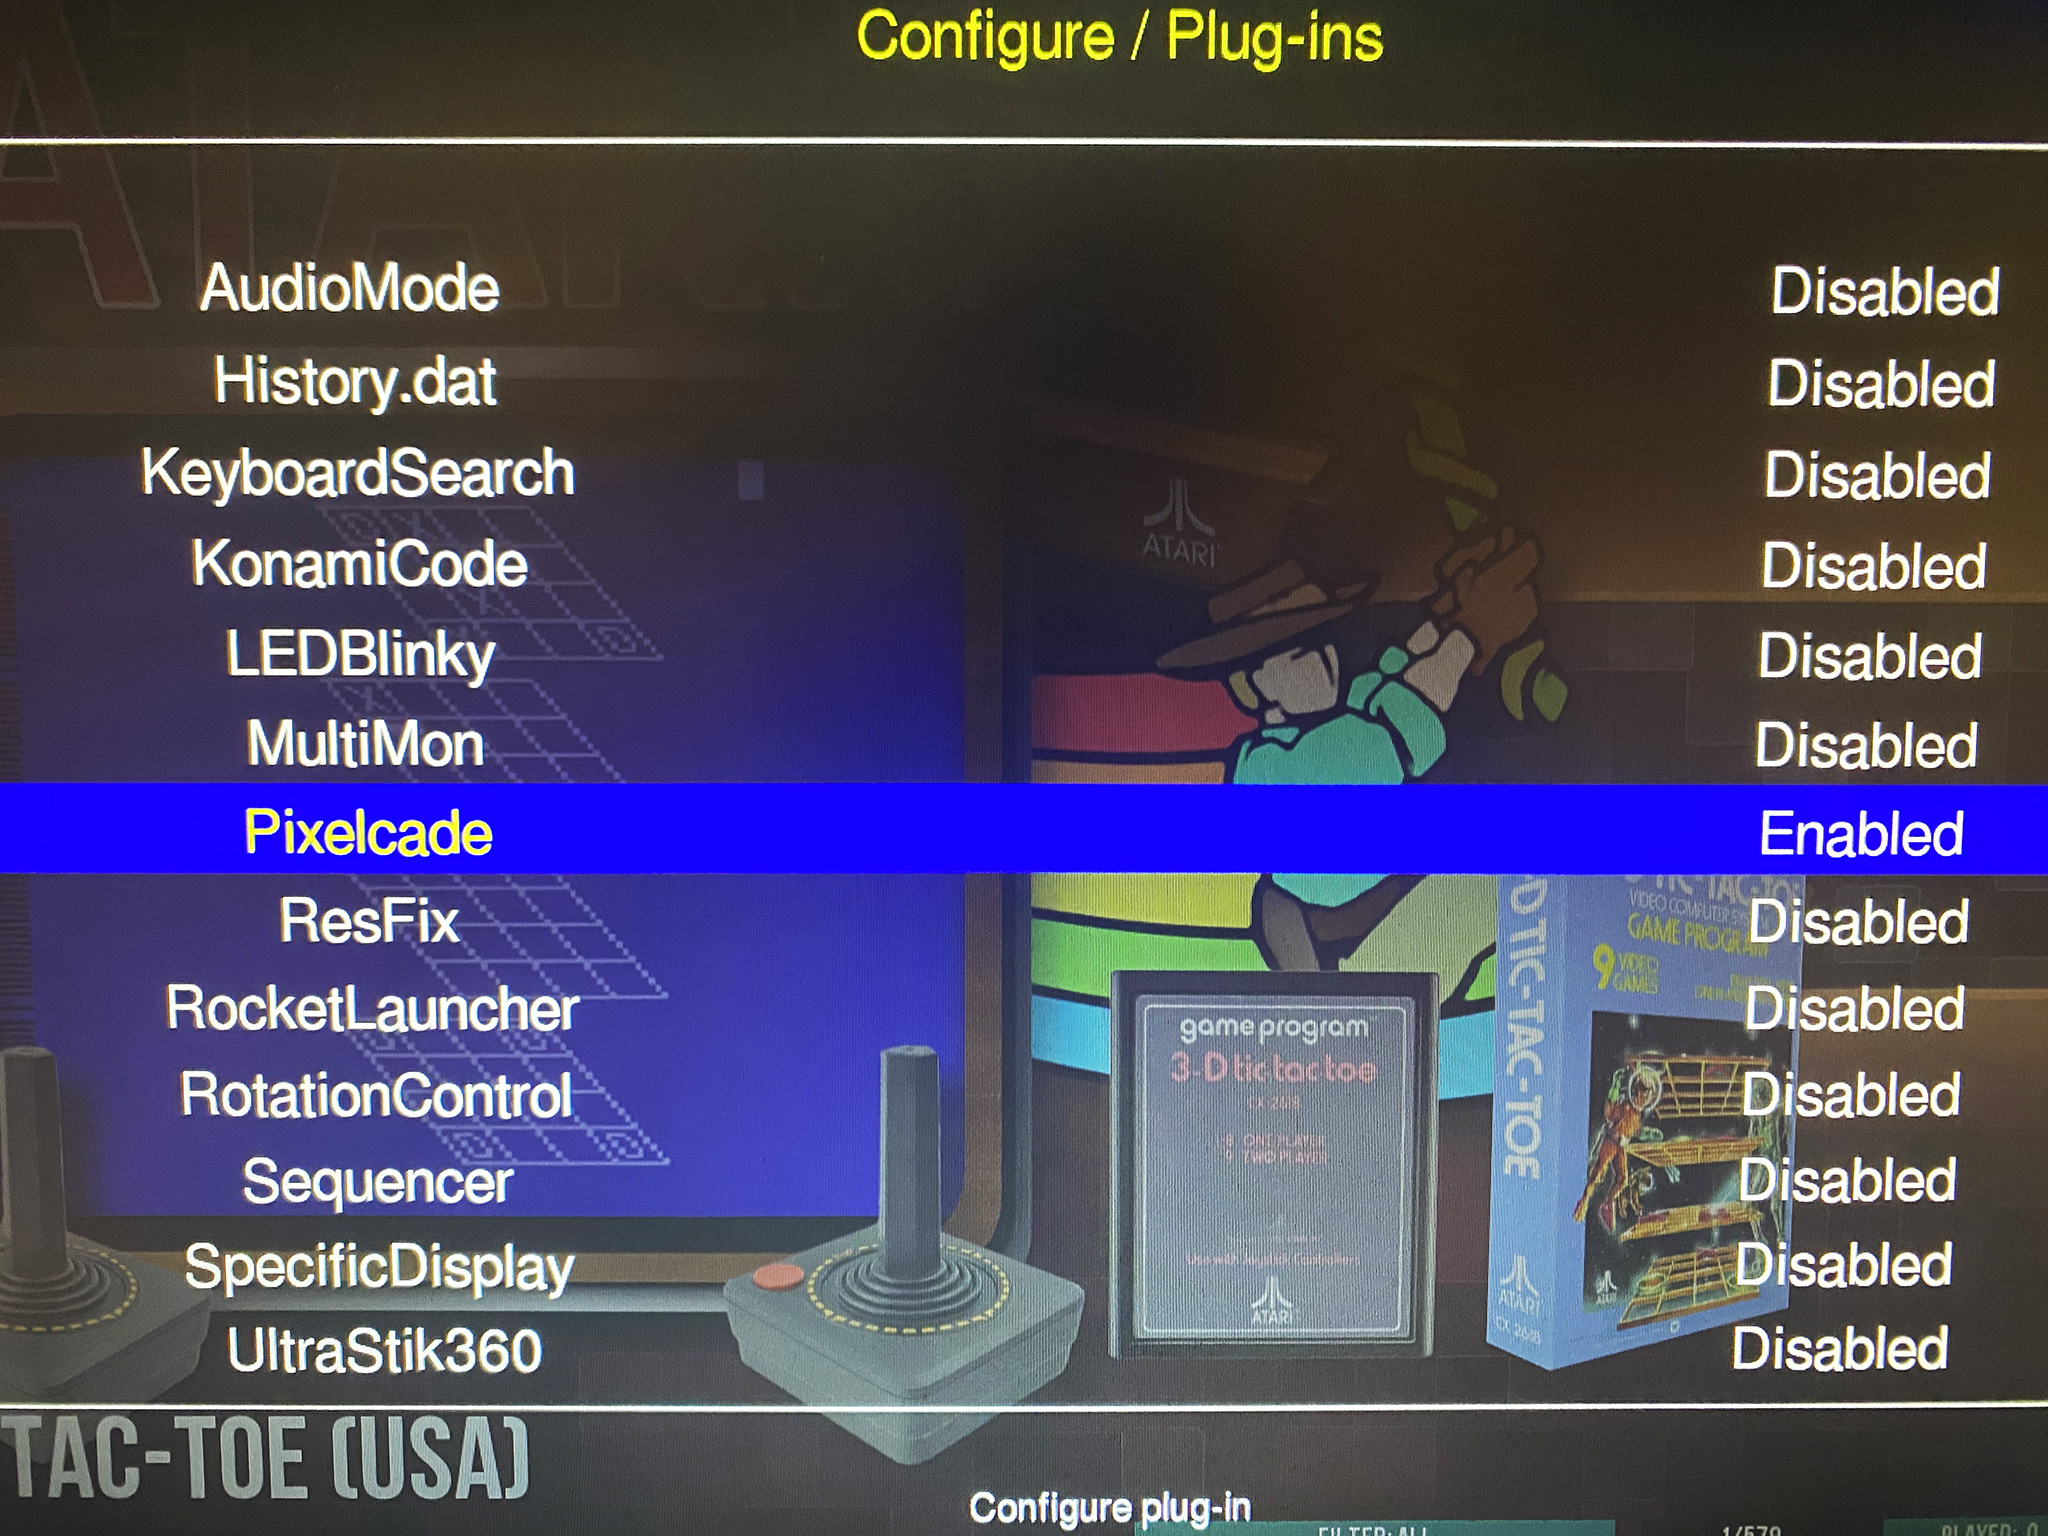
If you have Attract Mode installed on your Pi, the above scripts will also install the Attract Mode plug in. Also note that if switched from EmulationStation to Attract Mode, Pixelcade will no longer start at Pi startup so you’ll want to run the installer again.

The installer script will also automatically add and enable the Pixelcade plug-in but you can manually check too by bringing up the Attract Mode configuration menu (tab key on your keyboard).

Raspberry Pi 3 and 3B+ Images

Raspberry Pi 4 Images

Note that Pixelcade will not update during the screen saver of Attract Mode. Big thanks to Tony for developing the Attract Mode integration.