This guide is for manual steps and troubleshooting and has been replaced by this automated guide
Download and install the Pixelcade LED Marquee software for Windows (free). Note this installation will also install the free version of LEDBlinky which is required for integration with arcade front ends.
![]()
- Power on your PIXEL board with the included 5V power supply. IMPORTANT: Only use the included 5V power supply. Do not use a 12V power supply or you will damage the board.
- Plug the board into your PC’s USB port using the included USB A-A cable.
- Ensure the toggle switch on the board is pointing towards “USB”, it will not work if it’s pointing towards “BT”.
- Your board will show up under Windows device manager in the Ports section as either PIXEL-LED (Windows 7) or USB Serial Device (Windows 10).
- If you’re on Windows 7, you’ll need to install the PIXEL LED board driver manually, it’s located under \driver
- Take a note of the COM port that has been assigned.
![]()
Windows 7
![]()
Windows 10 – PIXEL board will be auto-detected on Windows 10 / no separate driver installation required
![]()
If installing the board driver manually (only required on Windows 7)
![]()
![]()
![]()
- From the Windows start menu, launch “Pixelcade Settings”
![]()
- Change the port to match your PIXEL board from the previous step.
![]()
- Now launch the Pixelcade Listener (pixelweb.exe). This program always be running while the LED marquee is in use and the installer will add pixelweb.exe to your startup-folder.
![]()
![]()
- The listener will launch minimized. Open the window and ensure you see “PIXEL Status: Connected” which means the board is successfully communicating with your PC. If it’s not connecting, then check again that you’ve entered the correct COM port in the above step.
![]()
Let’s now test and ensure Pixelcade is communicating with your PC correctly. Choose “Browse Artwork” to browse a subset of the Pixelcade artwork.
![]()
Select any image and it should display on the Pixelcade LED marquee.
![]()
Now that basic Pixelcade communications are working, let’s now enable integration with your arcade front end using a third party software called LEDBlinky. We’ll be using the free version of LEDBlinky and you can decide later if you want to go for the LEDBlinky additional features and paid version.
First enable LEDBlinky from your respective Arcade Front End: HyperSpin, GameEx, LaunchBox, Big Box, Mala, Maximus Arcade, or CoinOPS (PC).
CoinOPS
LEDBlinky is not required for CoinOPS so proceed directly here to setup Pixelcade for CoinOPS.
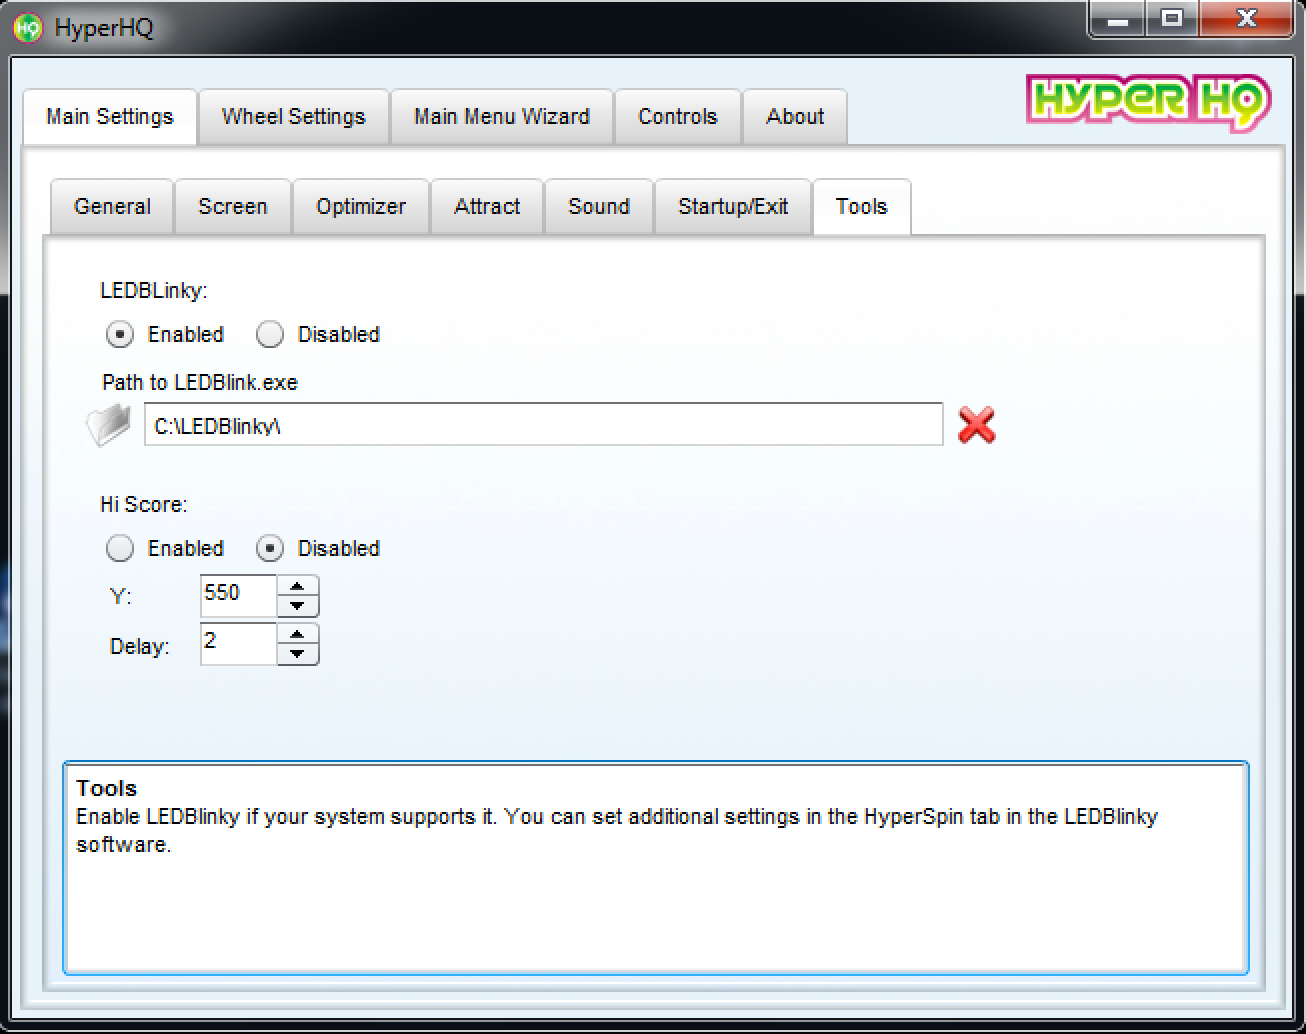
HyperSpin
For HyperSpin, launch HyperHQ and enable LEDBlinky from the “Tools” tab and click the folder icon to browse to the path where LEDBlinky is installed.
GameEx
For GameEx and GameEx Arcade Edition, launch the GameEx Setup Wizard and enable the LEDBlinky plug-in.
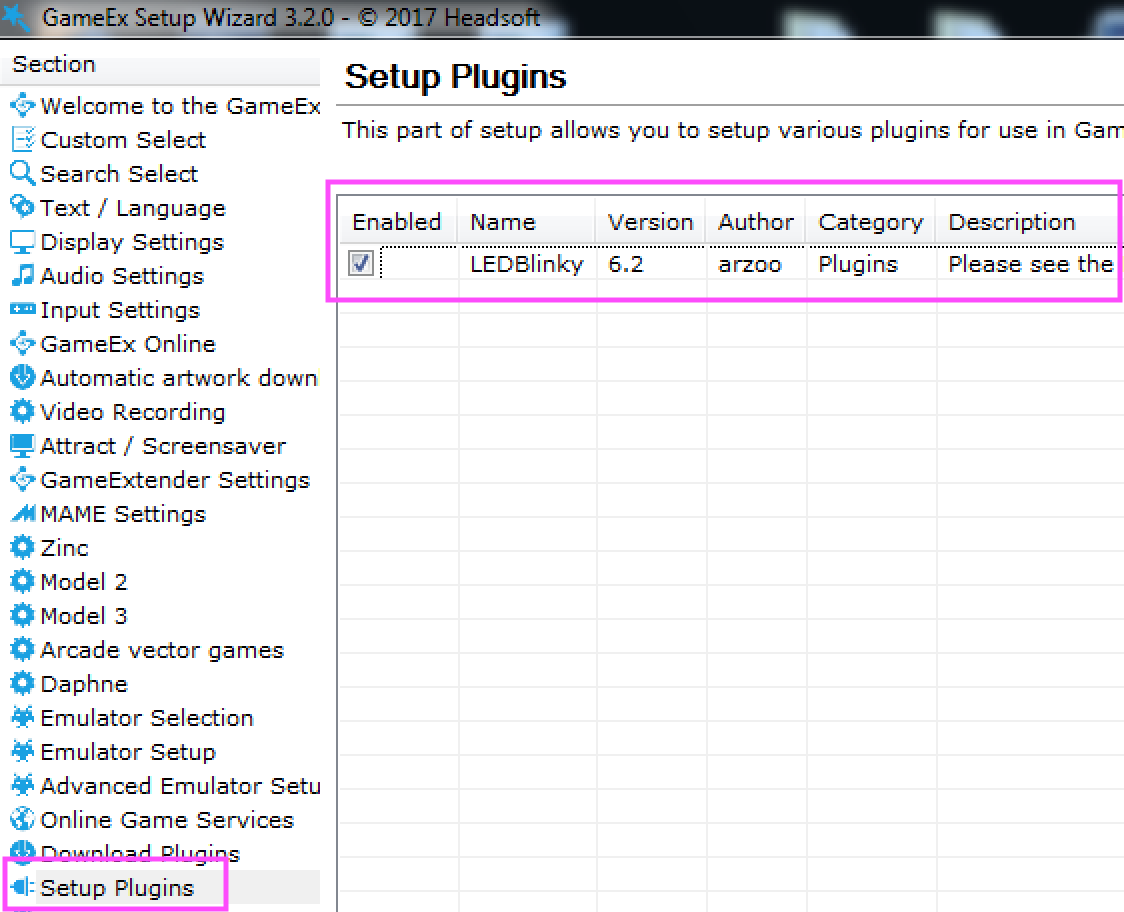
Then go to http://ledblinky.net and install the latest version of LEDBlinky in the \Plugins directory.
Launch Box / Big Box
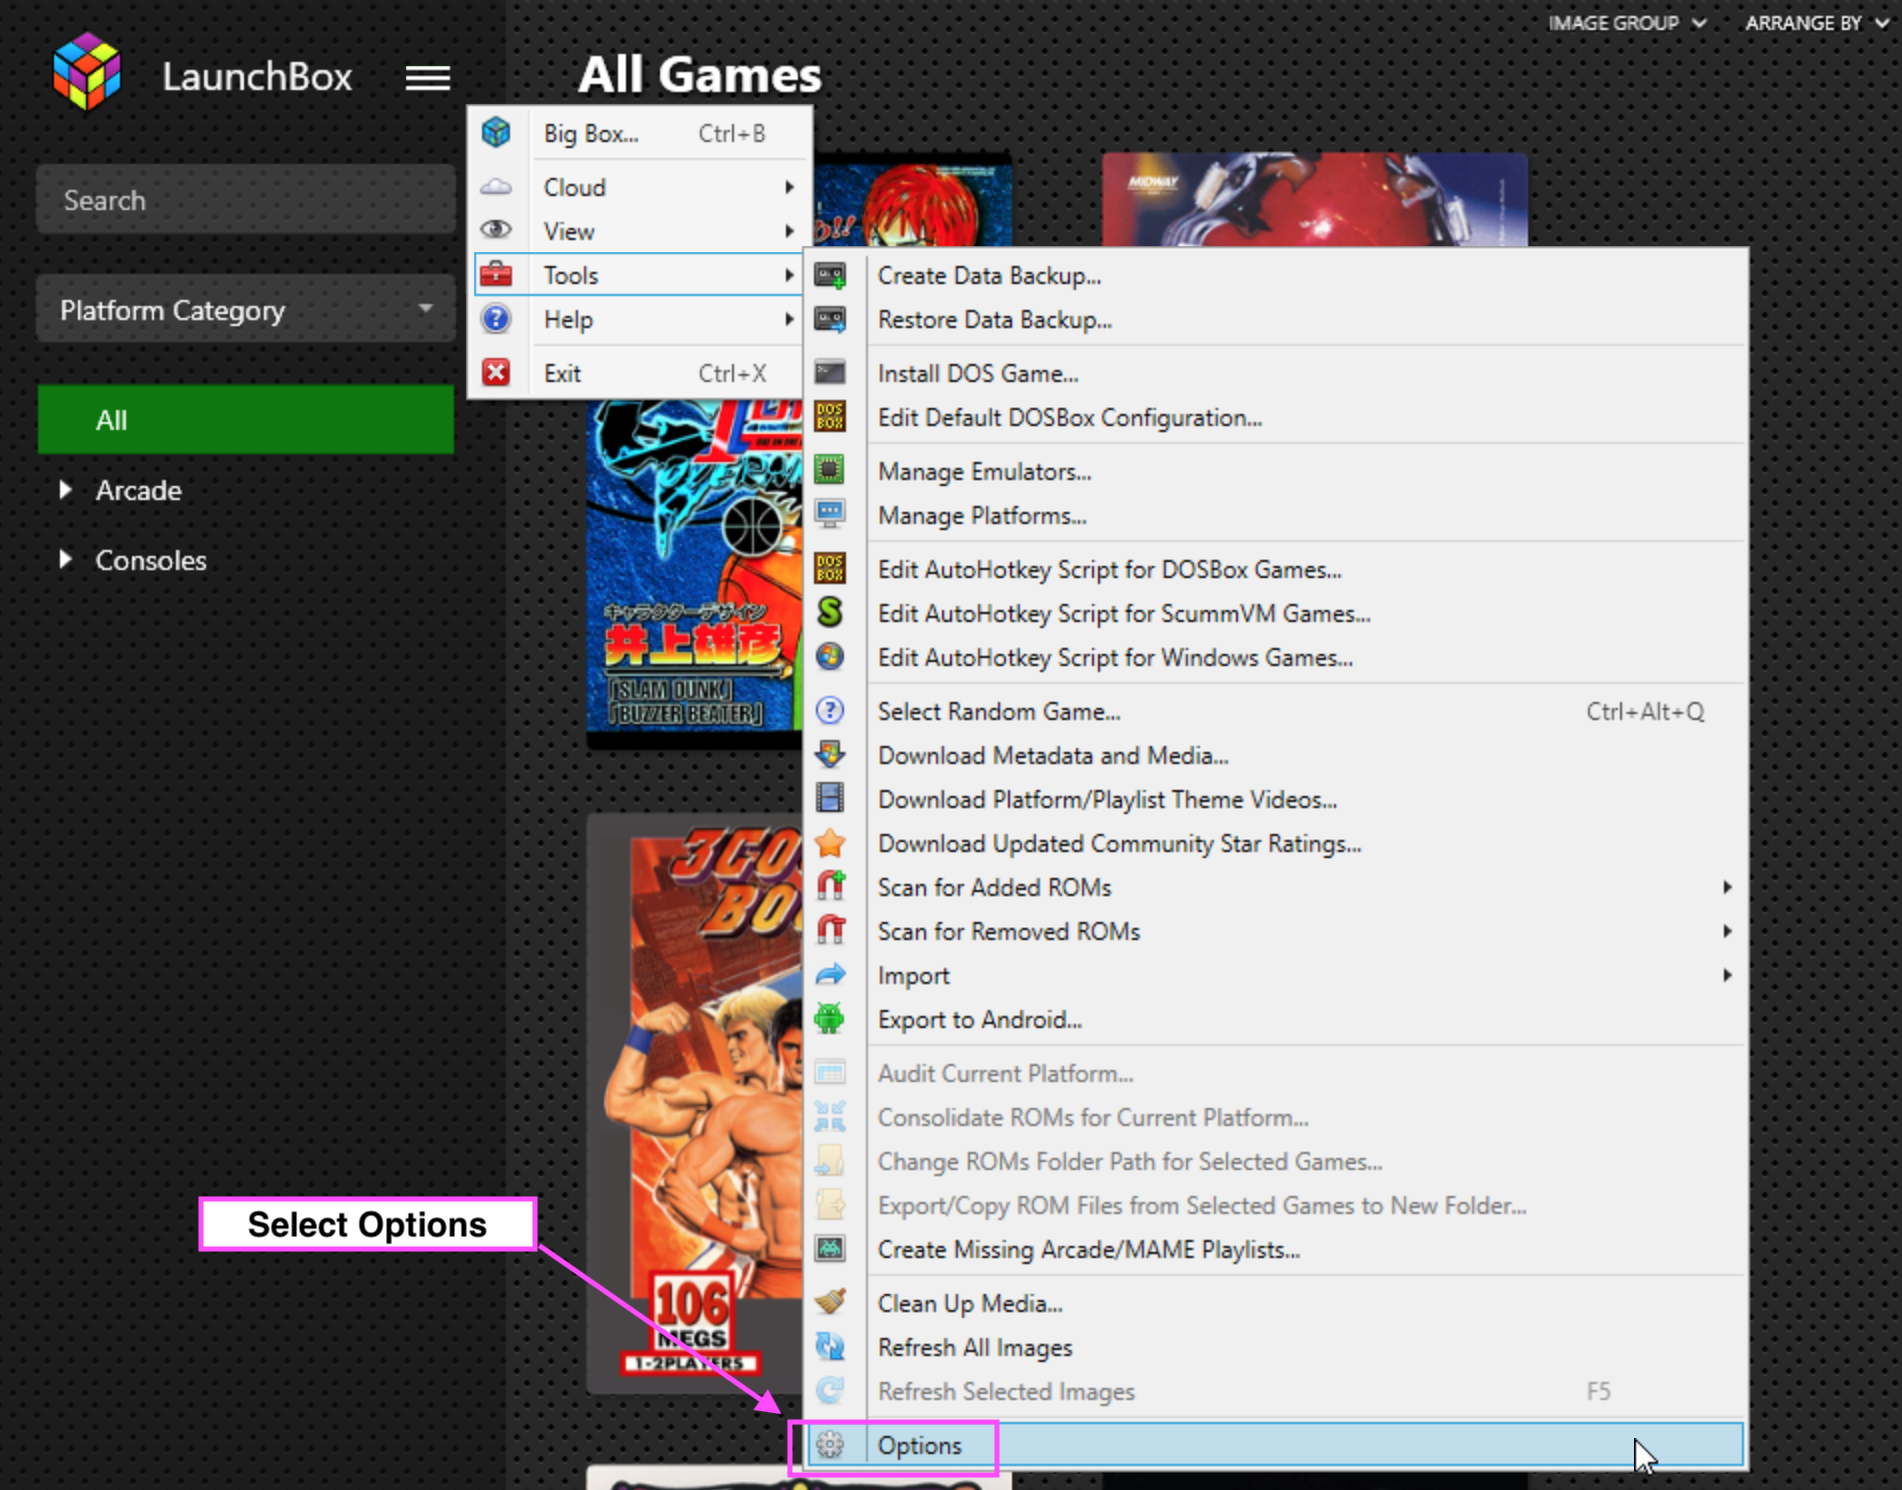
From Launch Box, choose “Tools”, “Options”
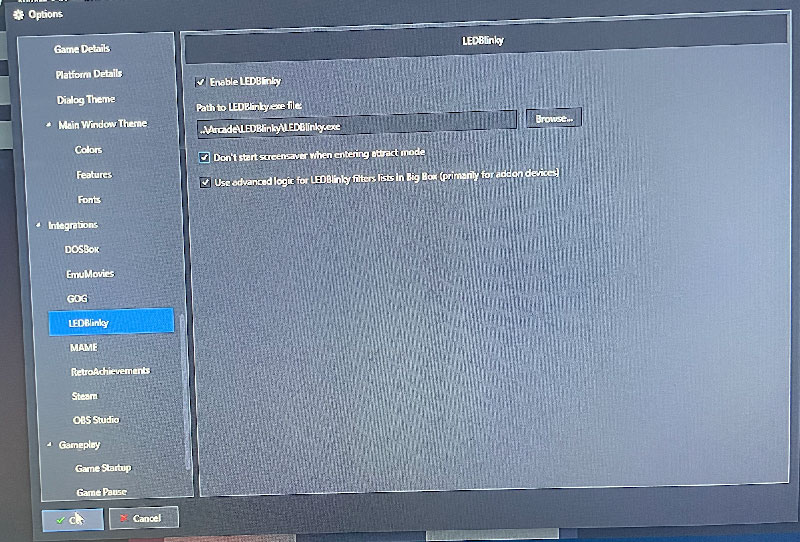
Enable LEDBlinky and browse to your LEDBlinky installation path and ensure both check boxes below it are checked.
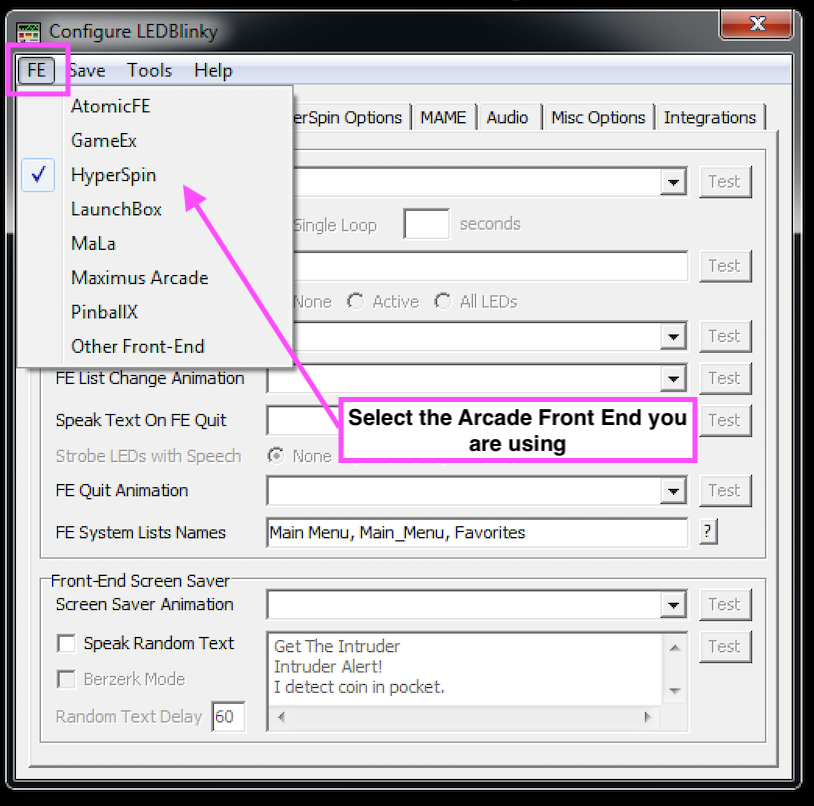
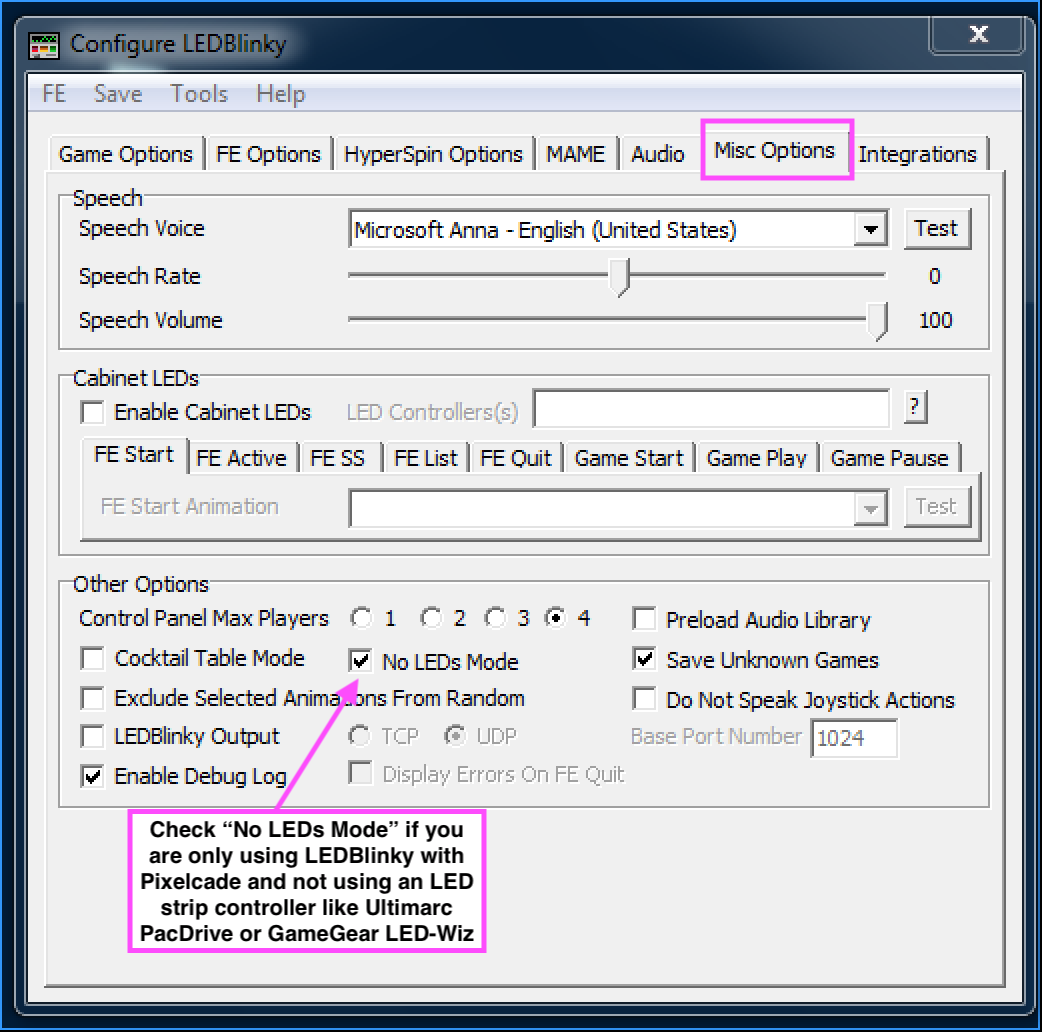
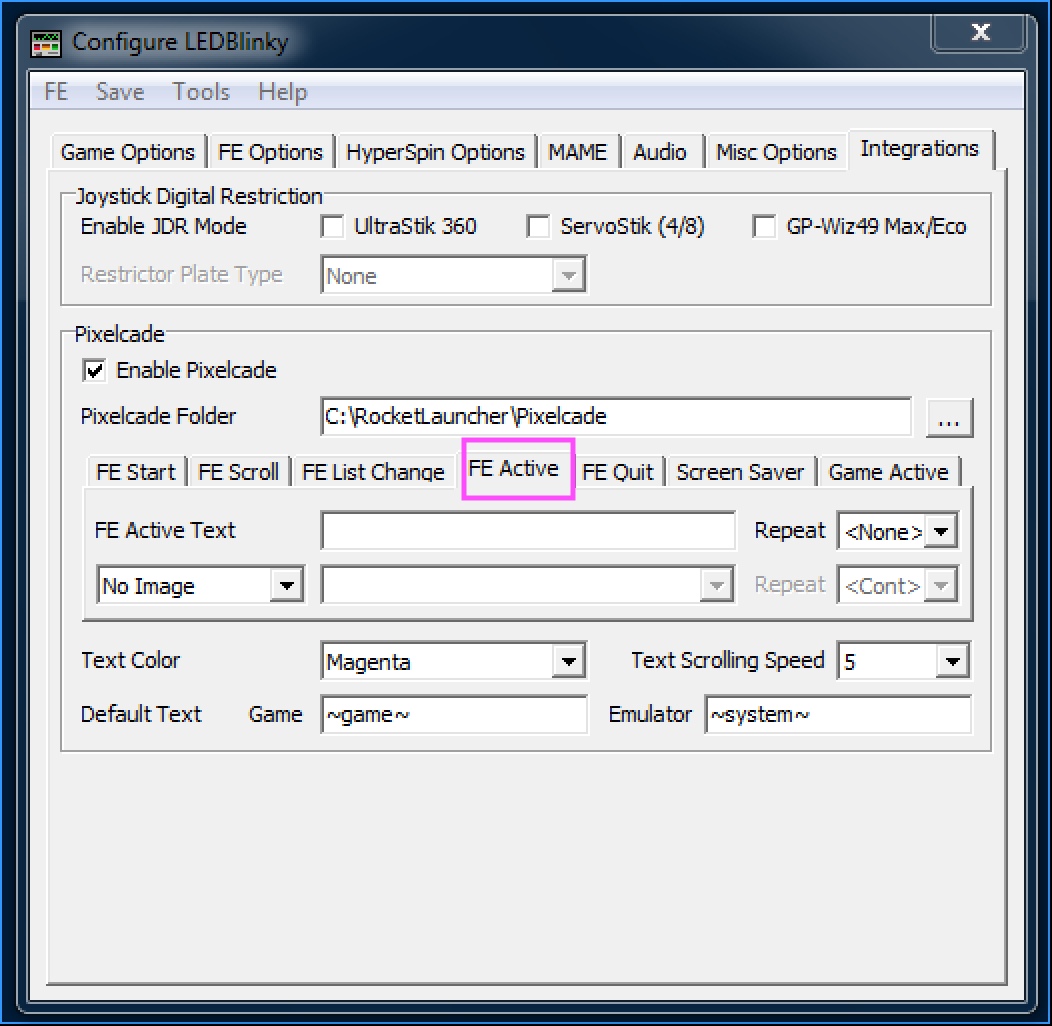
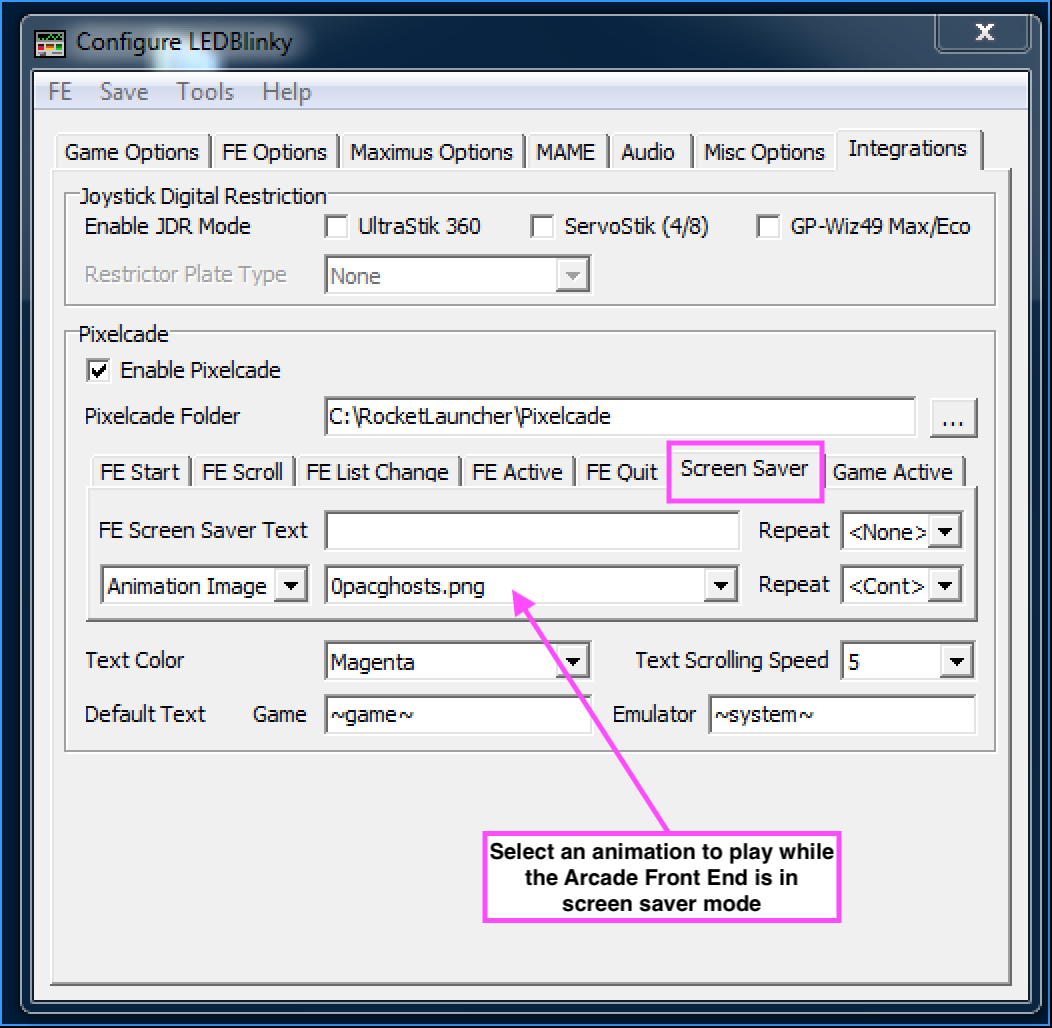
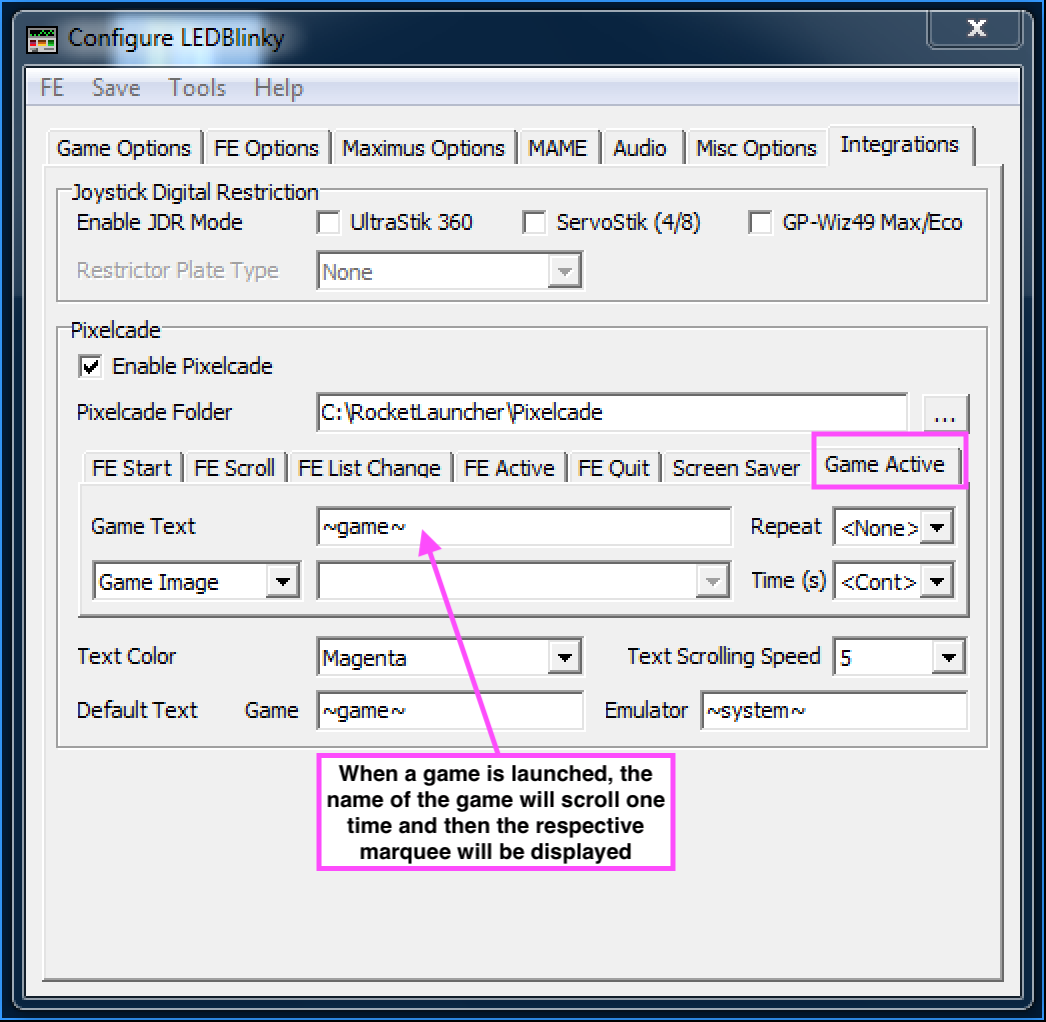
1. Now Launch “Configure LEDBlinky”
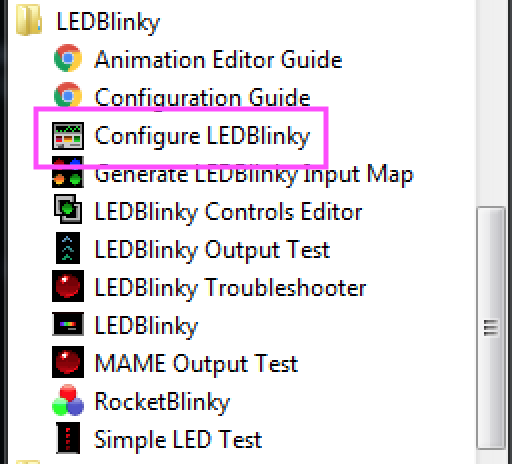
From the “FE” tab, select the Arcade Front End you are using