You can use the following special keywords (each keyword must be surrounded by tilde character).
~game~
~system~
~date~
~time~
For example:
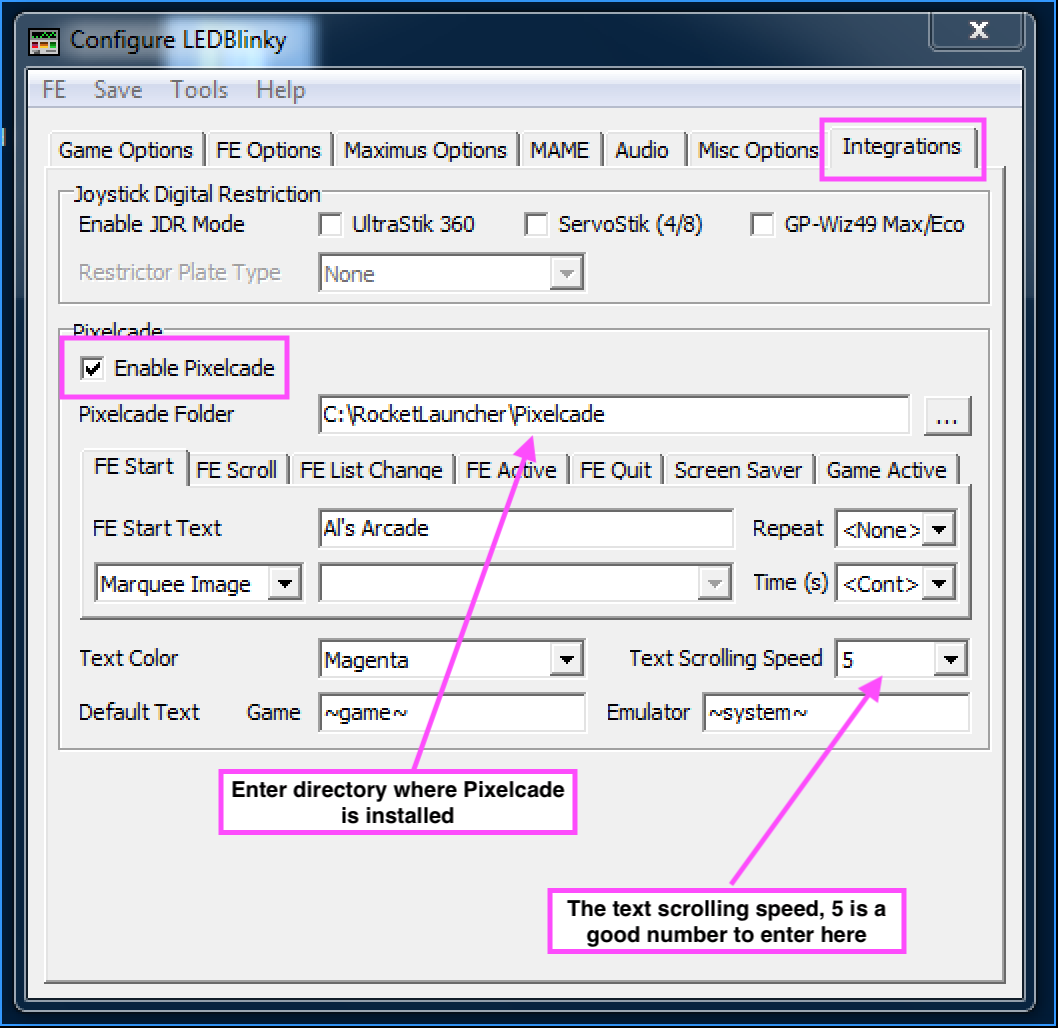
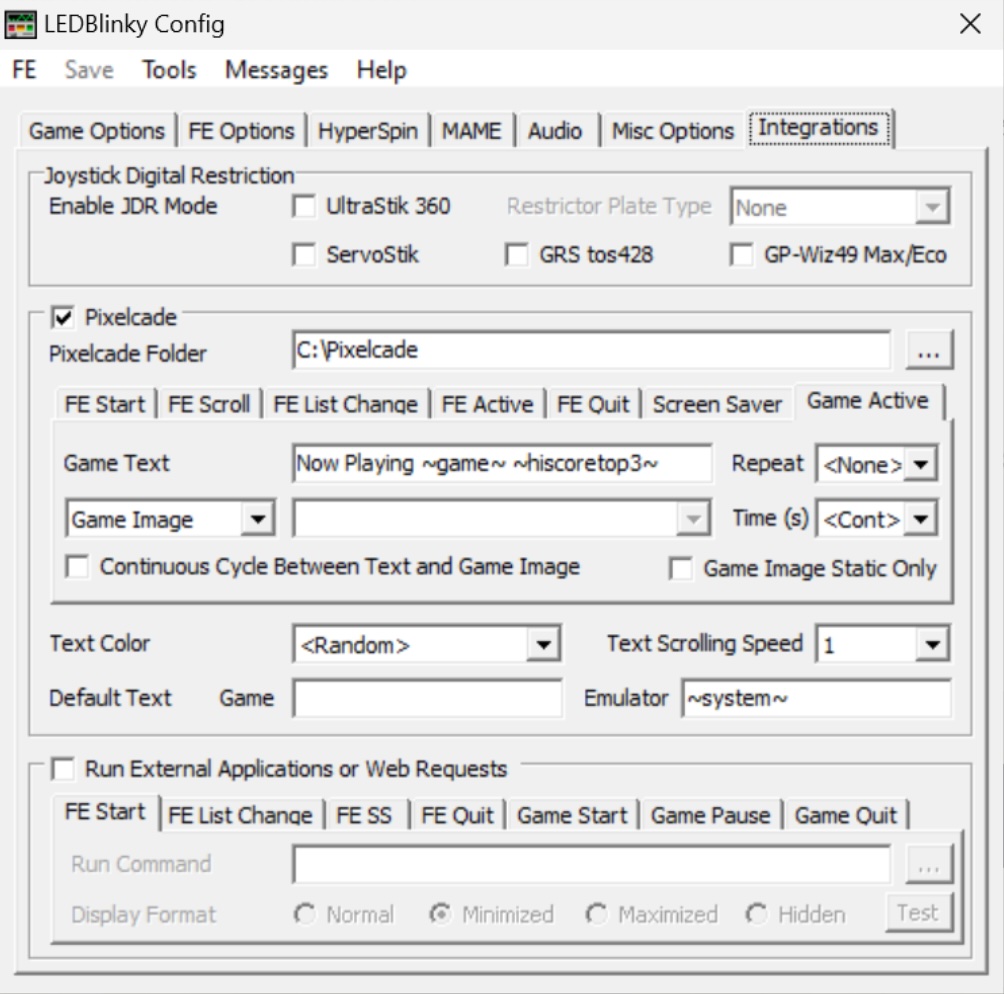
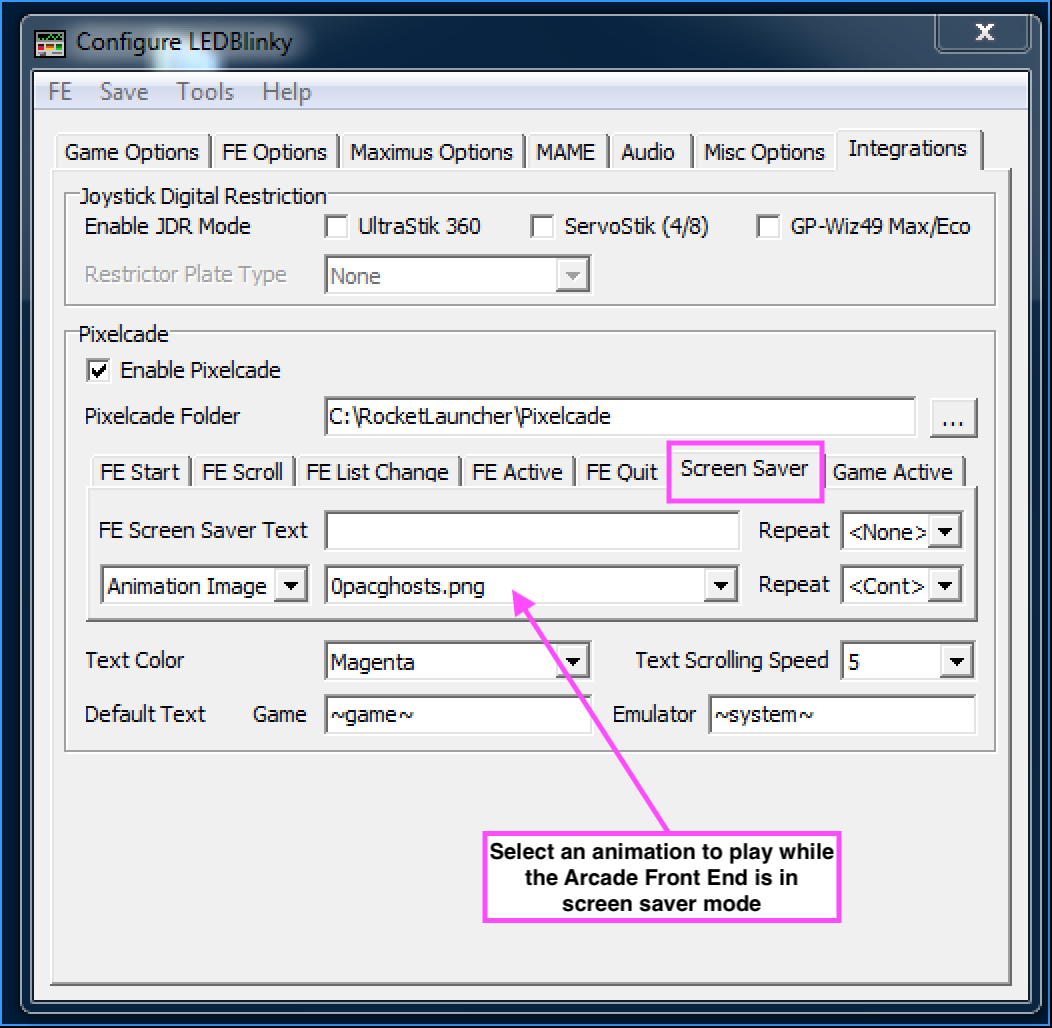
Now Playing ~game~
Advanced video from Maverick’s Arcade on how to Configure LEDBlinky and Pixelcade. The Pixelcade installer takes care of the default installation but go here for more options.