Download and install the Pixelcade LED Marquee software for Windows (free). Note this installation will also install the free version of LEDBlinky which is required for integration with arcade front ends and run a one time setup utility for your particular Arcade Front End.
You should also have your respective Arcade Front End installed (GameEx, Big Box, HyperSpin, CoinOPS, etc.) installed prior as the installation will include a wizard to configure your Arcade Front End for Pixelcade.
![]()
- Power on your PIXEL board with the included 5V power supply. IMPORTANT: Only use the included 5V power supply. Do not use a 12V power supply or you will damage the board.
- Plug the board into your PC’s USB port using the included USB A-A cable.
- Ensure the toggle switch on the board is pointing towards “USB”, it will not work if it’s pointing towards “BT”.
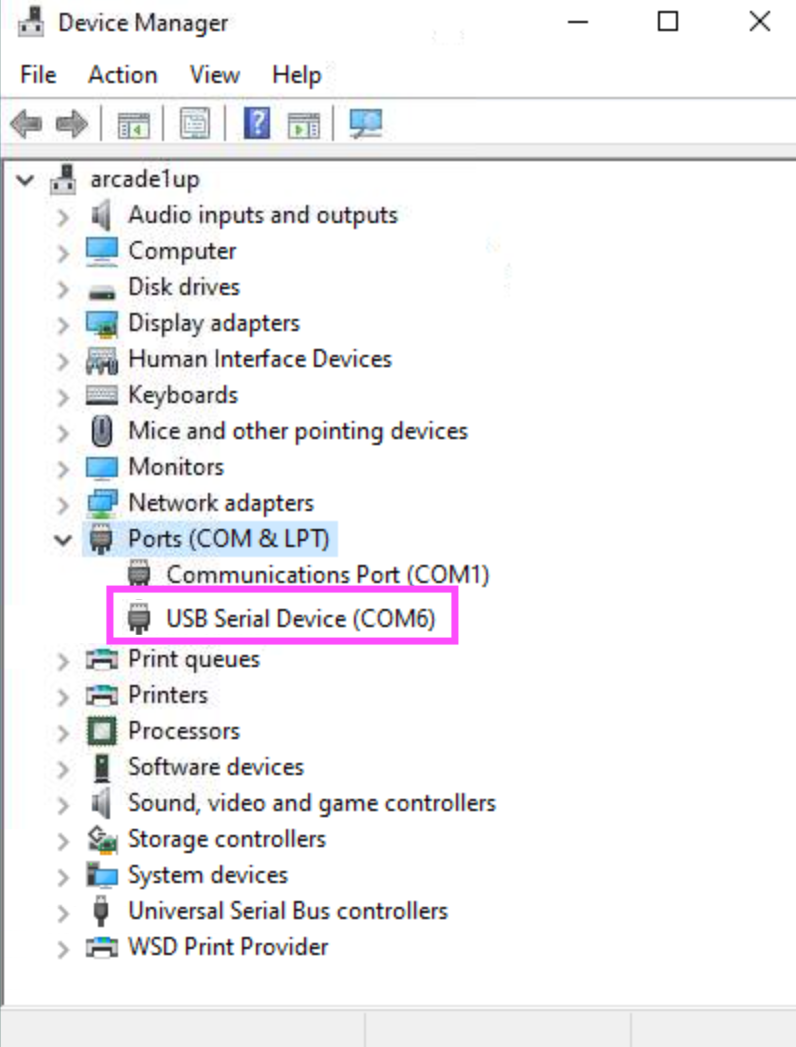
- Your board will show up under Windows device manager in the Ports section as either PIXEL-LED (Windows 7) or USB Serial Device (Windows 10).
- If you’re on Windows 7, you’ll need to install the PIXEL LED board driver manually, it’s located under \driver, instructions here
- Take a note of the COM port that has been assigned.
![]()
Windows 7 – Requires manual driver install
Windows 10 – PIXEL board will be auto-detected on Windows 10 / no separate driver installation required
Follow all the setup prompts which will include selecting your respective Arcade Front end and answering some questions and confirming your Arcade Front end folder location. The installer will make the needed changes to your Arcade Front End configuration files automatically but you may also refer to this guide if you want to make them manually or for troubleshooting.
Once the install has finished, launch the Pixelcade Listener (pixelweb.exe). This program must always be running while the LED marquee is in use and the installer will add pixelweb.exe to your startup-folder.
![]()
![]()
The listener will launch minimized. Open the window and ensure you see “PIXEL Status: Connected” which means the board is successfully communicating with your PC. If it’s not connecting, then check again that you’ve entered the correct COM port in the above step.
![]()
Let’s now test and ensure Pixelcade is communicating with your PC correctly. Choose “Browse Artwork” to browse a subset of the Pixelcade artwork.
![]()
Select any image and it will display on the Pixelcade LED marquee.
![]()
Pixelcade has been tested with the following Arcade Front Ends:
- HyperSpin
- CoinOPS
- Launch Box and Big Box
- Game Ex and Game Ex Arcade Edition
- Maximus Arcade
- MaLa
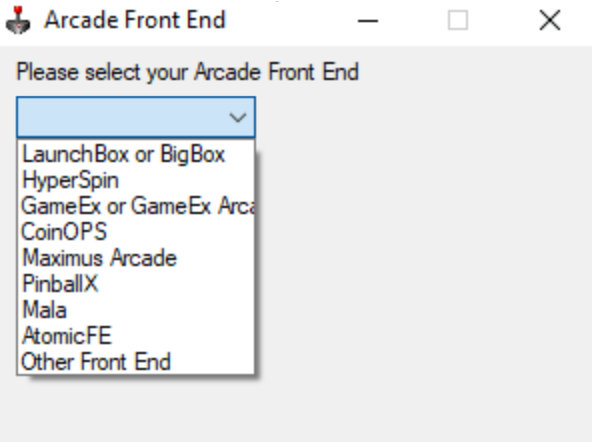
Use the Pixelcade Arcade Front End Setup Wizard to configure each one
![]()
Select your desired Arcade Front end and follow the prompts to configure it for Pixelcade. The wizard will automatically make the needed configurations but you may also refer here if you want to configure manually or for troubleshooting.
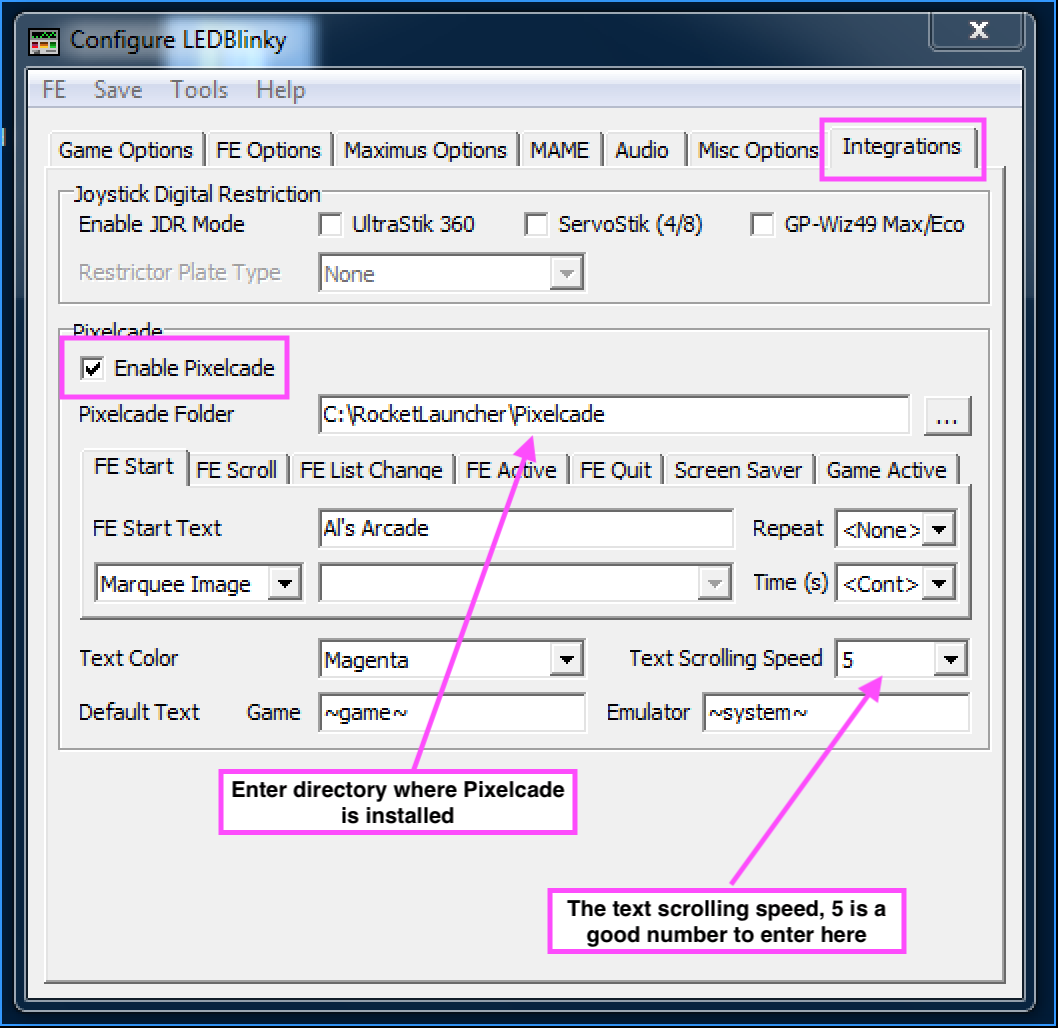
With the exception of CoinOPS, all the front ends for Pixelcade can be further customized using the “Configure LEDBlinky” application.
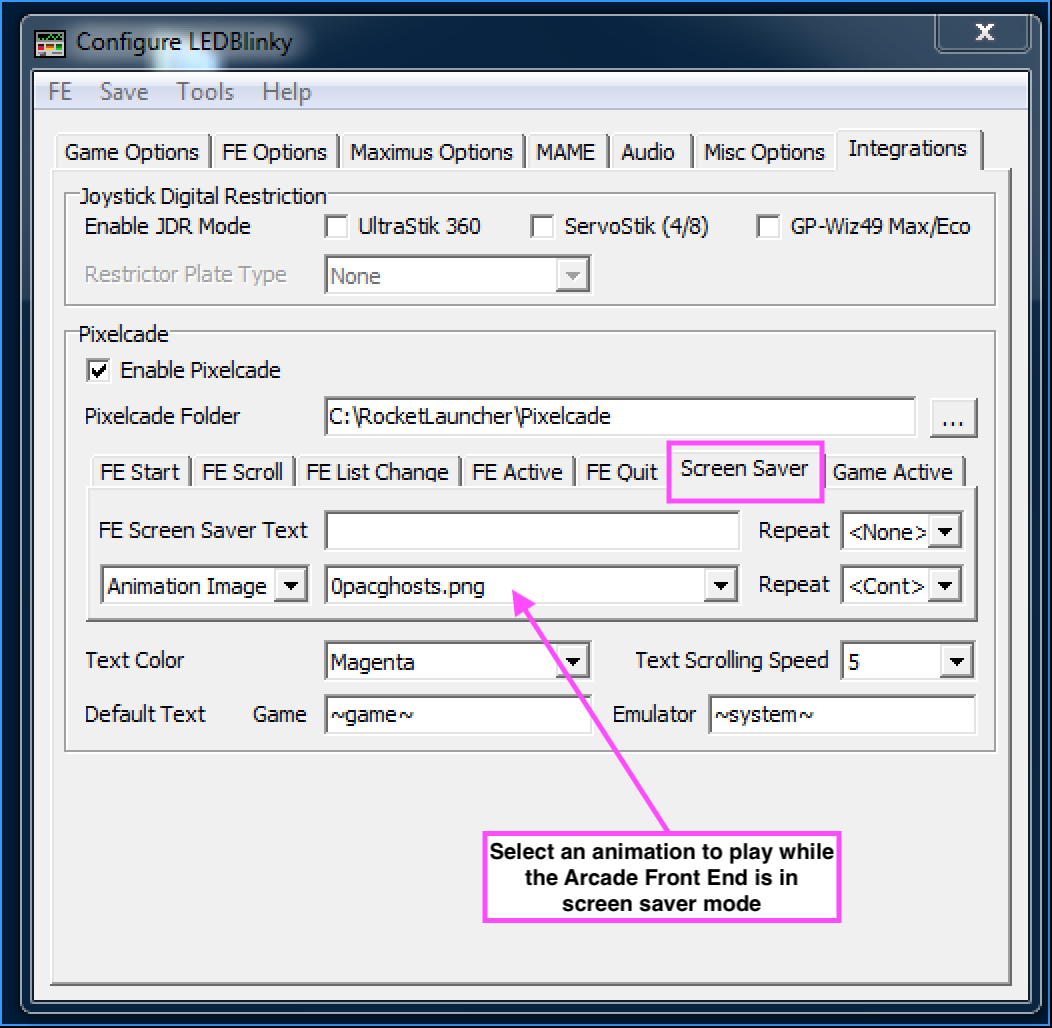
Also note that the paid version of LEDBlinky includes additional features like scrolling welcome text on start-up, updates on screen saver events, and scrolling text when existing the front end.