Optional How to Power Cable Splitter. Skip this step if you are not into soldering and simply use a 1.5 ft microUSB cable to connect your Pi Zero W to Pixelcade and power the Pi Zero W with a USB power adapter such as a phone charger.
Download this image and burn it to your Pi Zero W microSD card using an imager like Balena Etcher. This image will only work on a Raspberry Pi Zero. Note: this microSD card is separate from the Pixelcade microSD card.
If you have a Raspberry Pi 3 or 4 however, then you may also install Pixelcade Art Browser running the command below. This script has been successfully tested on Raspian stock lite images and will work on Raspberry Pi Zero W, Pi 3, and Pi 4.
curl -LO pixelcade.org/pi/setup-alu.sh && chmod +x setup-alu.sh && ./setup-alu.sh
Now insert the microSD card into your Pi Zero and power on.
From another computer or phone, connect to the “Pixelcade Setup” WiFi. There is no password.
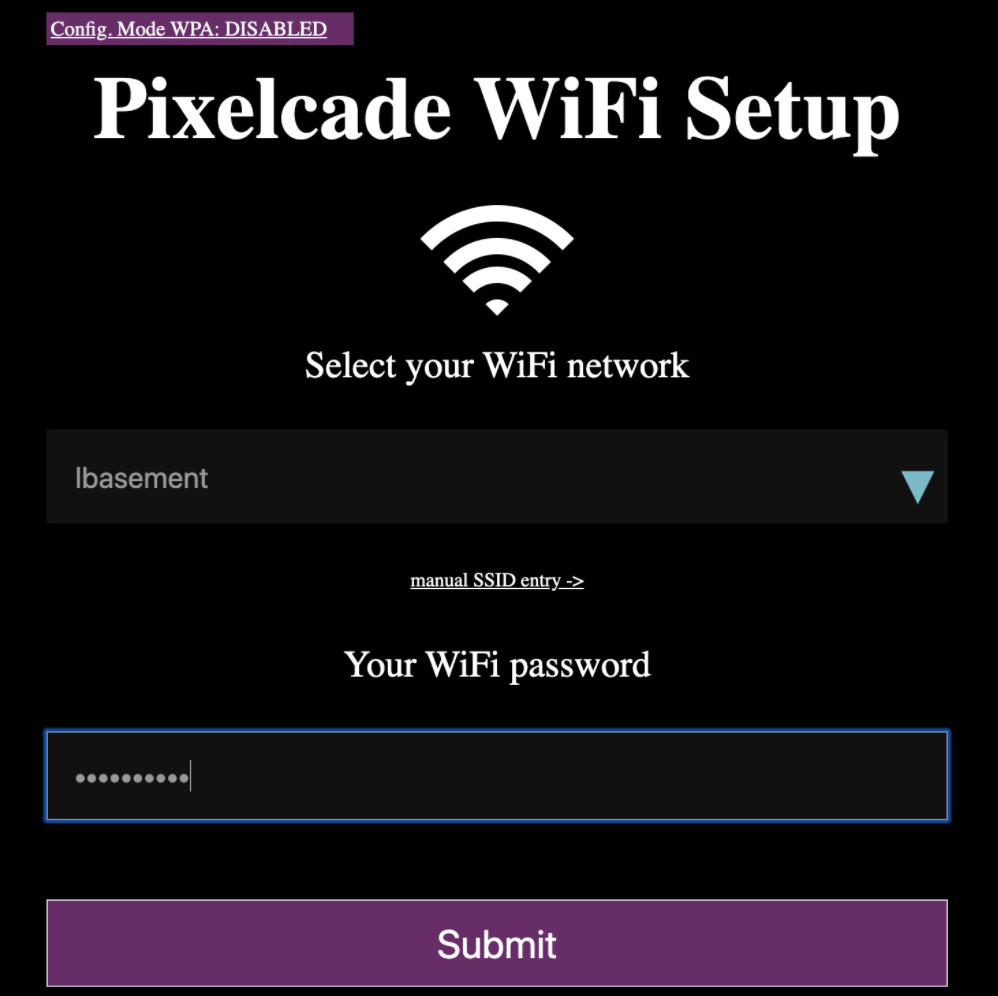
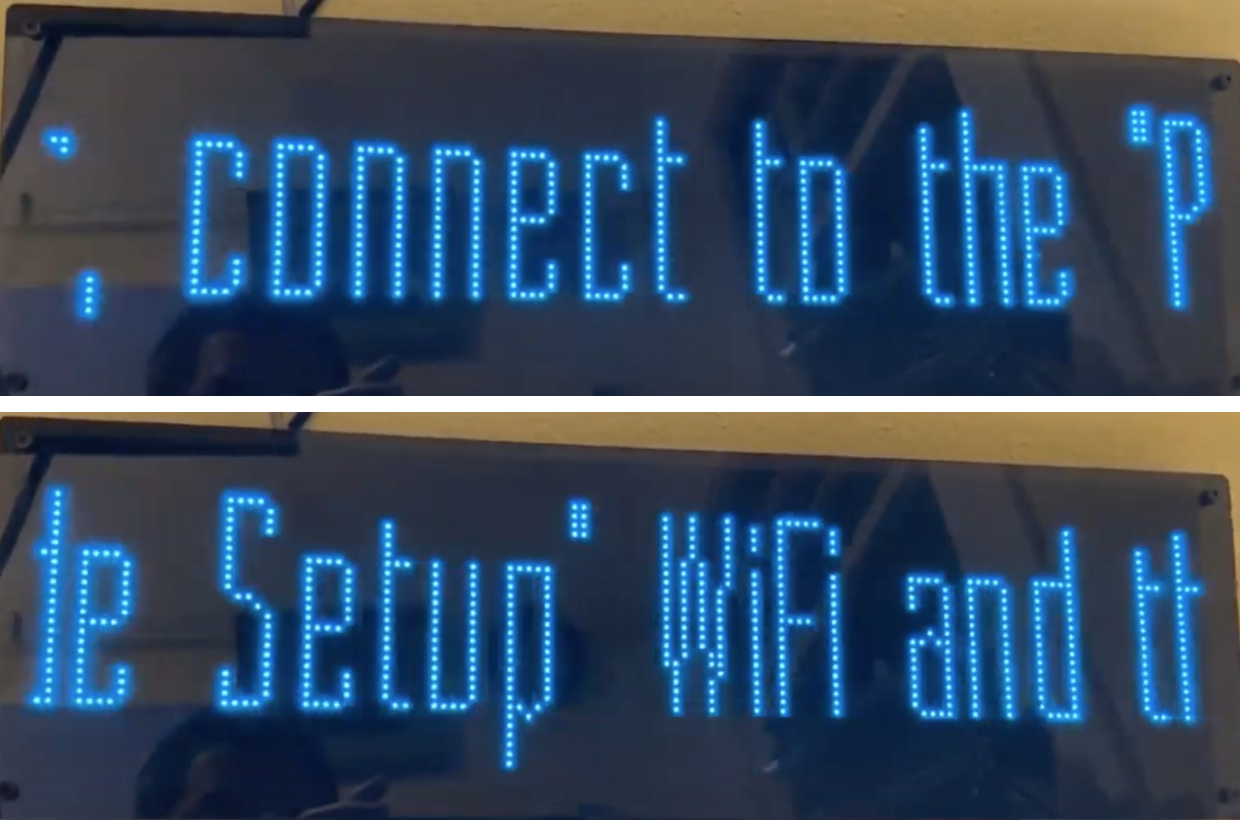
After connecting to the Pixelcade Setup WiFi, open a web browser and go to http://10.0.01 or http://raspiwifisetup.com
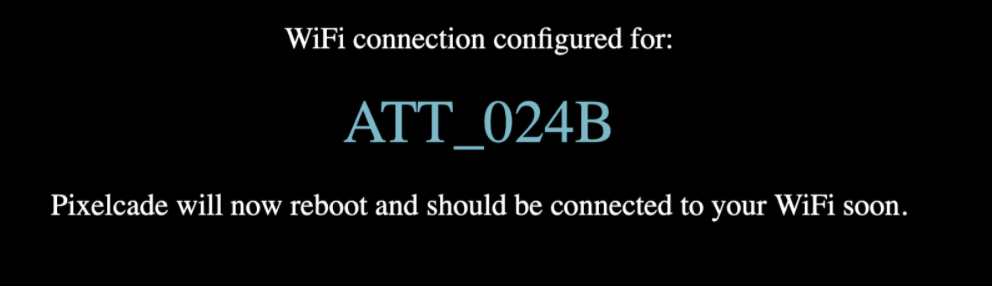
After clicking the Submit button, you’ll see this screen while your Pi reboots.
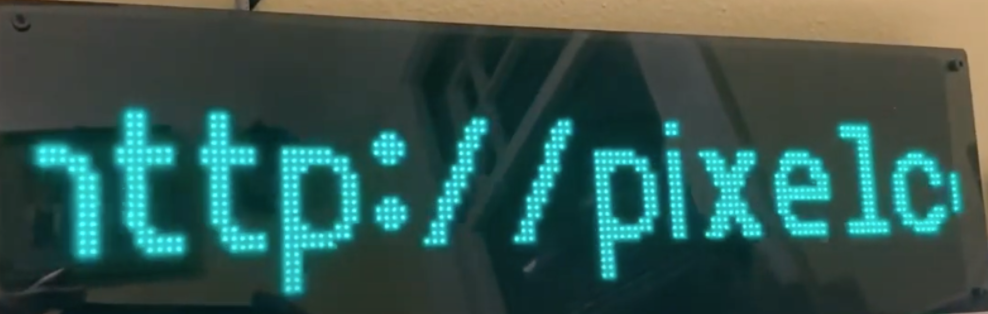
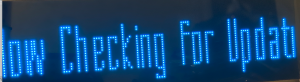
After rebooting, Pixelcade should now be displaying this green text including your Pi’s IP address.
Note that each time your Pi Zero W reboots, it will check for Pixelcade updates and new artwork upon start-up.
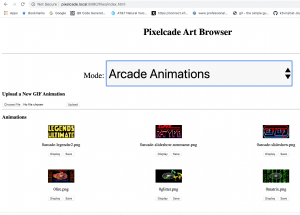
Access the Pixelcade Art Browser from this URL. Using the art browser, you can browse available static marquees, animations, and create your own scrolling text.
http://pixelcade.local:8080 or http://< Pi IP Address>:8080
You may also reboot or shutdown Pixelcade and your Pi Zero W by using these commands from any web browser:
http://pixelcade.local:8080/reboot
http://pixelcade.local:8080/shutdown
or
http://<Pi IP Address>:8080/reboot
http://<Pi IP Address>:8080/shutdown
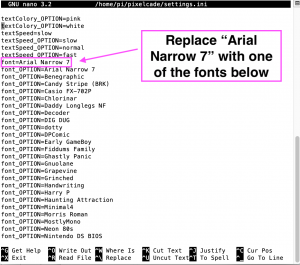
You can change the default font for scrolling text:
ssh pi@pixelcade.local or ssh pi@
password: raspberry
nano ~/pixelcade/settings.ini
Change this line
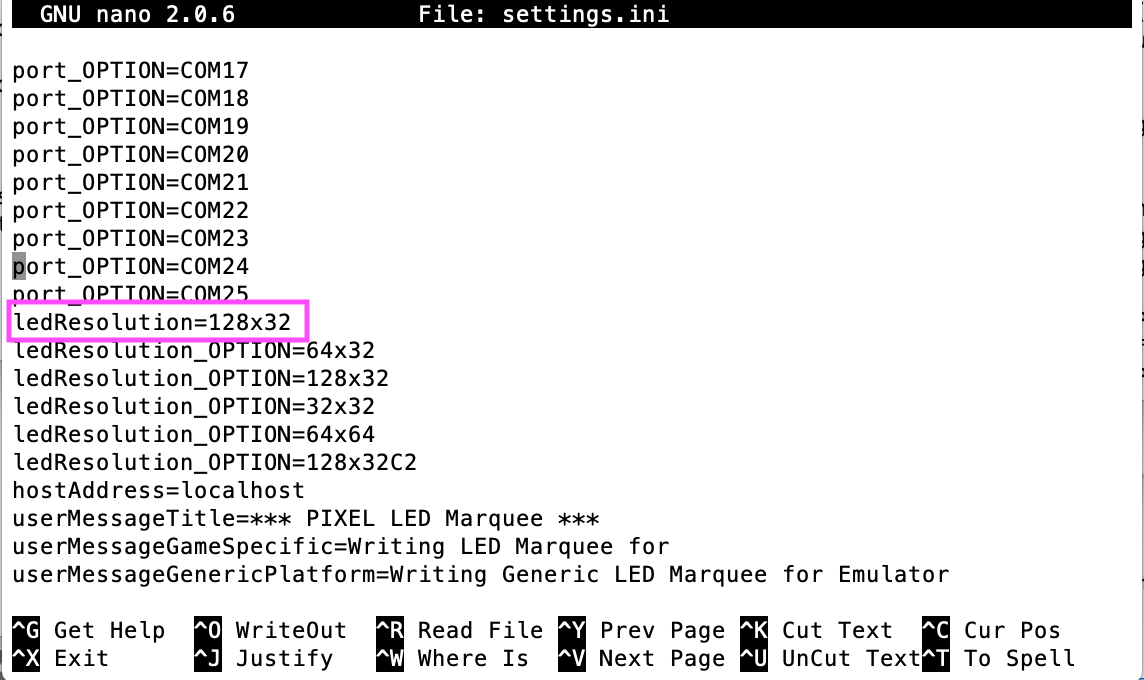
Also if you are not running 128×32, then also change ledResolution to your target resolution (ex. 64×32, 64×64, 32×32).
ctrl-x to save. You may also change the font size. Developers may refer to the Pixelcade API and text section for other font tweaks.
Note that the default artwork will be 128×32. If you are running a different resolution like 32×32 or 64×64, then add your still image artwork to the pixelcade/images folder and your gif animations to the pixelcade/animations folder and then reboot your Pi.