Step 1: Using the included USB A-A cable, USB connect Pixelcade LCD to your arcade computer or single board linux device. Please note that Pixelcade LCD firmware 6.0 or higher is required for USB connectivity.
Note if you choose not to connect over USB, you’ll see a WiFi connection screen appear on Pixelcade, follow instructions and use the Pixelcade mobile app to connect to your Wifi network.
Step 2: Power using the included 12V, 5A power brick or Pixelcade SATA power cable. Only use the power brick or Pixelcade SATA power cable that shipped with your Pixelcade LCD marquee.
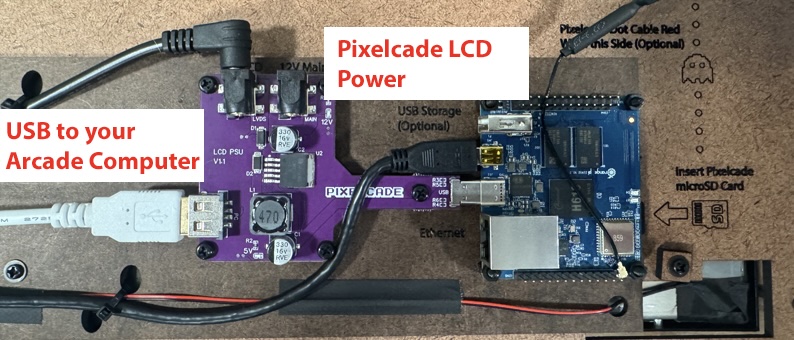 |
Power on your LCD marquee, and after the boot-up sequence, if you see this Pixelcade logo, then Pixelcade LCD has successfully connected to your PC over USB.
Step 3: Install the Pixelcade software on your Arcade Windows PC, Raspberry Pi, or MiSTer. Note at the end of the Pixelcade software install, a program will run to find and pair your Pixelcade LCD to your arcade PC. If this program does not run, you can launch the pairing manually by running the “Pixelcade LCD Pair” utility.
Step 4: From your PC, launch the Pixelcade Companion application and then click Settings and enter your WiFi credentials.
Step 5: Once connected to WiFi, you can then access and manage your Pixelcade marquee from the Pixelcade app for iOS or Android and use additional features such as the sports scoreboard, stock and news tickers, and online updates.
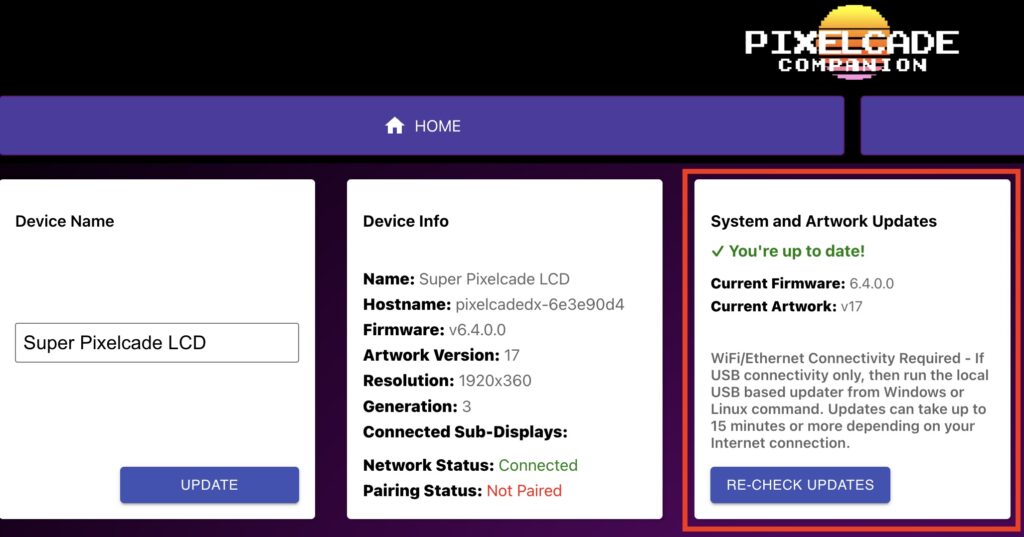
Use Pixelcade Companion to check for updates if your Pixelcade LCD is WiFi or Ethernet Connected
If your Pixelcade LCD is connected with USB only
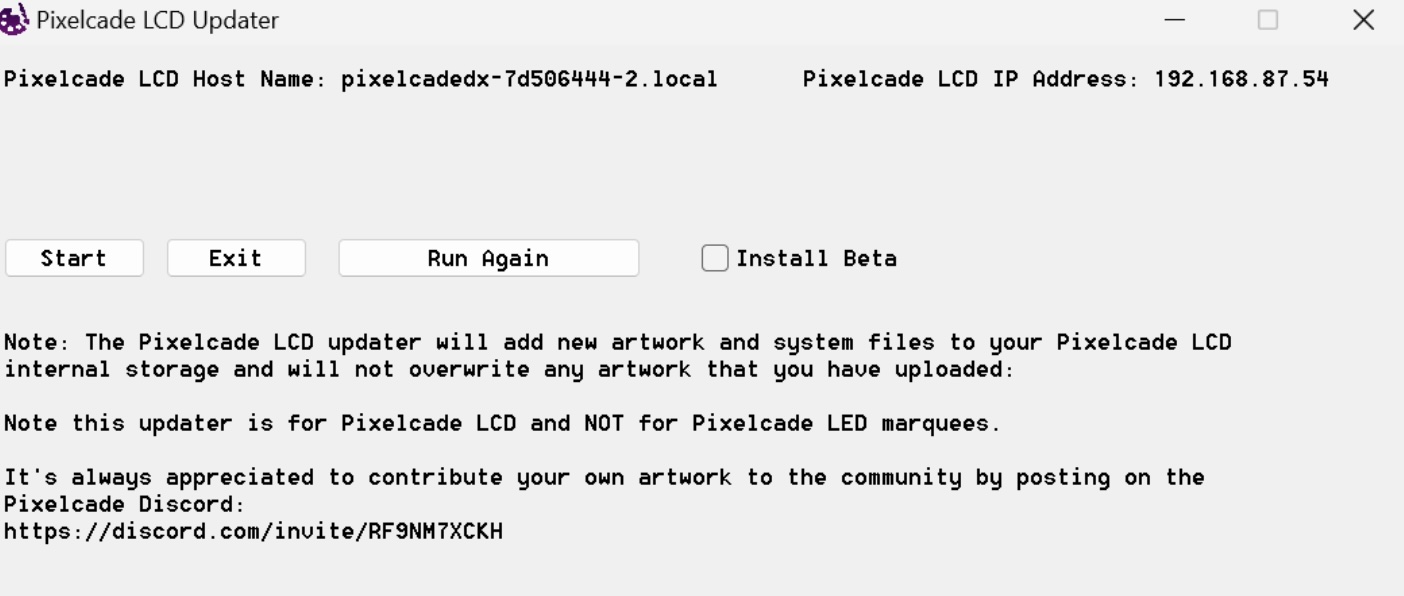
Windows
Run the LCD Update utility
Linux
ssh into your arcade host linux machine and run one of these commands:
LCD Artwork and Firmware Updater
curl -kLO -H "Cache-Control: no-cache" https://raw.githubusercontent.com/alinke/pixelcade-linux-builds/main/lcdupdater/lcdupdater.sh && chmod +x lcdupdater.sh && ./lcdupdater.sh
LCD Artwork and Firmware Updater – BETA
curl -kLO -H "Cache-Control: no-cache" https://raw.githubusercontent.com/alinke/pixelcade-linux-builds/main/lcdupdater/lcdupdater.sh && chmod +x lcdupdater.sh && ./lcdupdater.sh -beta
Issue | Resolution |
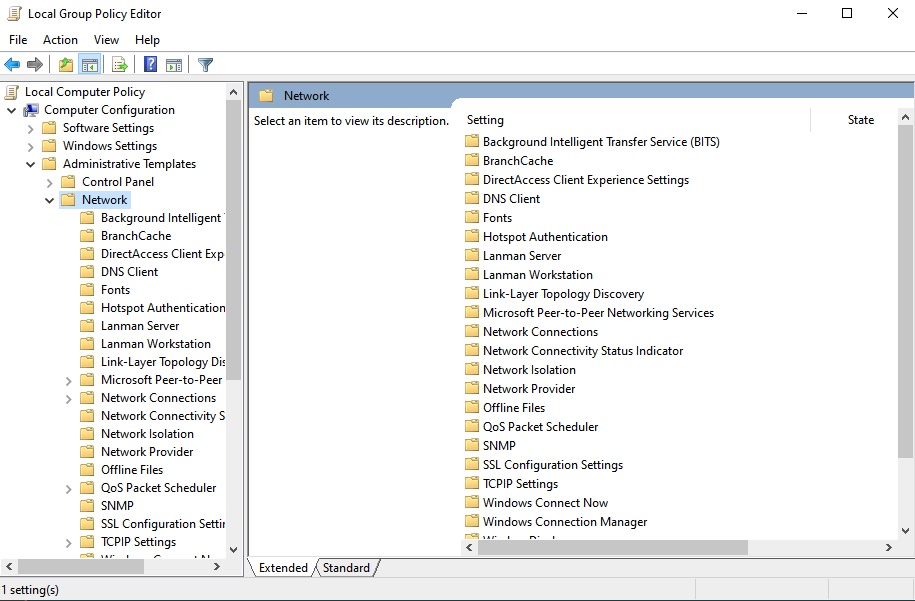
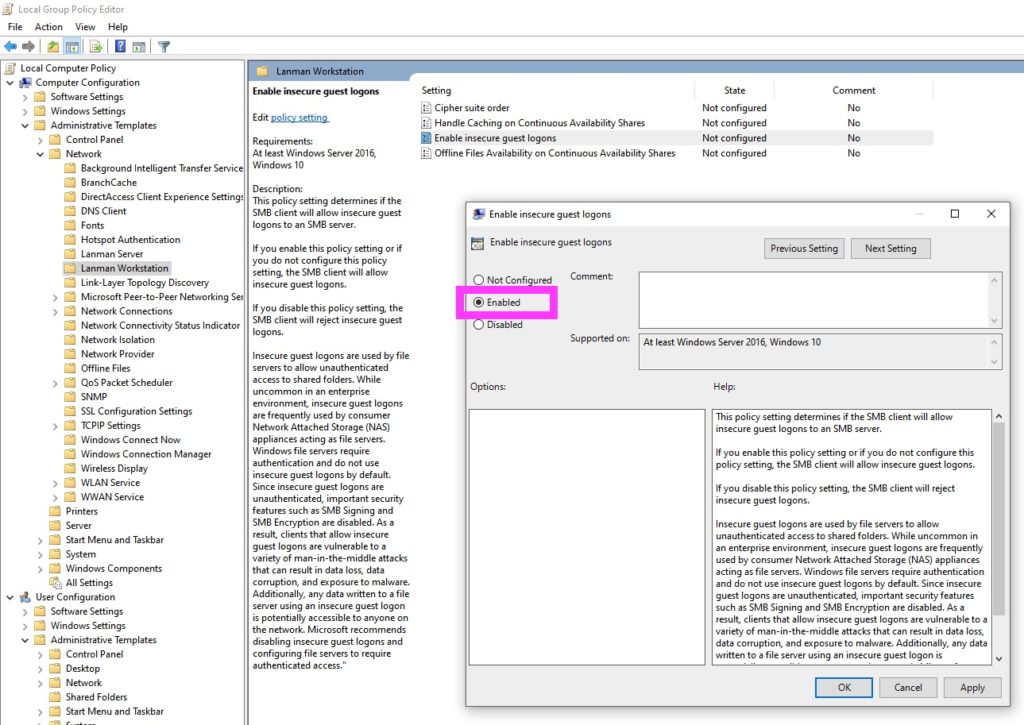
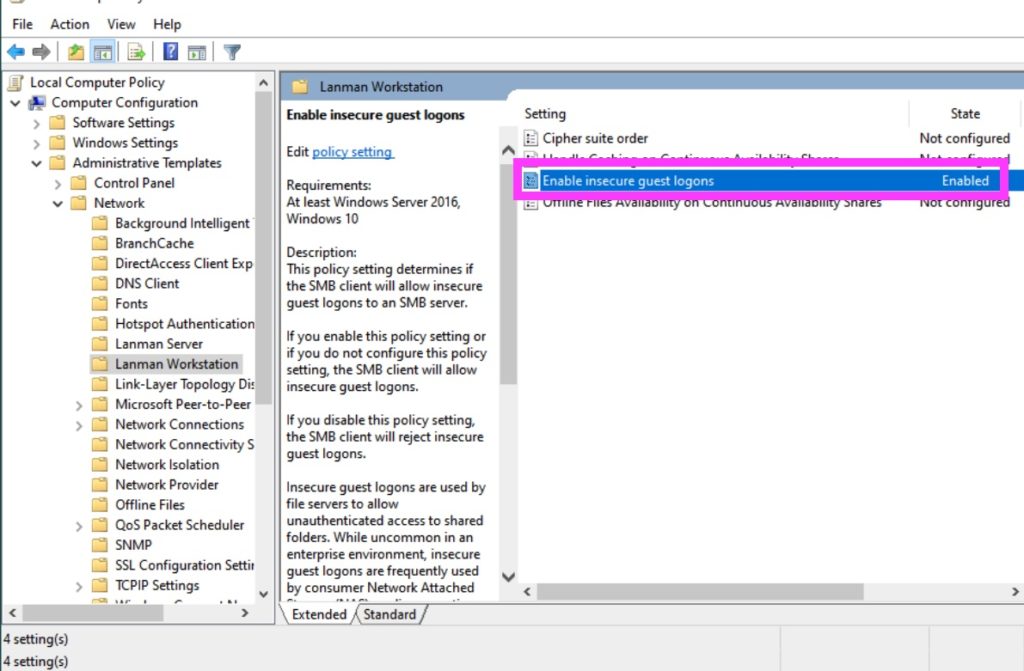
| Cannot access the Pixelcade LCD network share from Windows. Note if prompted, use “guest” with no password. | Most likely you have a Windows group policy enabled that does not allow insecure guest logins. From Windows, launch the local group policy editor by running gpedit.msc Navigate to Local Computer Policy –>Computer Configuration –>Administrative Templates –> Network –> Lanman Workstation –> Enable insecure guest logons and then choose enable
|
When running the pairing utility, Pixelcade LCD is detected but cannot pair or intermittent connectivity issues like for example if the Pixelcade Listener at times displays a message that it’s connecting via the IP address. Note that Pixelcade needs a network service called mDNS to function. This allows your arcade PC or Raspberry Pi to resolve Pixelcade’s host name, like for example pixelcadedx-fa77t3b8.local to an IP address like 192.168.1.65. Some PCs and/or home networks do not support mDNS reliably. For mDNS or .local domains to work: – Machines (the querier and the responder) must run an mDNS process. Raspberry Pi does by default (avahi-daemon), Macs do, most Linux distros and recent versions of Windows too. – Machines must be in the same network. No routing (or add an mdns repeater in this case) – The network must not filter IP multicast. mDNS works over IPv4 or IPv6 multicast – The “regular” unicast DNS server(s) must not resolve .local. Name your local lan .lan or .whatever, never .local. If ping fails, then try installing Bonjour for Windows if you are on a Windows PC. Reboot and try again. If not working on a Pi, here is a command to test if the avahi service is running: If this occurs, Pixelcade does have a built in fail safe to switch to connecting to your Pixelcade by IP address instead of by host name. An easy test if you have this issue is to ping the pixelcade host name from a command prompt
Note that xxxxxxxx will be a unique number to your Pixelcade LCD like for example fa77t3b8 so the ping commmand would be:
If the ping command fails, then a work around will be to modify your hosts file with an entry like this:
Again note these numbers will be unique to your Pixelcade LCD. On Windows, your hosts file is located in: c:\Windows\System32\Drivers\etc\hosts After this change, you should also reserve that IP address on your home router which will prevent that IP address from changing. | 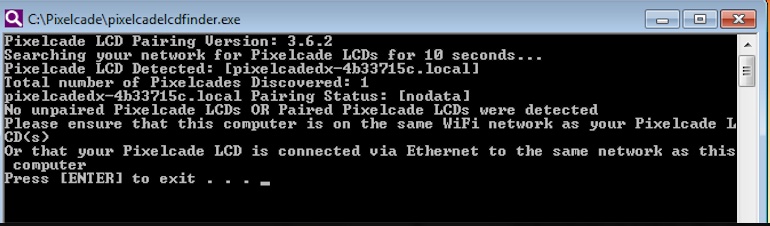 |