AtGames Ultimate Legends UCE Integration – Beta
Raspberry Pi Setup (Raspberry Pi Zero W, Pi 3, and Pi 4 Supported)
For Pixelcade to dynamically change when a game is launched from a USB drive (UCE), you’ll need to add on a Raspberry Pi. A $10 Raspberry Pi Zero works nicely with a 16 GB microSD card for example. Pixelcade will change when a game is launched and when a game is exited with this integration. Pixelcade will not change when games are selected and only when launched. Pixelcade will also not change at this time for native/stock ALU games. In addition, this will add additional capabilities such as a pixel art art browser where you can browse and change artwork from any browser on your WiFi network including iPhones.
Optional How to Power Cable Splitter. Skip this step if you are not into soldering and simply use a 1.5 ft microUSB cable to connect your Pi Zero W to Pixelcade and power the Pi Zero W with a USB power adapter such as a phone charger.
Download this image and burn it to your Pi’s microSD card using an imager like Balena Etcher. Note: this microSD card is separate from the Pixelcade microSD card.
Or if you have an existing Pi image already loaded, you may also install Pixelcade for ALU by running this command below. This script has been successfully tested on Raspian stock lite images and certain RetroPie images.
curl -LO pixelcade.org/pi/setup-alu.sh && chmod +x setup-alu.sh && ./setup-alu.sh
Now insert the microSD card into your Pi Zero and power on.
From another computer or phone, connect to the “Pixelcade Setup” WiFi. There is no password.
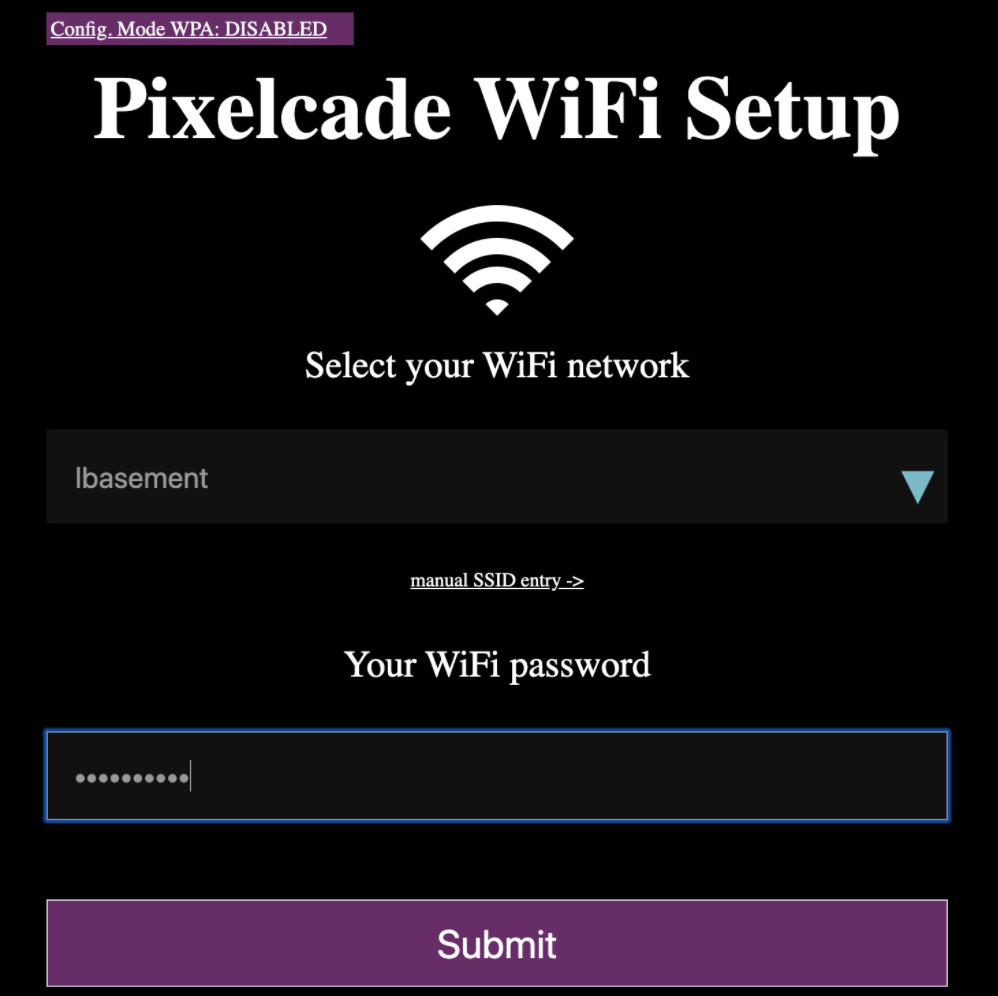
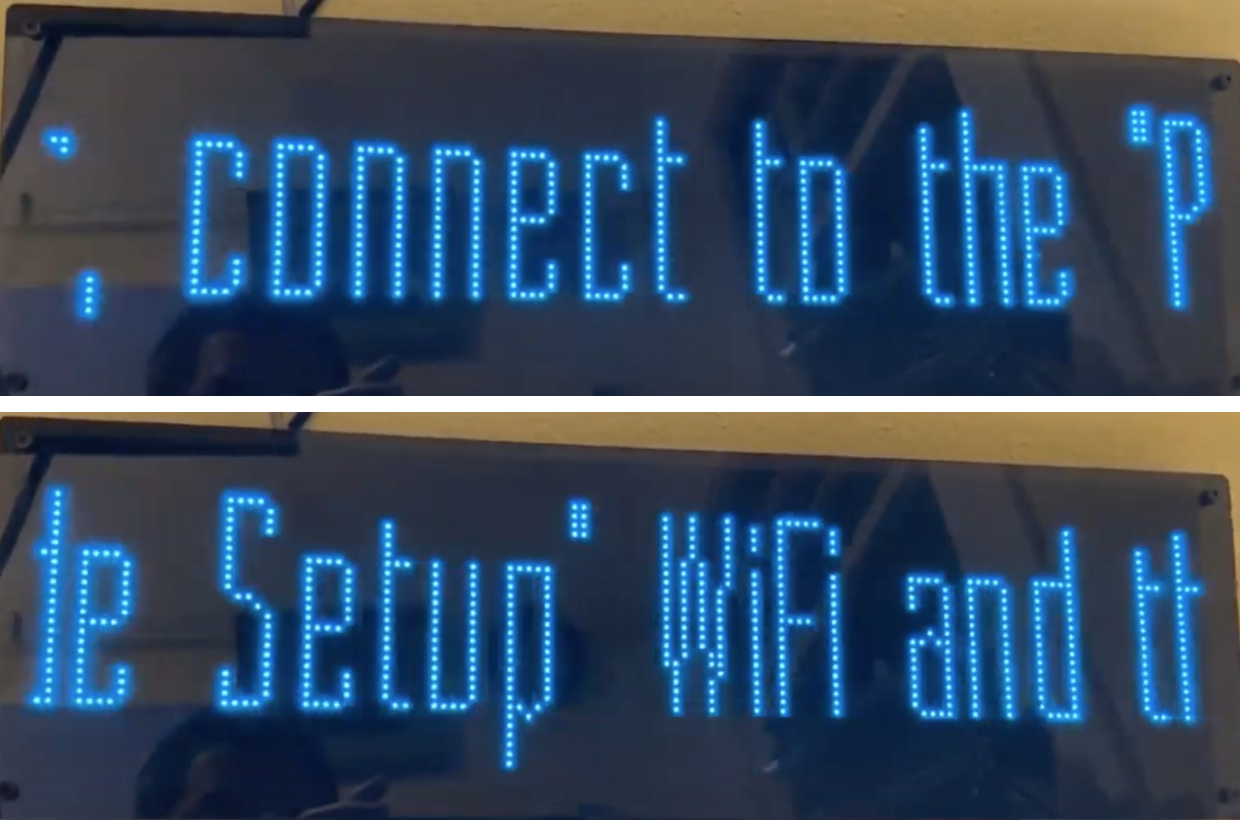
After connecting to the Pixelcade Setup WiFi, open a web browser and go to http://10.0.01 or http://raspiwifisetup.com
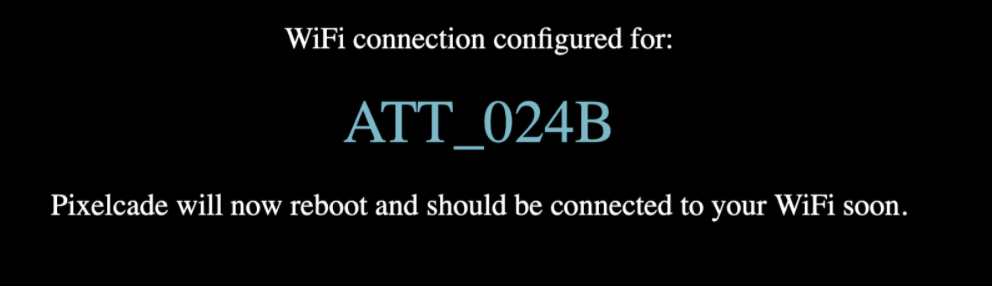
After clicking the Submit button, you’ll see this screen while your Pi reboots.
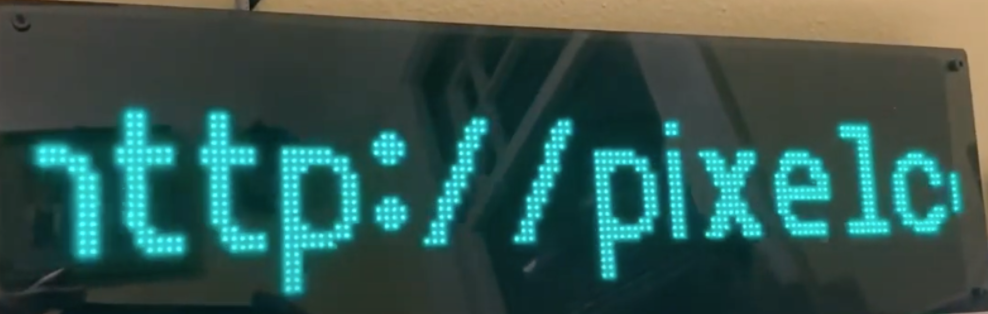
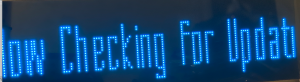
After rebooting, Pixelcade should now be displaying this green text including your Pi’s IP address.
Note that each time your Pi Zero W reboots, it will check for Pixelcade updates and new artwork upon start-up.
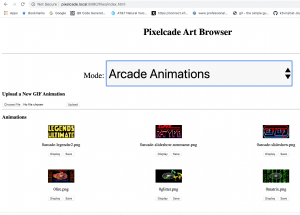
Access the Pixelcade Art Browser from this URL. Using the art browser, you can browse available static marquees, animations, and create your own scrolling text.
http://pixelcade.local:8080 or http://< Pi IP Address>:8080
You may also reboot or shutdown Pixelcade and your Pi Zero W by using these commands from any web browser:
http://pixelcade.local:8080/reboot
http://pixelcade.local:8080/shutdown
or
http://<Pi IP Address>:8080/reboot
http://<Pi IP Address>:8080/shutdown
You can change the default font for scrolling text:
ssh pi@pixelcade.local or ssh pi@<Pi IP Address >
password: raspberry
nano ~/pixelcade/settings.ini
Change this line
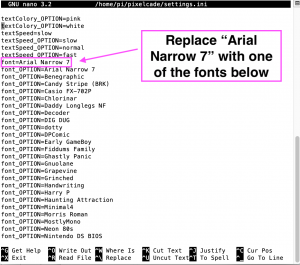
ctrl-x to save. You may also change the font size. Developers may refer to the Pixelcade API and text section for other font tweaks.
AtGames Legends Ultimate
On your USB flash drive create a folder called /content/Pixelcade
In that folder create a configuration file called Pixelcade.cfg using this as a template:
# Lines starting with # are comments and ignored by the system
# Currently the ALU can’t resolve the local hostname but I’m hoping that AtGames will be able to adjust it to work
hostname=pixelcade
port_number=8080
# Change the IP address to the one shown in the photo above when booting up your pi.
# If possible, set your router to give a static IP to the Pi so this never needs to change.
ip_address=192.168.1.80
# If there is no art for a given game, this will make it display a short message before displaying the platform’s logo. For now you must have two %s the first one will be replaced by the game name, the second one the platform name for hopefully the logo.
onmissing_game=t=PDub's Playing %s&c=blue&l=2|console/stream/%s?l=99999
# This gets displayed when exiting the game (assuming it didn’t crash). You can use one of more api calls separated by | The first command must not have a loop to reset whatever queue was set during the game.
onexit_api_calls=text?t=PDub's Arcade Loft&c=blue|console/stream/alu?l=99999
For clarity, you don’t need to URL encode the api text strings in Pixelcade.cfg,, the system will do that for you.
For a full list of the available API check out https://pixelcade.org/api/
To create your UCE, you will need to use a core that has the Pixelcade extension builtin, and make note of the rom name you use, it’s important to put the art in the right place later.
A good place to look for these cores is WildCoder’s channel https://www.youtube.com/c/WildCoder
Currently only the picodrive core for Sega 32X, Sega CD and the beetle_pce_fast core for PC Engine and PC Engine CD cores support it, but more will come.
https://bit.ly/ALUPCEngineCore
On your USB flash drive create a folder called /content/Pixelcade/art
There, create 4 sub folders: sega32x, segacd, nec_turbografx-16, and nec_turbografx_cd.
In these folders add GIF (animated or not) and/or PNG files with the same name as the rom you used to create your UCE file earlier. And if all the names are matching when you launch your UCE it should display the marquee on the Pixelcade.
Note: As of Firmware 4.21.0 the two following addons no longer work on the ALU. We’re working with AtGames to enable them again in future firmware.
The Prince of Persia port (SDLPoP) also supports the Pixelcade if you have a bitmap in /content/Pixelcade/DOS/ called Prince of Persia (1990).gif or Prince of Persia (1990).png
https://bit.ly/ALUPrinceOfPersiaPort
The Jazz Jackrabbit port (openJazz) also supports the Pixelcade if you have a bitmap in /content/Pixelcade/pc/ called Jazz Jackrabbit (1994).gif or Jazz Jackrabbit (1994).png
https://bit.ly/ALUPrinceOfPersiaPort
You can download Pixelcade’s artwork pack there: https://pixelcade.org/pi/artwork.zip
And extract the content you need in /content/Pixelcade/art
Make sure to keep the sub folder names since that’s how the Pixelcade extension on the ALU knows where to find the right images.
For more information on how to create your own artwork, head over to https://pixelcade.org/art/